Official Release Date: July 1, 2011
This release includes significant changes to the main window user interface to make the program faster and simpler to use, more consistent throughout.
This page explains a few of the major changes. For a list of all changes in the new release, see the What's New section at the back of the ProSelect 2011r2 Reference Manual (quick access under the Help menu in ProSelect)
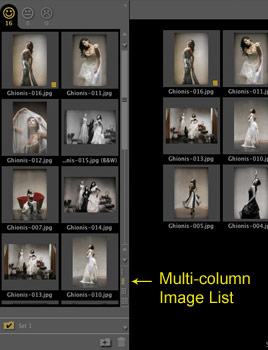
Multi-Column Image List
Depending on your screen size, you can now set the Image List to display from 1 to 4 columns of images or layouts. This makes it easier to locate and select your images especially when building books.
Variable Thumbnail Sizes
You can now select to show thumbnail images in small, medium and large sizes. The small ones are the same size used in earlier versions of ProSelect with other sizes being 50% and 100% larger respectively. Simply choose the size that you want to use from the View -> Thumbnail Size menu.
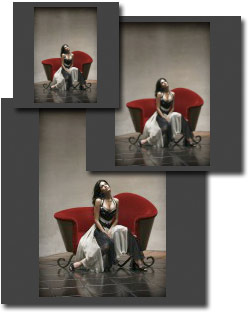
You can now select to show thumbnail images in small, medium and large sizes. The small ones are the same size used in earlier versions of ProSelect with other sizes being 50% and 100% larger respectively. Simply choose the size that you want to use from the View -> Thumbnail Size menu.
Rotate Images in Layouts
You can now rotate any images used in a layout independently from the image orientation used in Working with Images. This feature, along with tilting of images, can be applied when in Cropping View and is automatically carried through to Hi-Res Production.
New "Working with" Control Bar
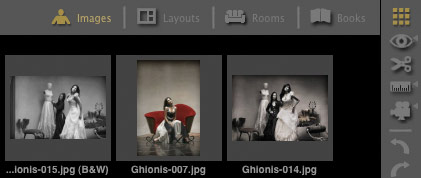
By default, ProSelect 2011r2 displays a new Working with control bar at the top of the main window making it very easy to see which mode you are currently in. If you prefer to have these in the right-hand tool bar you can change this in the Preferences.
Working with Rooms
A very powerful part of this new release is the all new Working with Rooms module which allows you to easily design, display and save custom Wall Galleries for your clients*.
With this module, you can add any mix of prints, canvases and layouts (collages), at different sizes, framed or un-framed to a room view background. Your designs are automatically saved in and loaded from your album file. If you have a projector (or very big screen TV!) you can also show your entire design at actual size on the wall!
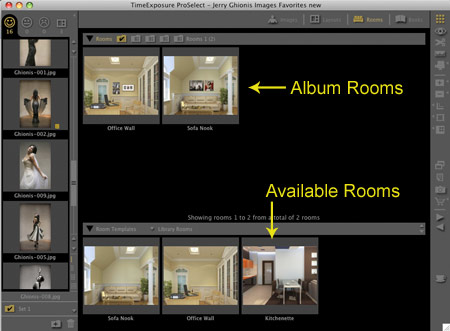
Changes made to an image or layout when Working with Images or Working with Layouts are automatically carried through to your Wall Gallery design when you switch back to Working with Rooms (Hint: Use the "R" keyboard shortcut).
* With ProSelect Pro you can design and save an unlimited number of designs in each album. With ProSelect (basic) you can design and save one Wall Gallery design (although you can still switch room backgrounds for that design) in each album.
Precise alignment is a snap!
When dragging the position of one or more selected items in a room they will automatically snap to the edges or centers of other items in the design. You can have a perfectly arranged and aligned design in just seconds!
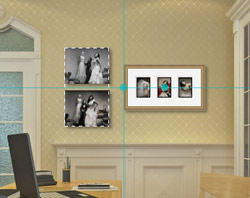
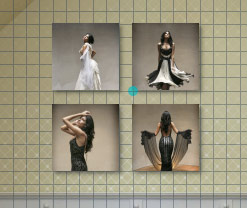
Alternatively, switch to Grid View (press the G key) and you can align objects to a grid with spacing that you set.
Exploding Wall Grouping!
Wall Grouping templates are also supported in your Wall Gallery designs. As before, they are moved and framed as one unit. However, you can now use the Convert Wall Grouping into Layouts command (under the Album menu) to make each opening into a separate layout which can be moved, framed and sized (if not a fixed size) independently in a Room Design.
Gallery Wrap Canvases
It's easy to design and use Gallery Wrap Canvases in ProSelect 2011r2. Simply convert any composite template or wall grouping traditionally matted template into a canvas wrap by specifying a wrap size from 1" to 5" in ProSelect's built-in Template Editor.
Gallery Wrap templates only show the "face side" when displayed in all views except Cropping View where you can also see the edges. This allows you to precisely control and check which parts of your image(s) appear on the face and edges of the canvas.
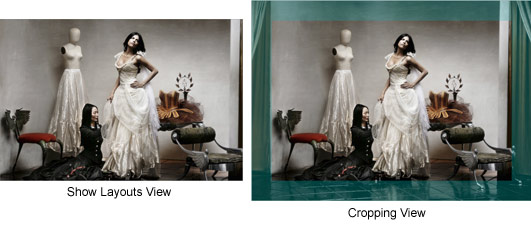
Hi-Res production will produce all Gallery Wrap canvas images at full size (including the wrap edge) so it's easy to get your canvases made exactly the way you want.
Mirror Display Area Fills a High-resolution Projector Screen
ProSelect 2011r2 now allows you to take full advantage of ProSelect's Mirror Display Area on a high-resolution screen even from a computer with a lower resolution screen (such as a laptop). If required, images, layout and rooms for the second screen display are independently generated at the full resolution of that screen for maximum size and impact.
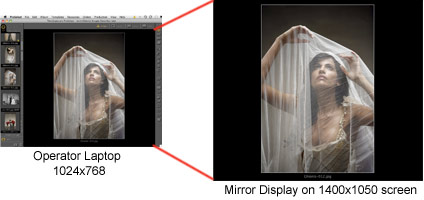
ProSelect 2011r2 now allows you to take full advantage of ProSelect's Mirror Display Area on a high-resolution screen even from a computer with a lower resolution screen (such as a laptop). If required, images, layout and rooms for the second screen display are independently generated at the full resolution of that screen for maximum size and impact.
Managing External Resource Images
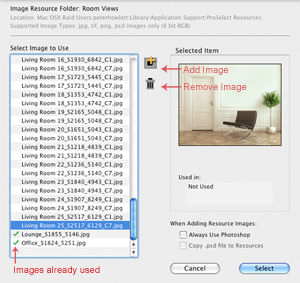
Adding and deleting Resource Images is now much easier and can be done within ProSelect's Image Resource Selection window.
To add resource images to the applicable folder, you can use the Add Image button or simply drag them into the list.
You can now add resource images without needing to have Photoshop installed - if Photoshop is installed you can select whether to use it or not. To delete a resource image, select the images and click the trash icon.
Images that are used in ProSelect are easily identified from the green check mark and, in the case of templates and background images, selecting a used image will name the template(s) or style(s) that the image is used in.
Completion Actions
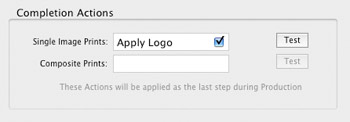
You can now specify different completion actions for both prints and composites in ProSelect Hi-Res production setup window. These actions are run on the final image after cropping and sizing just prior to saving. You could use a completion action to automatically apply a company logo to the corner of all of your prints.
You can now specify different completion actions for both prints and composites in ProSelect Hi-Res production setup window. These actions are run on the final image after cropping and sizing just prior to saving. You could use a completion action to automatically apply a company logo to the corner of all of your prints.

