 Job Structures
A Job Structure defines how you want your files organized. You can use it to add subfolders, rename your images, and enable metadata. ProCapture Backup comes preloaded with some default job structures. Use these, create your own, or edit a preloaded job structure to customize it to your workflow.
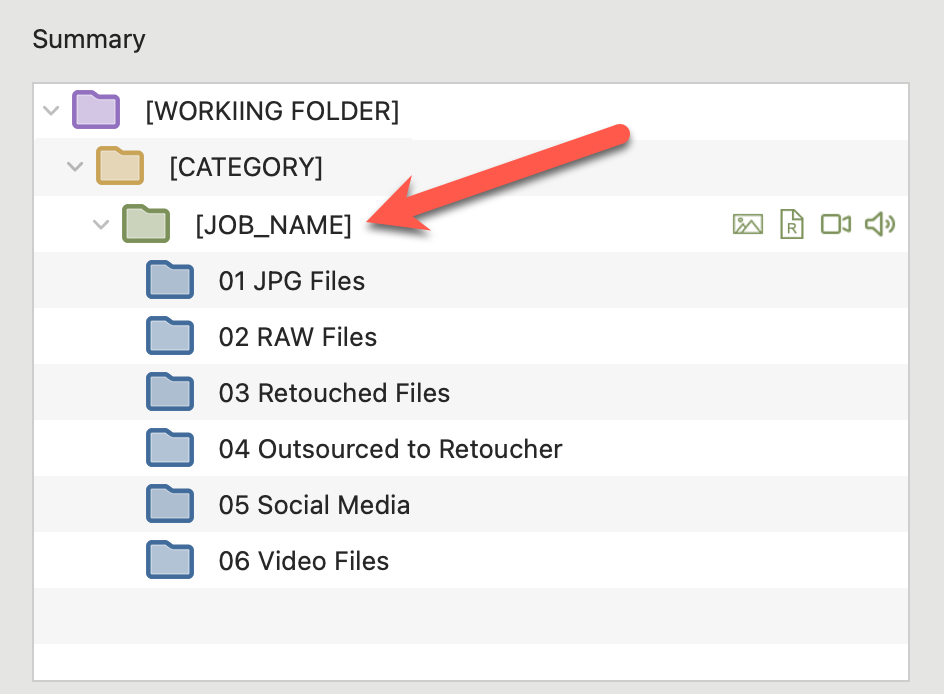
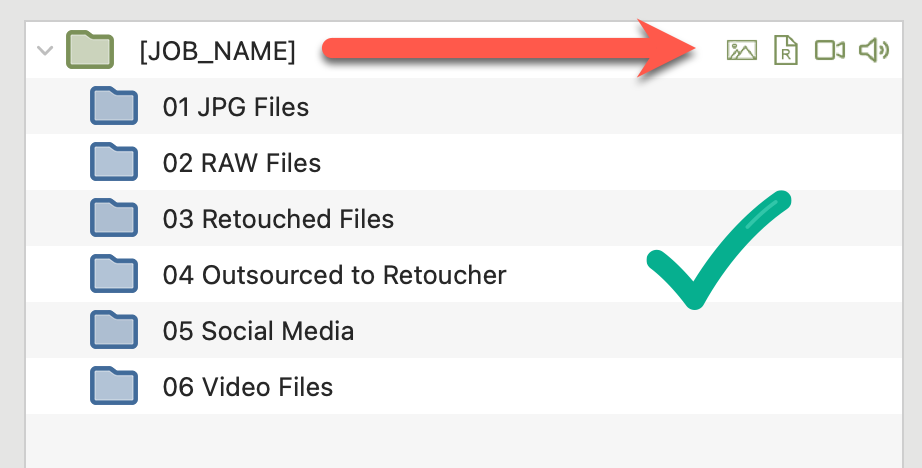
- The root folder of every Job Structure is always the Job Name Folder - shown as a green folder .
- You can then add subfolders
 under the Job Name Folder.
 - Images, RAWs, video, and audio files can be saved directly in the Job Name Folder or placed into the subfolders.
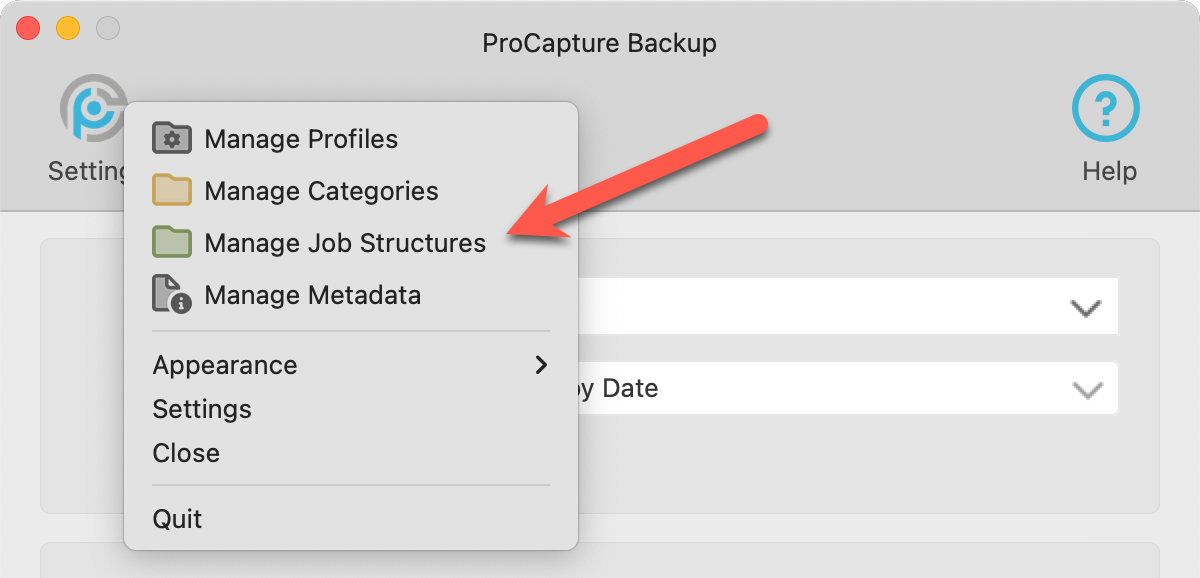
- Click on the Settings button
 .
. - Select "Manage Job Structures" from the list.
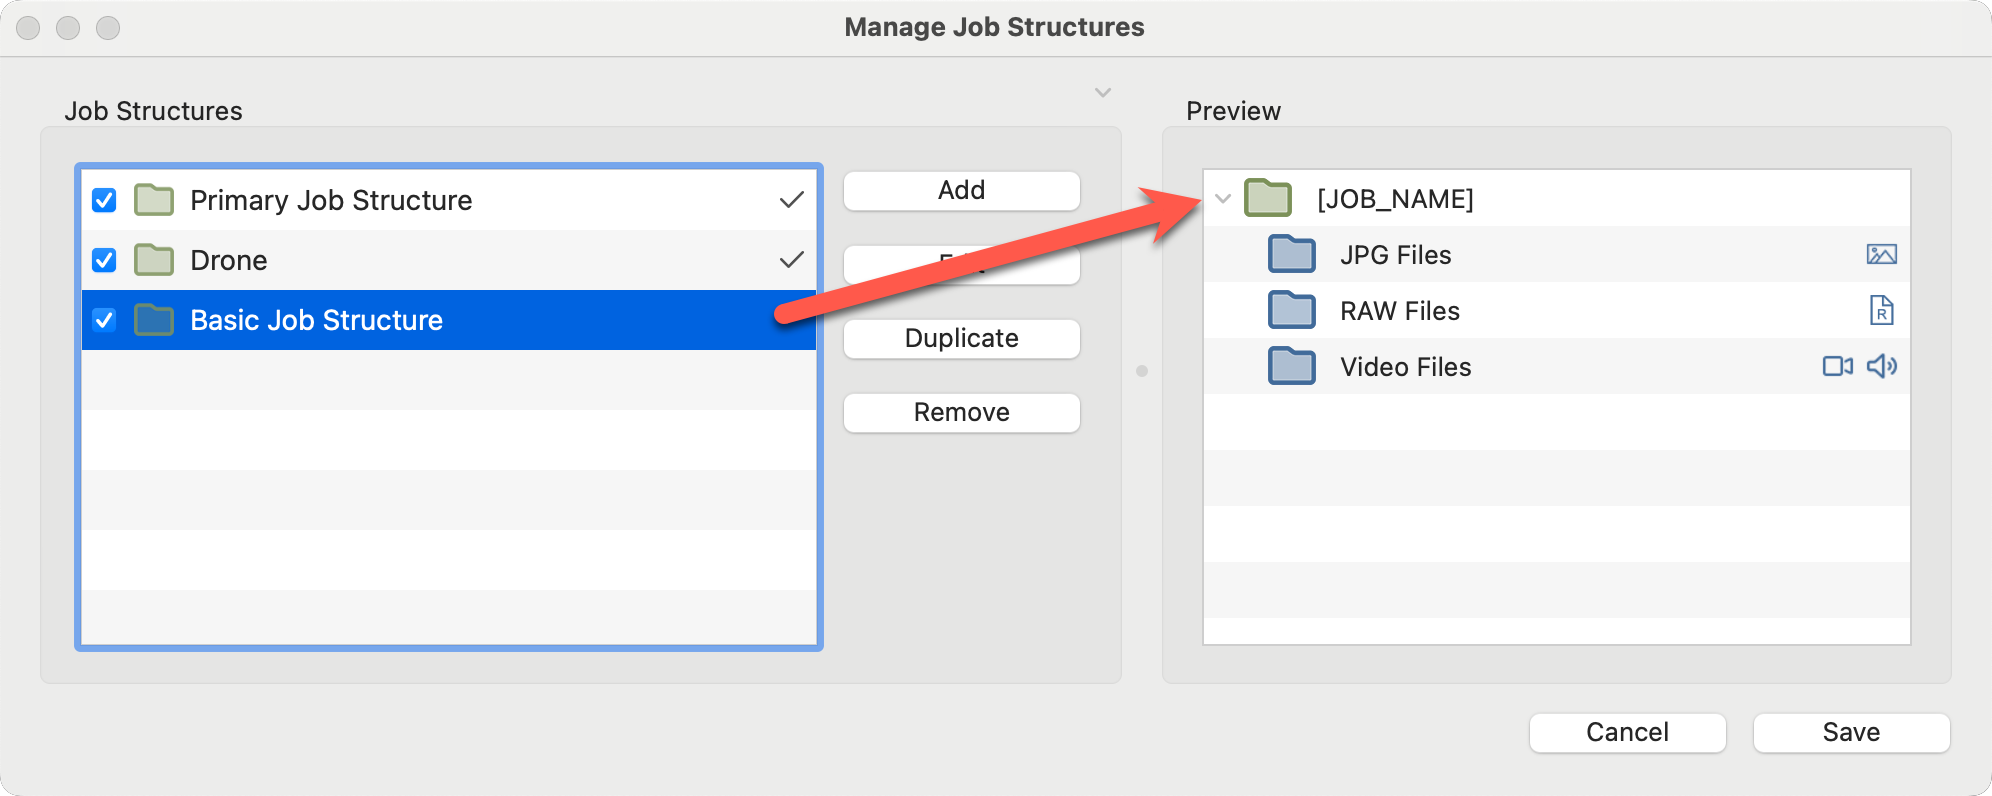
- In the Manage Job Structures window, a list of Job Structures appears on the left. When you select one, a preview of the folder structure appears on the right.
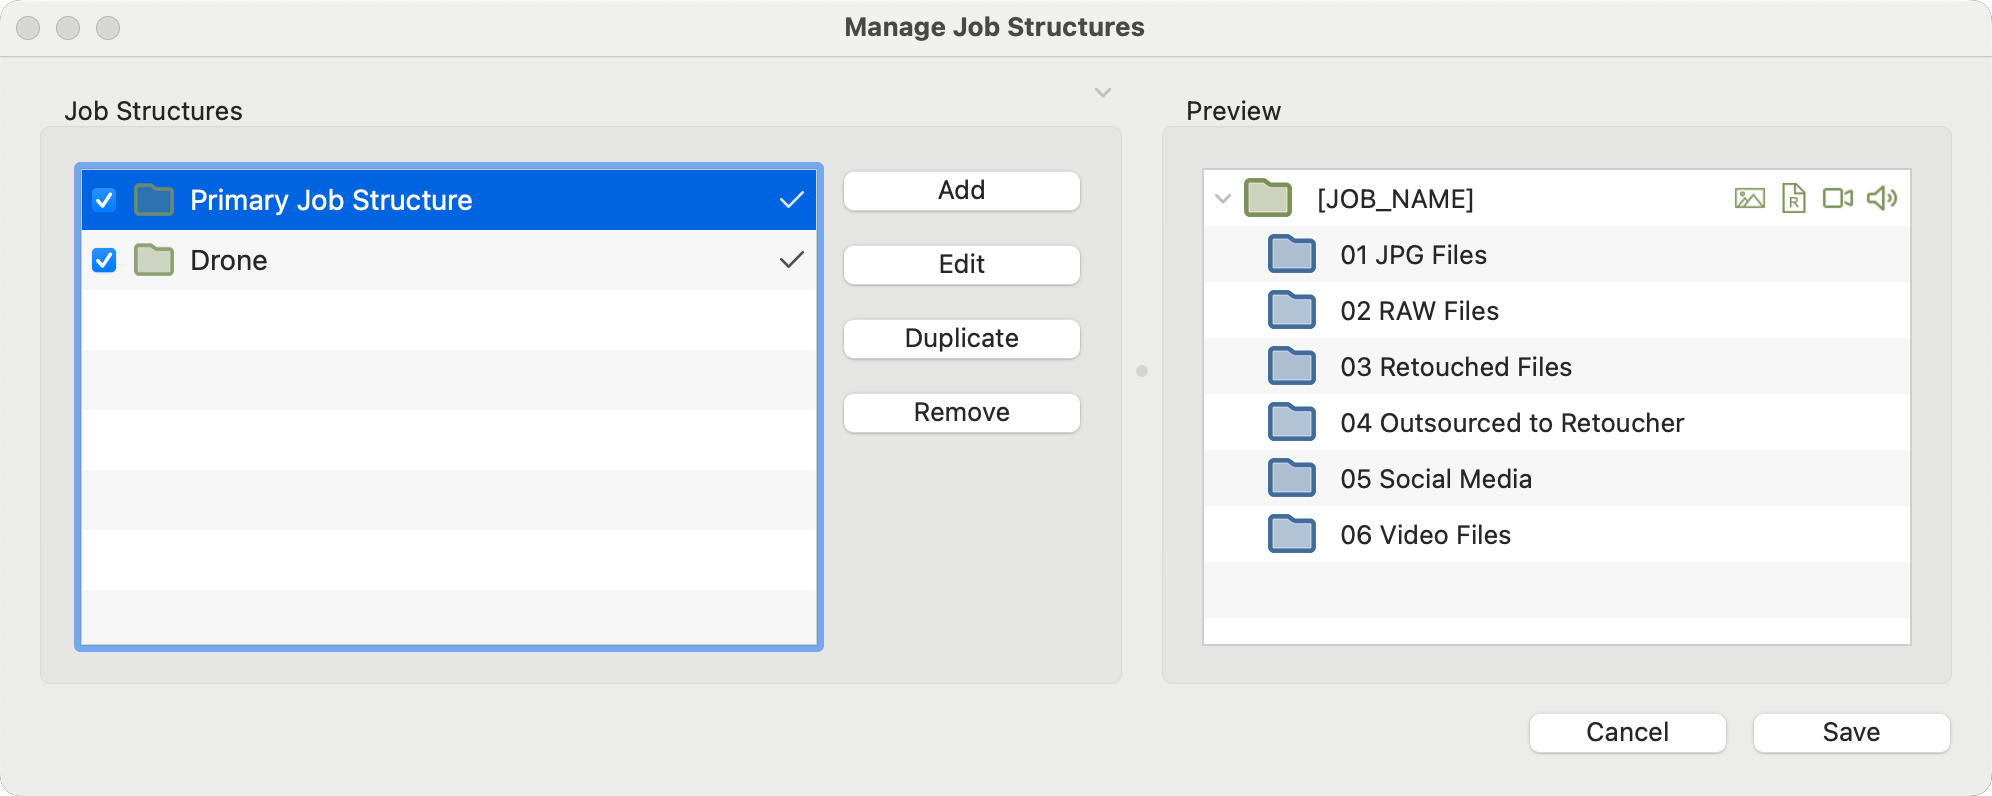
- Hide the preview area on the right by clicking the gray arrow next to "Preview."
 Use the checkboxes in the Job Structure list to enable/disable a structure for use.
 A checkmark next to a job structure indicates the structure is currently being used in a Profile.
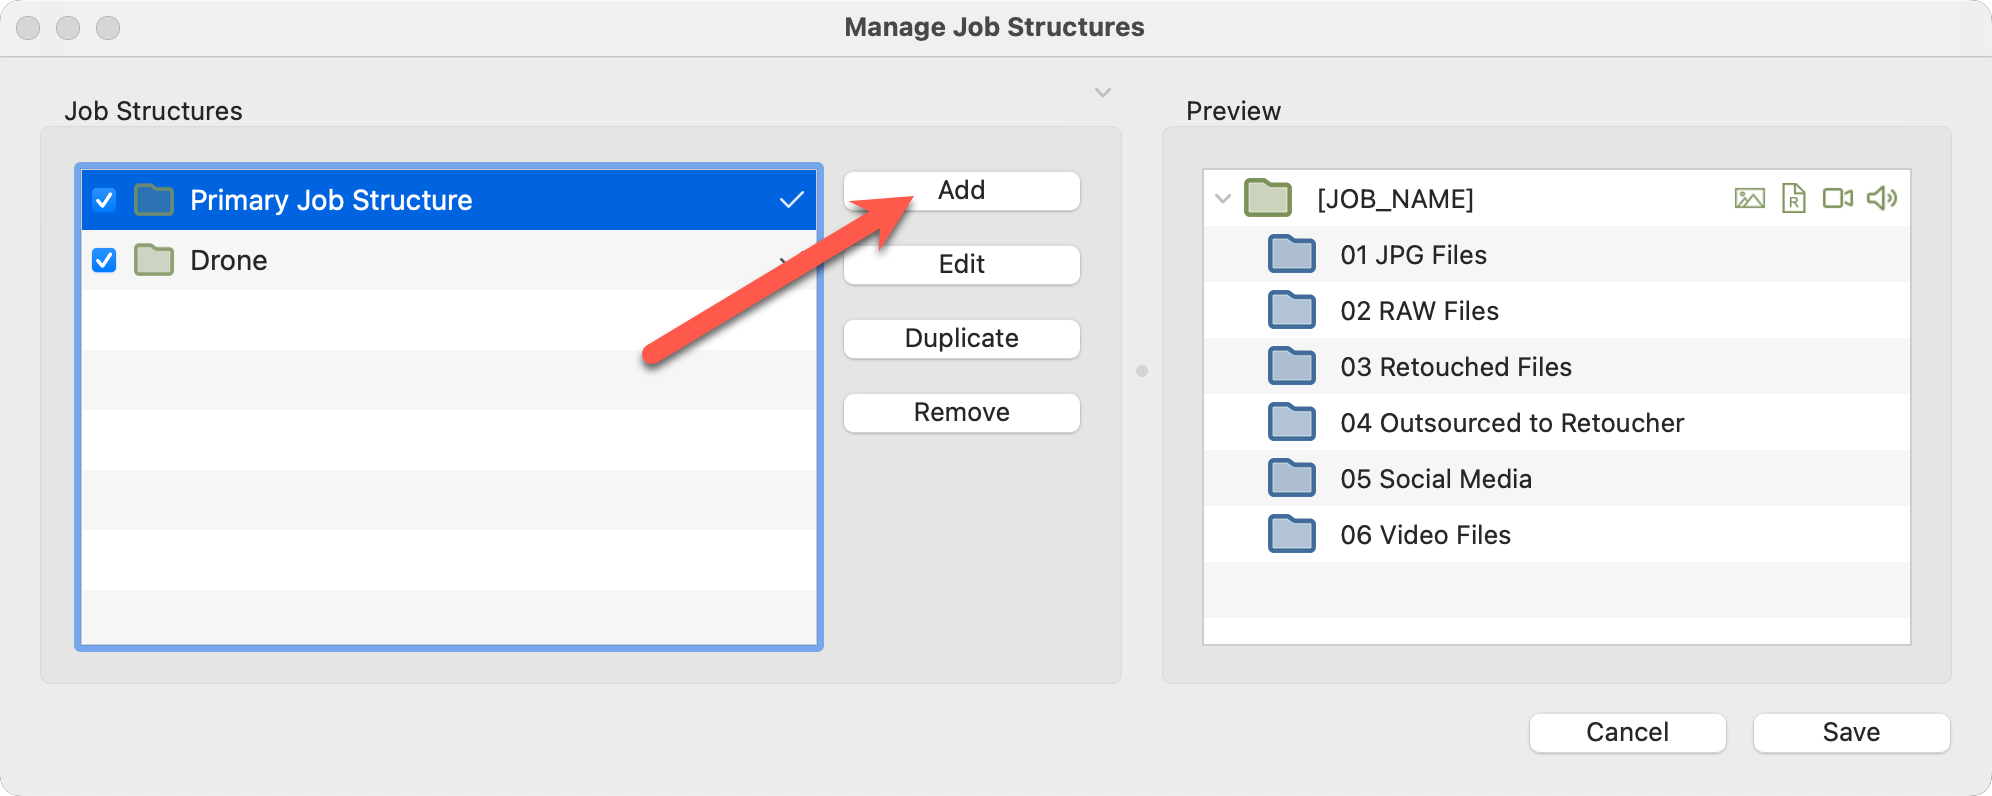
- Click on the Add button to create a new job structure.
- From this window, you can edit, duplicate, or remove an existing job structure.
- From the Manage Job Structures window, click on the Add button.
- Enter a name for the job structure.
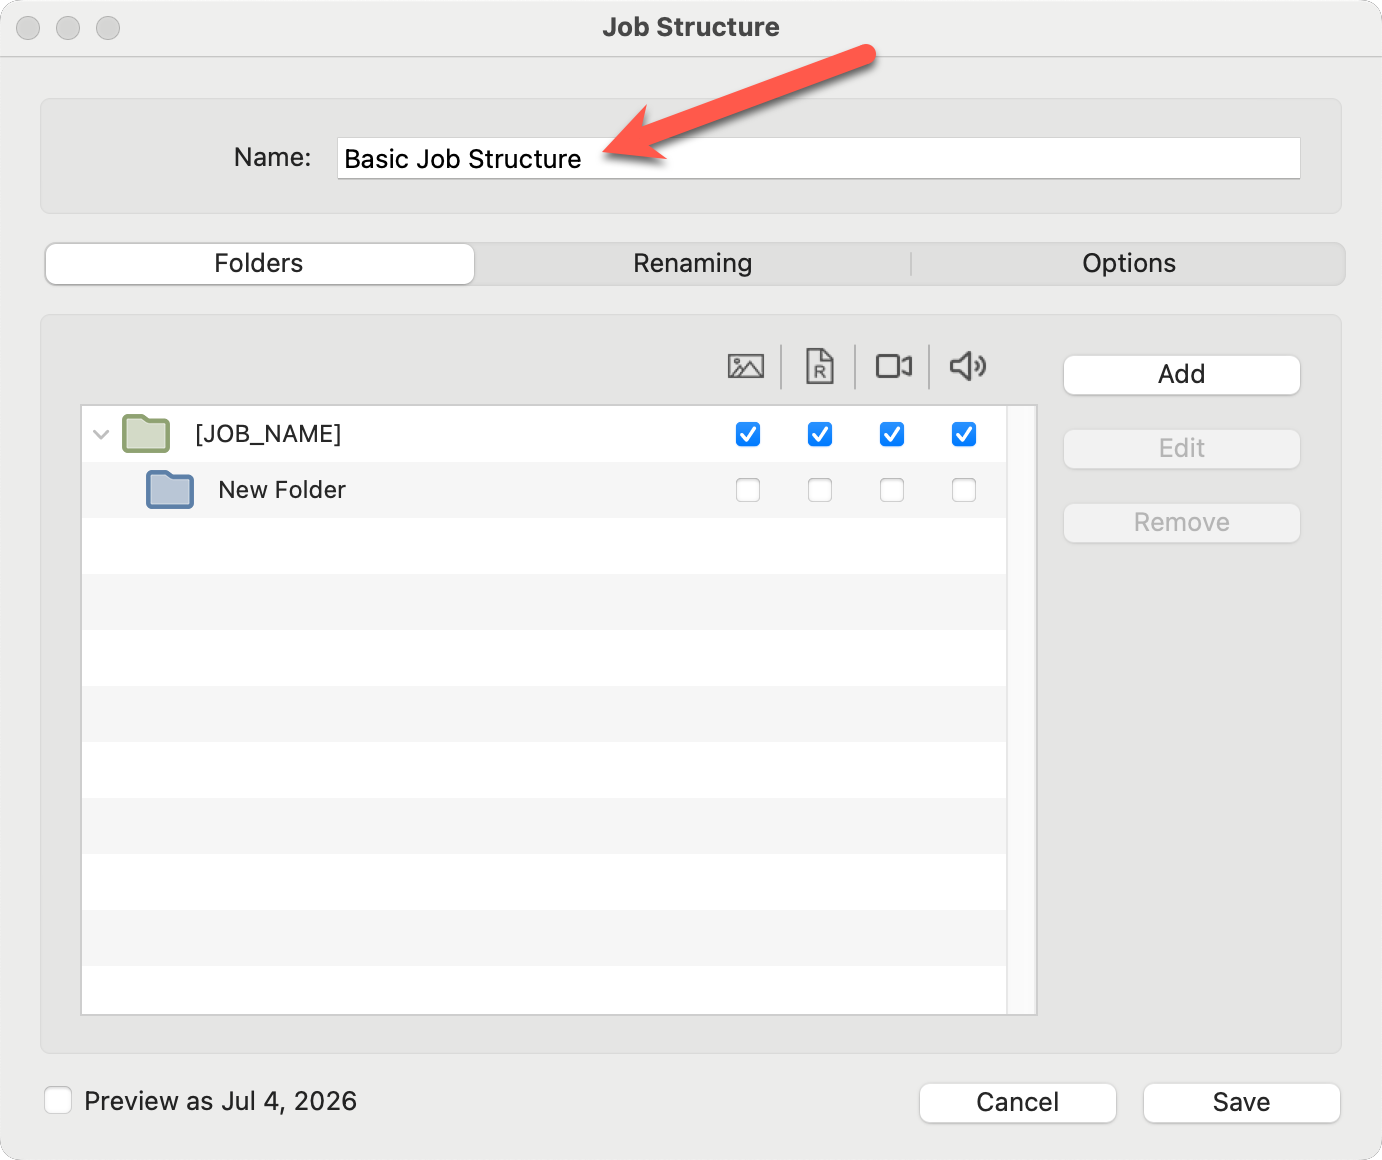
- There are 3 tabs in the Job Structure window: Folders, Renaming, and Options.
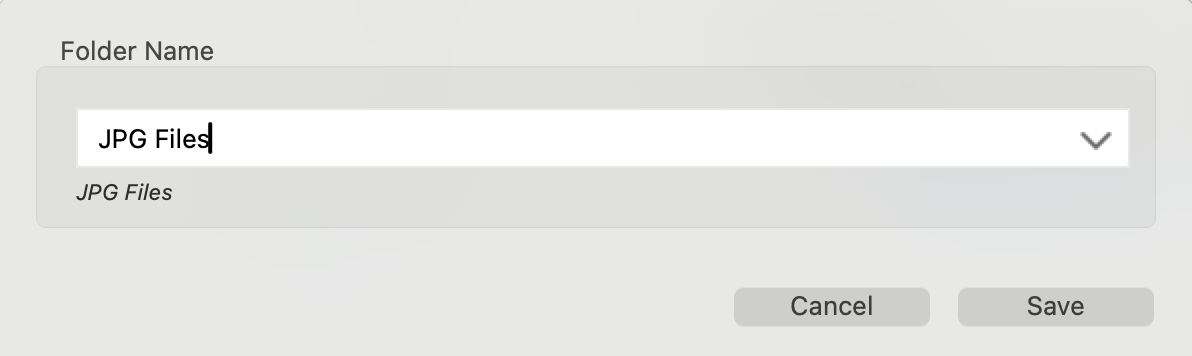
- Begin with the "Folders" tab. Use the Add button to add subfolders. Name each subfolder. Dynamic text can be used here; see Using Dynamic Text to learn more.
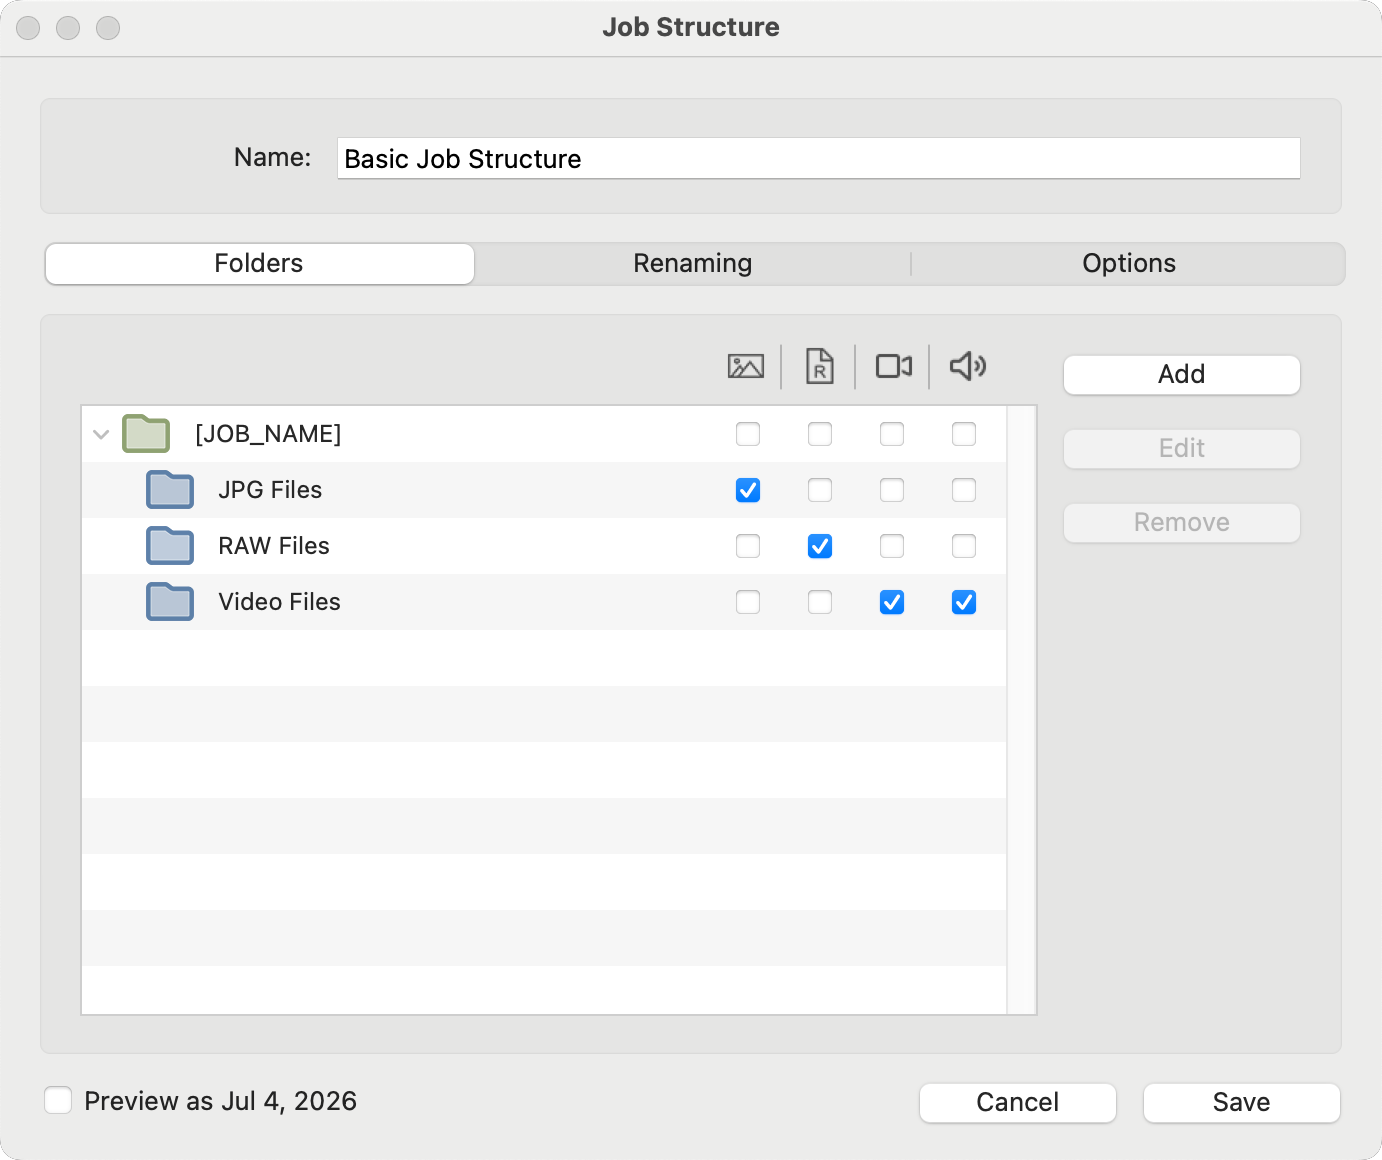
- Once you have added your subfolders, use the checkboxes to indicate where your image, RAW, Video, and Audio files should be saved.
- To rename your images, use the options in the "Renaming" tab. For more information, see Renaming.
- To add metadata, such as copyright information, use the "Options" tab. See Metadata for more details.
- Save to exit.
- A Preview of your job structure will appear in the Manage Job Structures window. Note that the Image, RAW, Video, and Audio file icons appear next to the folder where you placed them.
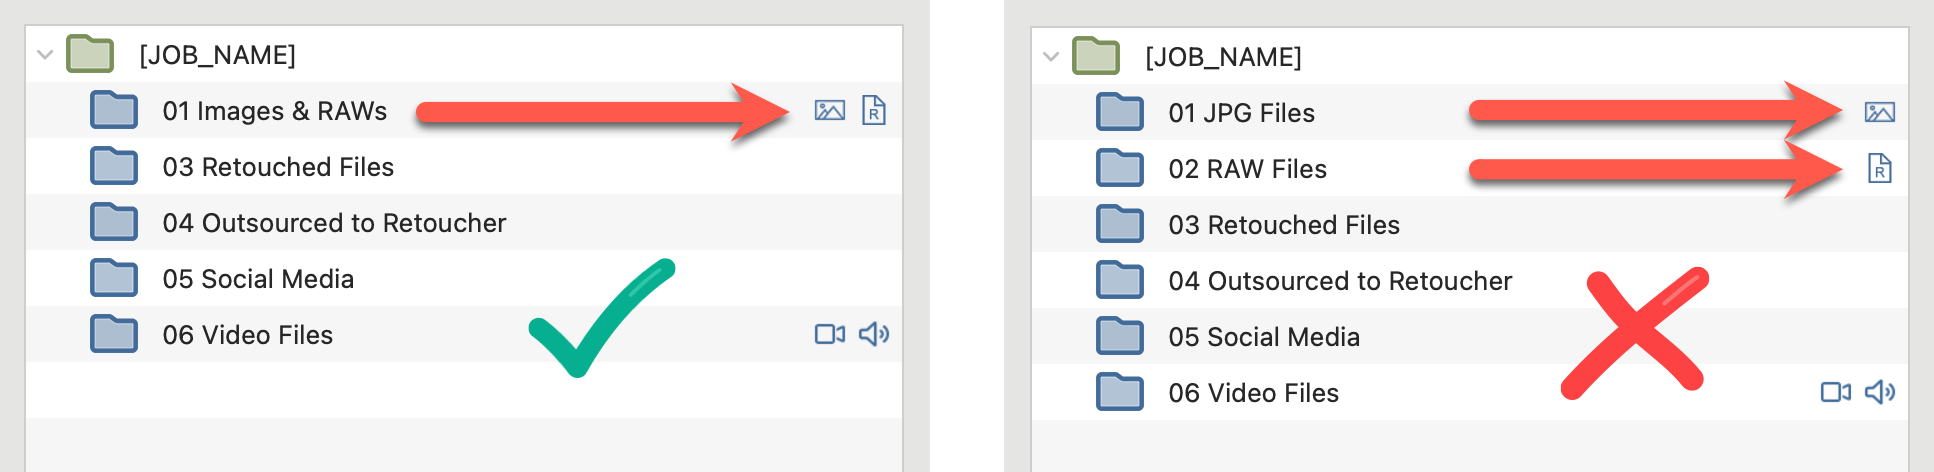
To work properly with ProSelect, your Images and RAW files must be stored in the same folder. This folder can be:
- The main Job Name folder (root level), or
- A single subfolder inside the job folder
If your Images and RAWs are saved in different folders, ProSelect will not be able to link them correctly.
Main Job Name Folder
The preset Job Structure in ProCapture Backup places all file types in the main root-level job folder, which fully supports ProSelect.
Using Subfolders
If you choose to use subfolders:
- Images and RAWs must be placed in the same subfolder.
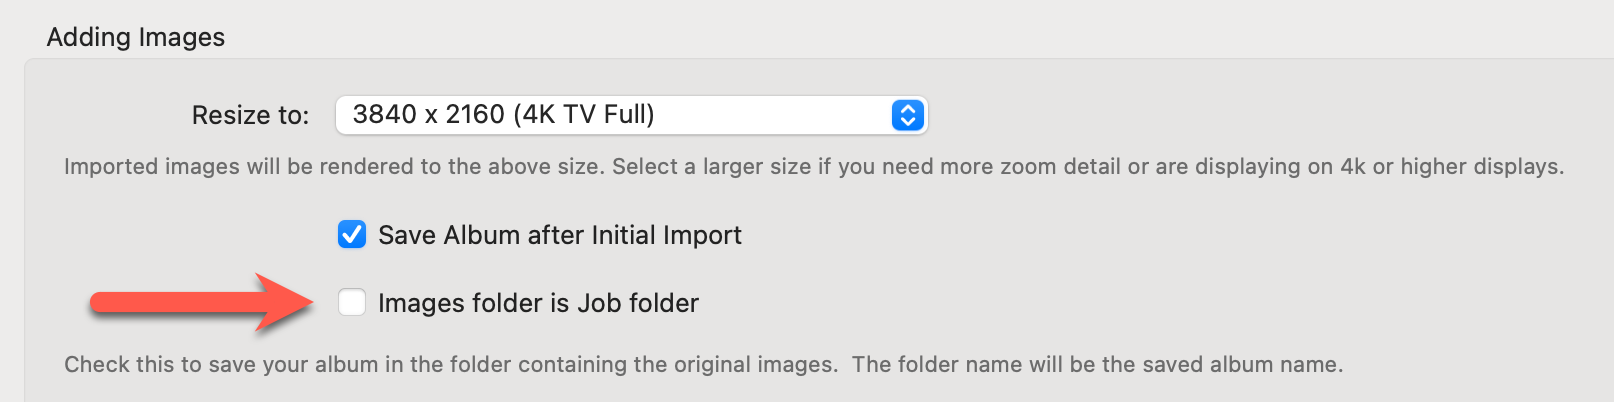
- You must also update your ProSelect settings:
- Go to Settings
- Uncheck “Images folder is job folder”
ProCapture Backup™ can apply a metadata template during import, so every file you offload is tagged automatically. This makes your files consistent and saves time later. When enabled, ProCapture Backup can embed metadata such as:
- Copyright information
- Photographer or studio name
- Job name and job details
- Other template fields you set up in advance
- Click on the Settings button, and select "Manage Metadata" from the list.
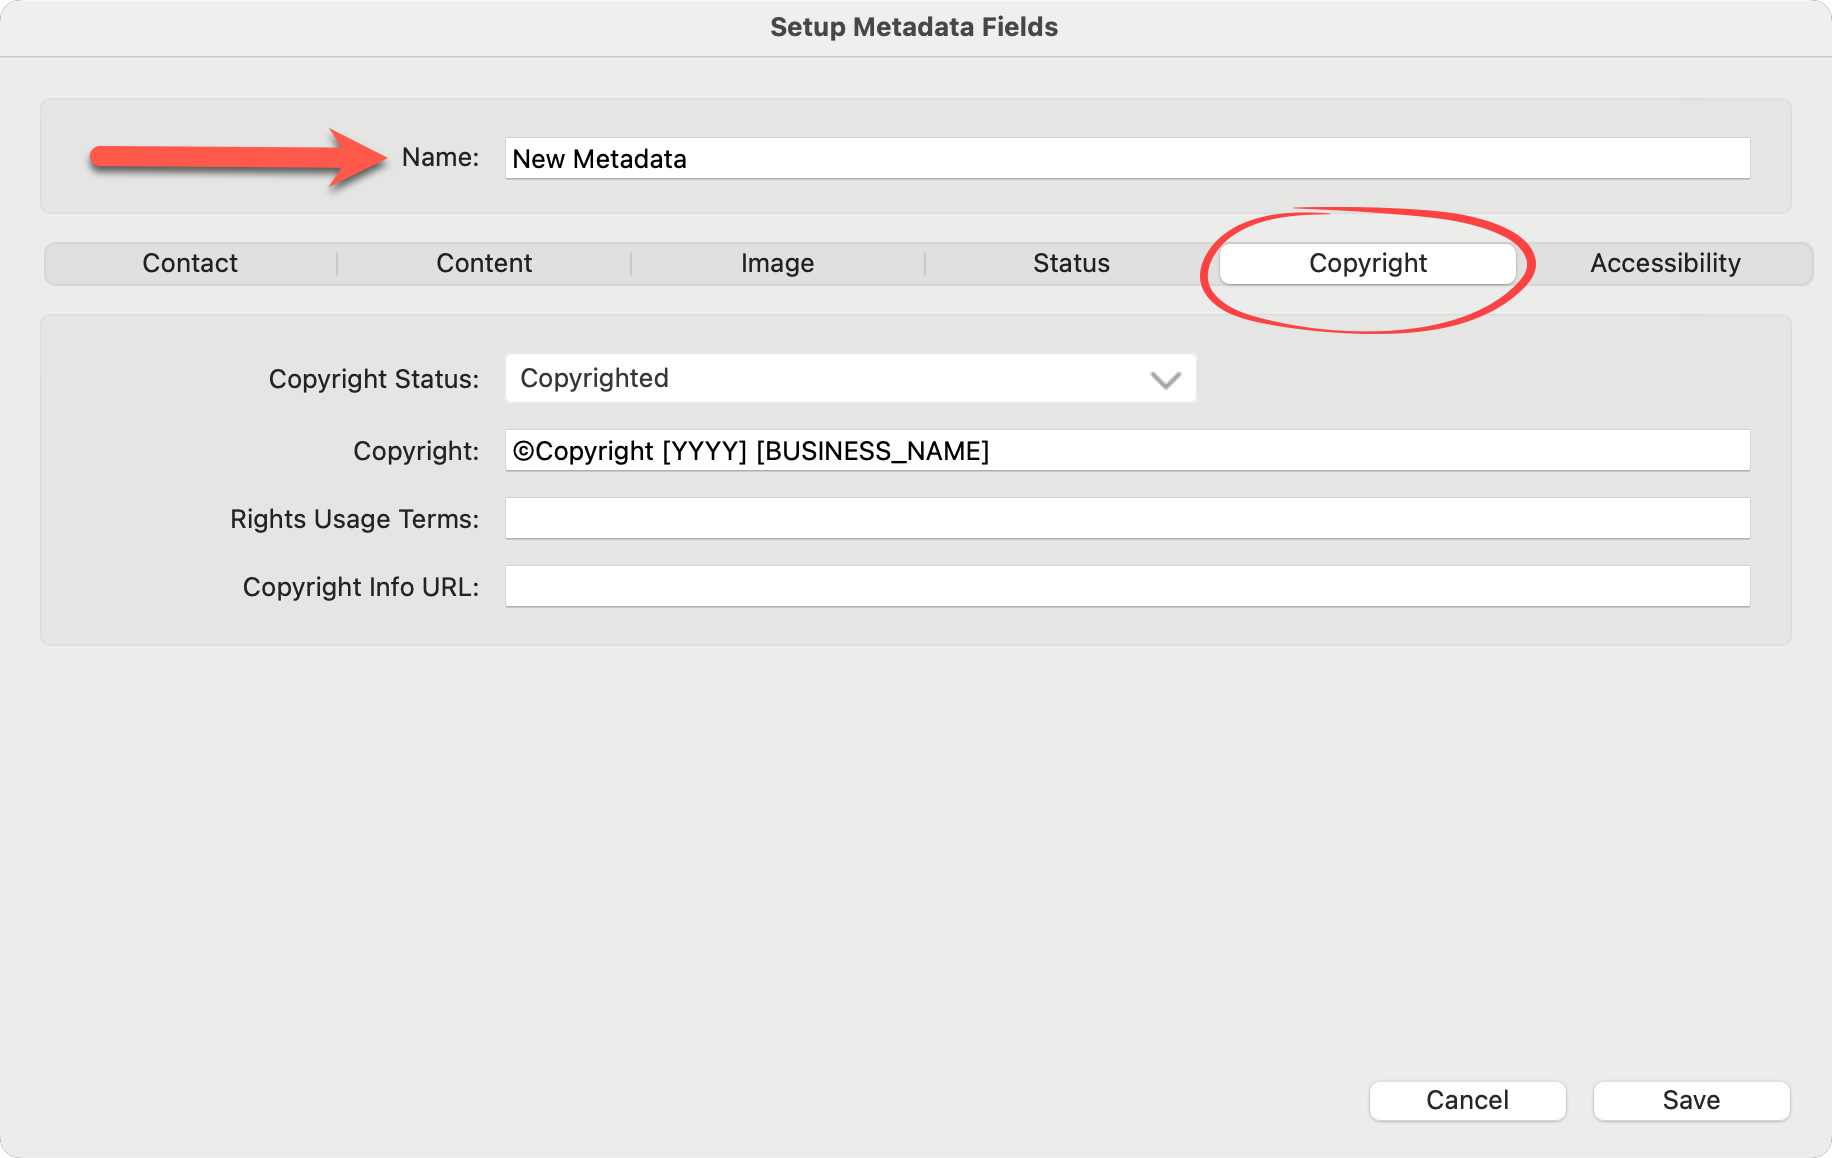
- Click on the Add button.
- Type in a name for the Metadata.
- Enter the information you want in the available fields. Use the tabs along the top to switch between different sections of the metadata template. Dynamic Text is enabled. See the page Using Dynamic Text to learn more.
- Save.
- Metadata presets can be applied to a profile in the Job Structure.
- Click on the Settings button, and select "Manage Job Structures" from the list.
- Edit the selected Job Structure.
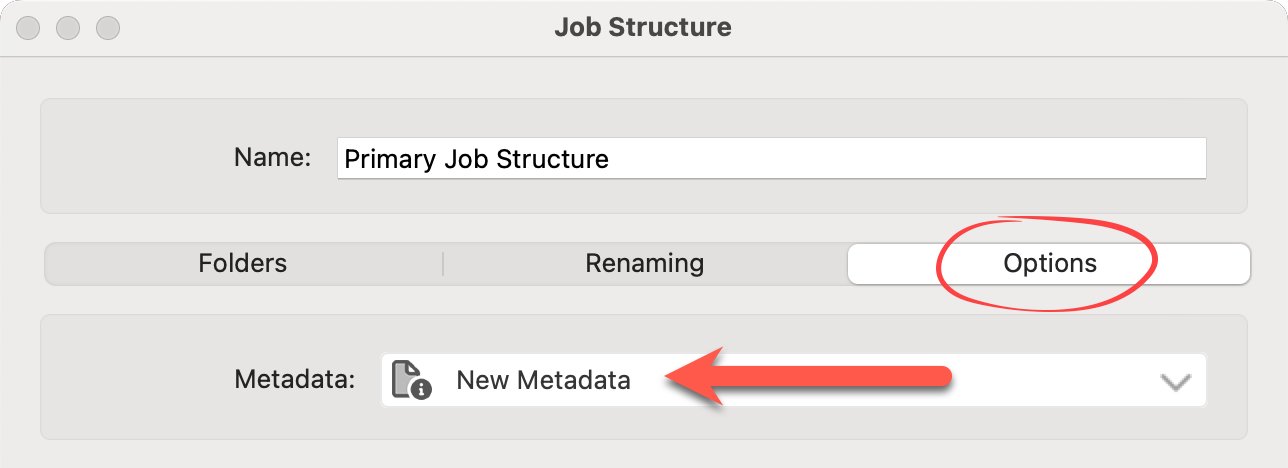
- Click on the "Options" tab.
- Select a Metadata preset from the list.
- Save.