ProSelect Data & Resources
ProSelect stores most configuration information in two key locations:
- ProSelect_Data.xml file: This file houses your pricing details and the specifications for your templates, mats, frames, rooms, music, title slides, and more. Note that this file does not contain any image data.
-
ProSelect Resources folder: This folder holds all images related to the configurations listed above, including overlay images for templates, room view images, frame segments, and images for mats or backgrounds.
Where is the information stored?
If you are not using any sharing options, ProSelect stores all of your data in your user account’s Application Data location on your computer. This data is preserved when you update or uninstall the software.
- macOS: StartupDisk/Users/YourUserName/Library/Application Support/ProSelect/
(See Accessing Hidden Folders on macOS) - Windows: C:\Users\YourUserName\AppData\Roaming\ProSelect\
(See Accessing Hidden Folders on Windows)
Default Data
The ProSelect default data is included with all new ProSelect subscriptions. It is a working set of data to get you started. It includes preloaded products, book templates, slideshows, pricing, and other elements that are available immediately upon installation. This default data also includes ProSelect's default resources, which are usually images such as library rooms, overlays, mats, and frames. These built-in resources and data provide a comprehensive foundation for using ProSelect effectively. As you adapt the software to fit your studio's branding, you can expand these resources by creating custom product templates, price lists, and adjusting settings to suit your needs. Additionally, downloading Supplier Collection files allows you to enhance your product offerings further.
What's Included in the 2025r1 Default Data
- Prints: Sample print and presentation option configurations from popular Suppliers such as WHCC, Millers, and Bay Photo.
- Gallery Wraps: Pre-configured Gallery Wrap options from ACI and WHCC.
- Composite Templates: A comprehensive collection of ready-to-use popular composite templates.
- Rooms: 30 calibrated and ready-to-use Library Rooms.
- Book Designs: A sample of popular book designs (setup parameters) from WHCC, Bay Photo, Finao, and ACI.
- Stacked Album/Book Pages: Pre-configured template spreads for both square and vertical albums.
- Stacked Wall Groupings: 52 Wall Groupings using stacked sizes for use with most Suppliers.
- Frames: A selection of frame moldings available from popular Suppliers including GNP, WHCC, and ACI.
- Traditional Mats: A comprehensive selection of commonly used traditional mats from Suppliers including GNP, WHCC, and 3XM.
Stacked sizes are new for ProSelect 2024r1 and above. Many fixed-size product templates have multiple sizing options because they have been "stacked together." Remember to use the drop-down arrows next to stacked templates to reveal all the sizing options.
You always have the ability to reset to ProSelect's default data. This action will discard all existing ProSelect data, including any user-made modifications. The ProSelect system will revert to its original settings, as initially configured by the developers. We recommend backing up your data file before starting this process. This backup ensures you can revert to your previous setup if you decide against the reset. Once you have reset, you can then import Supplier Collections to flush out your product offerings.
Resetting your ProSelect default data provides a fresh start by clearing out old or confusing products and prices. This can streamline your workflow and eliminate outdated items that are no longer available or producible.
- Go to the top menu, File > ProSelect Data > Reset to Default Setup.
- A warning dialog will appear to confirm the reset.
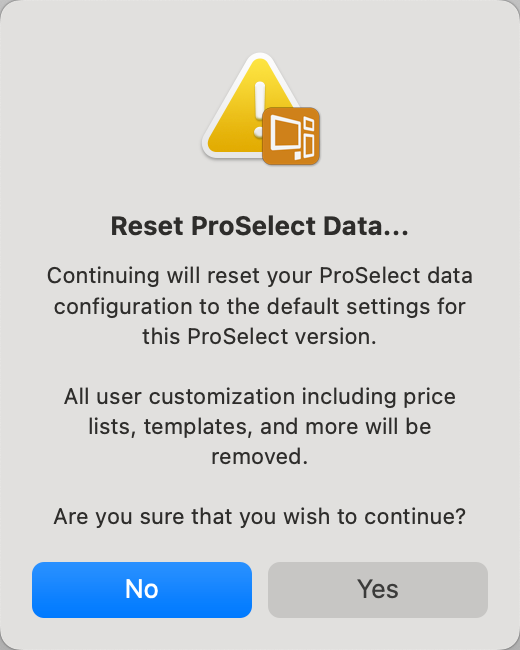
- Once you are certain you wish to reset to the default setup, click "Yes."
As new resources become available, The "Install Default Resources" option allows you to retain your current ProSelect data (such as prices, templates, etc.) while adding new resources that come with the most recent version of the software. This feature lets you choose multiple collections of elements to install. For example, you can select and add only new rooms or other specific resources based on your needs. There are some resources that may only be available from starting new or resetting your system to default.
- On the top menu, go to File > ProSelect Data > Install Default Resources.
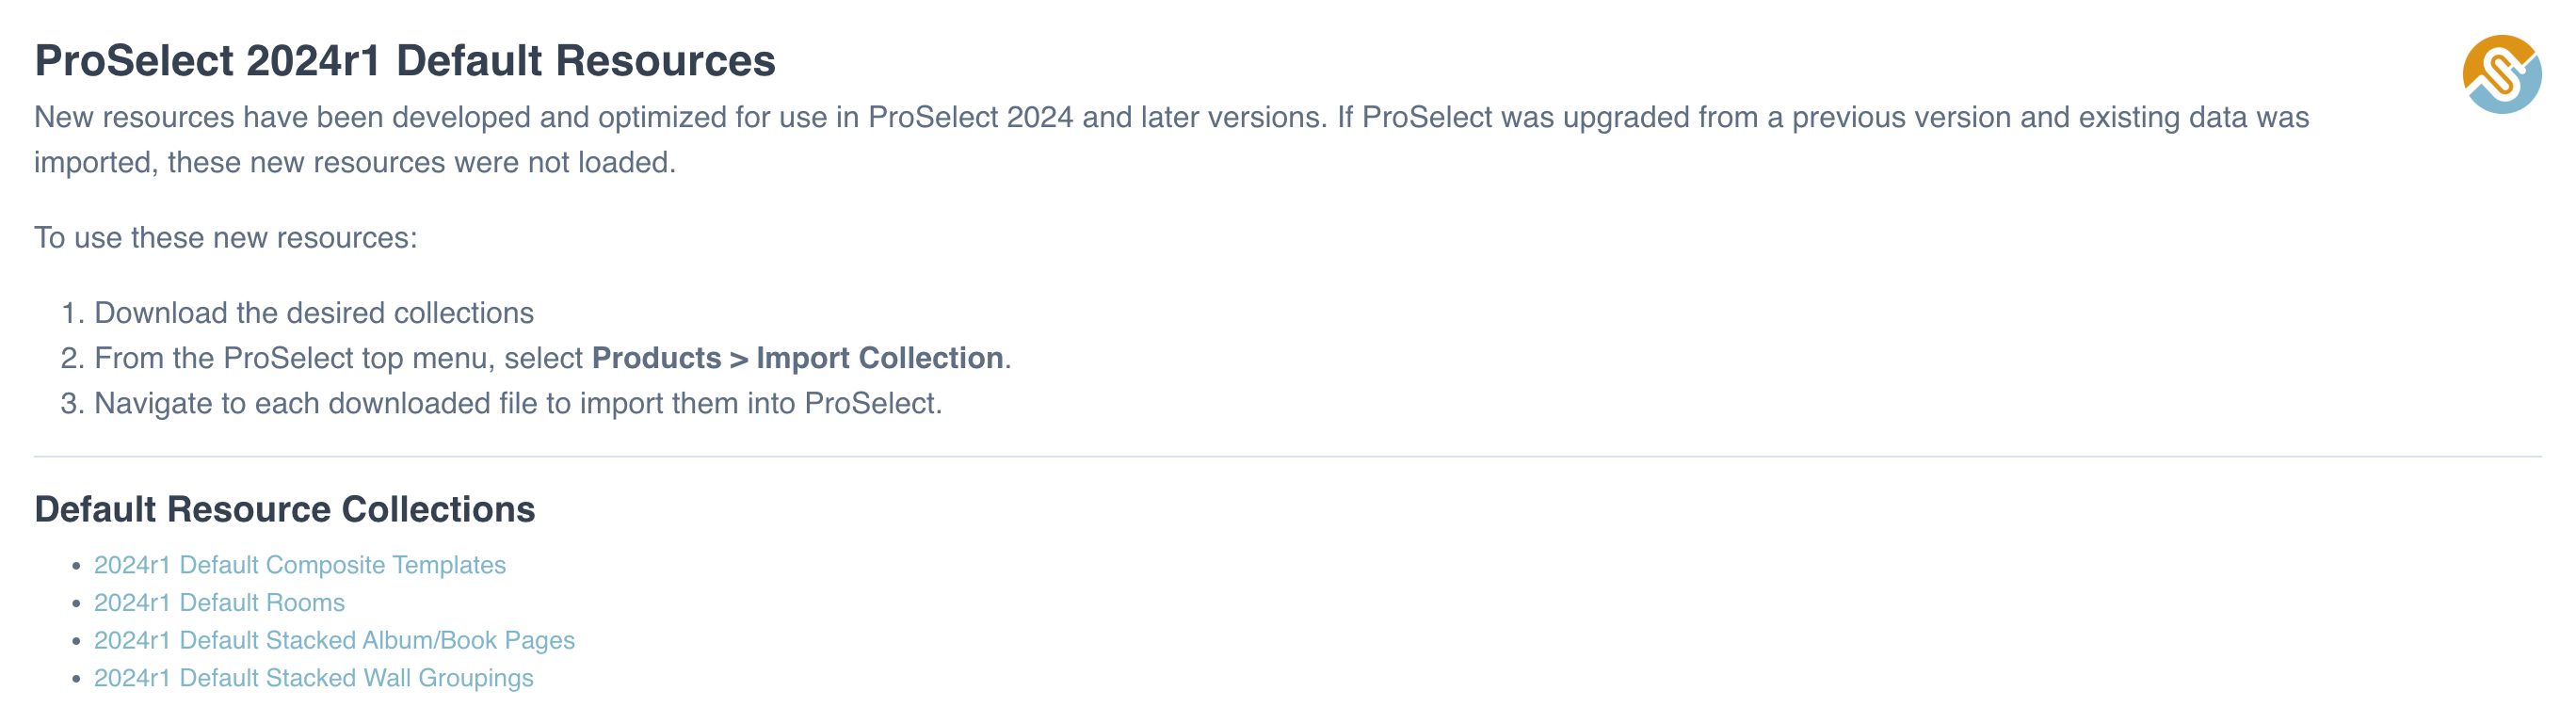
- You will be directed to the Pro Studio Software website.
- From here, click on a collection to download it.
- The collection will download to your designated downloads folder.
- In the downloads folder, double-click the file to unzip (if it did not automatically unzip).
Import Collection in ProSelect
- Navigate back to ProSelect. On the top menu, go to Products > Import Collection.
- Find the collection file (.ppc) on your computer and click "Open", or drag and drop the file into the Image List on the ProSelect main screen.
- The Import Collection dialog will appear.
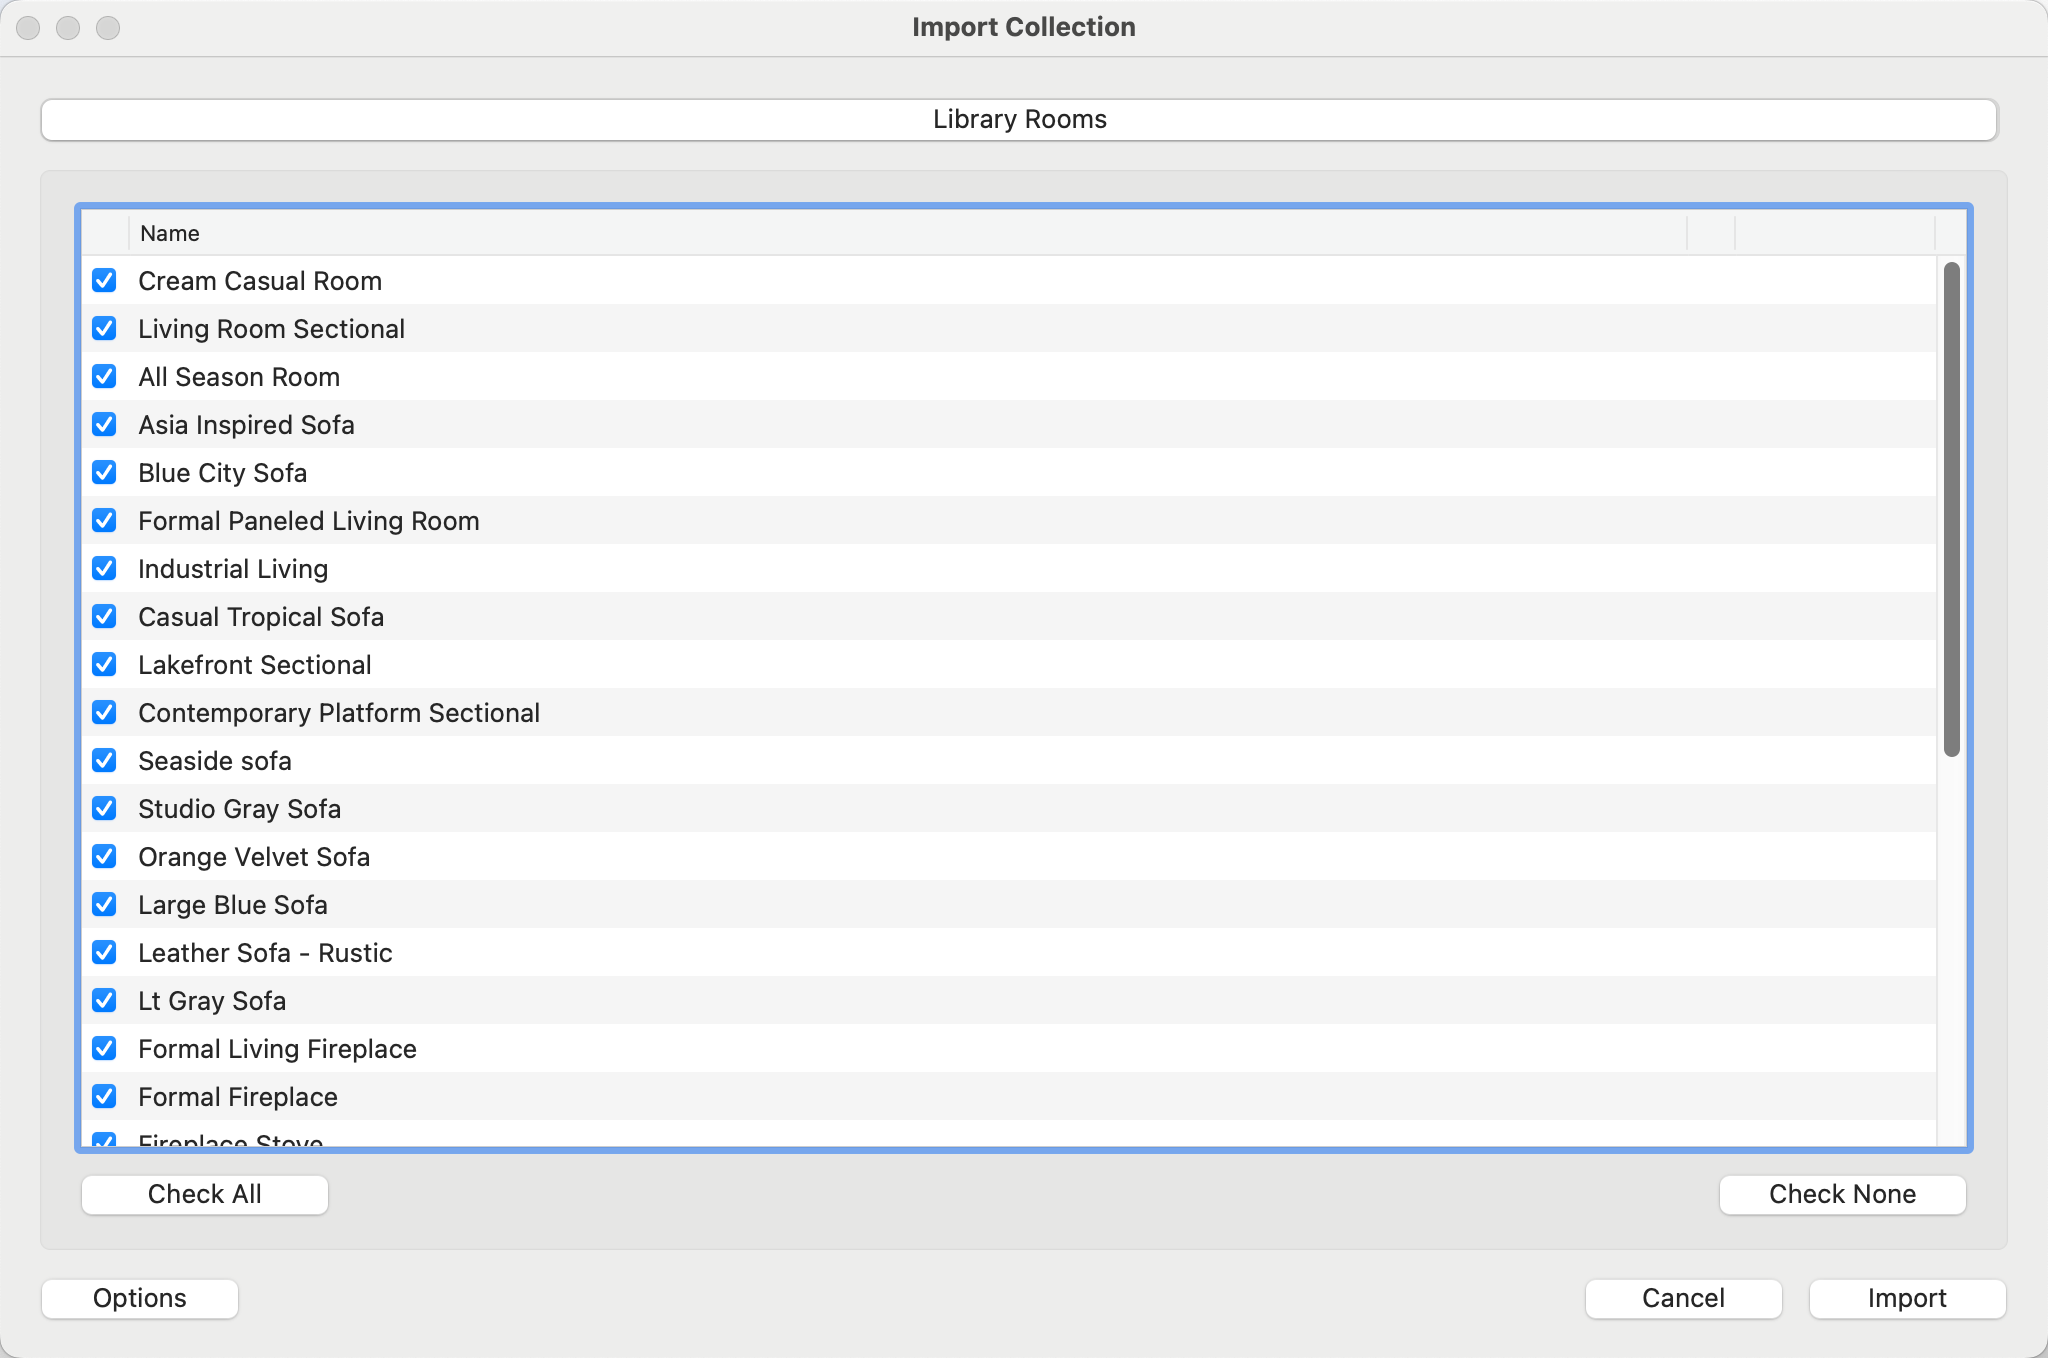
- Use the checkboxes to select which items to import. You can choose to "Check All" and import the entire collection, or "Check None" and select individual elements to import.
- Once you have gone through the tabs and confirmed which items to import, click the Import button.
Import Options
Import options are accessed by clicking on the Options button. These options are relevant to collections which include pricing and/or Photoshop files. In most cases, you should not change these settings.
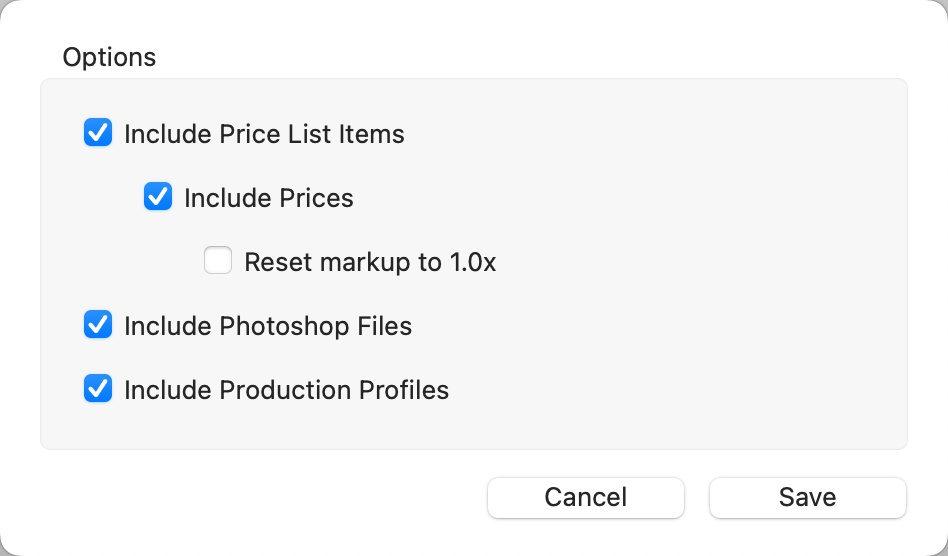
- Include Price List Items: By default, Price List Items will be included in the import as well as their prices. Pricing is imported to ALL Price Lists in ProSelect. Uncheck these boxes if you do not wish to import pricing.
- Reset Markup to 1.0x: If a markup has been utilized when pricing, you have the option of resetting all imported items to a markup of 1.0x.
- Include Photoshop Files: When importing a collection that includes items with associated high-resolution resource images (such as overlay images or mat images), these image files are automatically imported into the designated ProSelect Resources subfolder.
- Include Production Profiles: If any of the imported items have an assigned Production Profile, it will be imported as well. Uncheck the box if you do not wish Production Profiles to be imported.
If the Collection includes items already present in your ProSelect setup, these will be indicated as 'Conflict' in the right-hand column of the import window. You can resolve these conflicts by clicking on the down arrow and choosing either to "Replace" or "Add" the item. You can multi-select and apply either "Replace" or "Add" to more than one item at a time.
(a) Replace the existing items with those from the Collection.
(b) Add the Collection items as a new group, distinct from existing ones.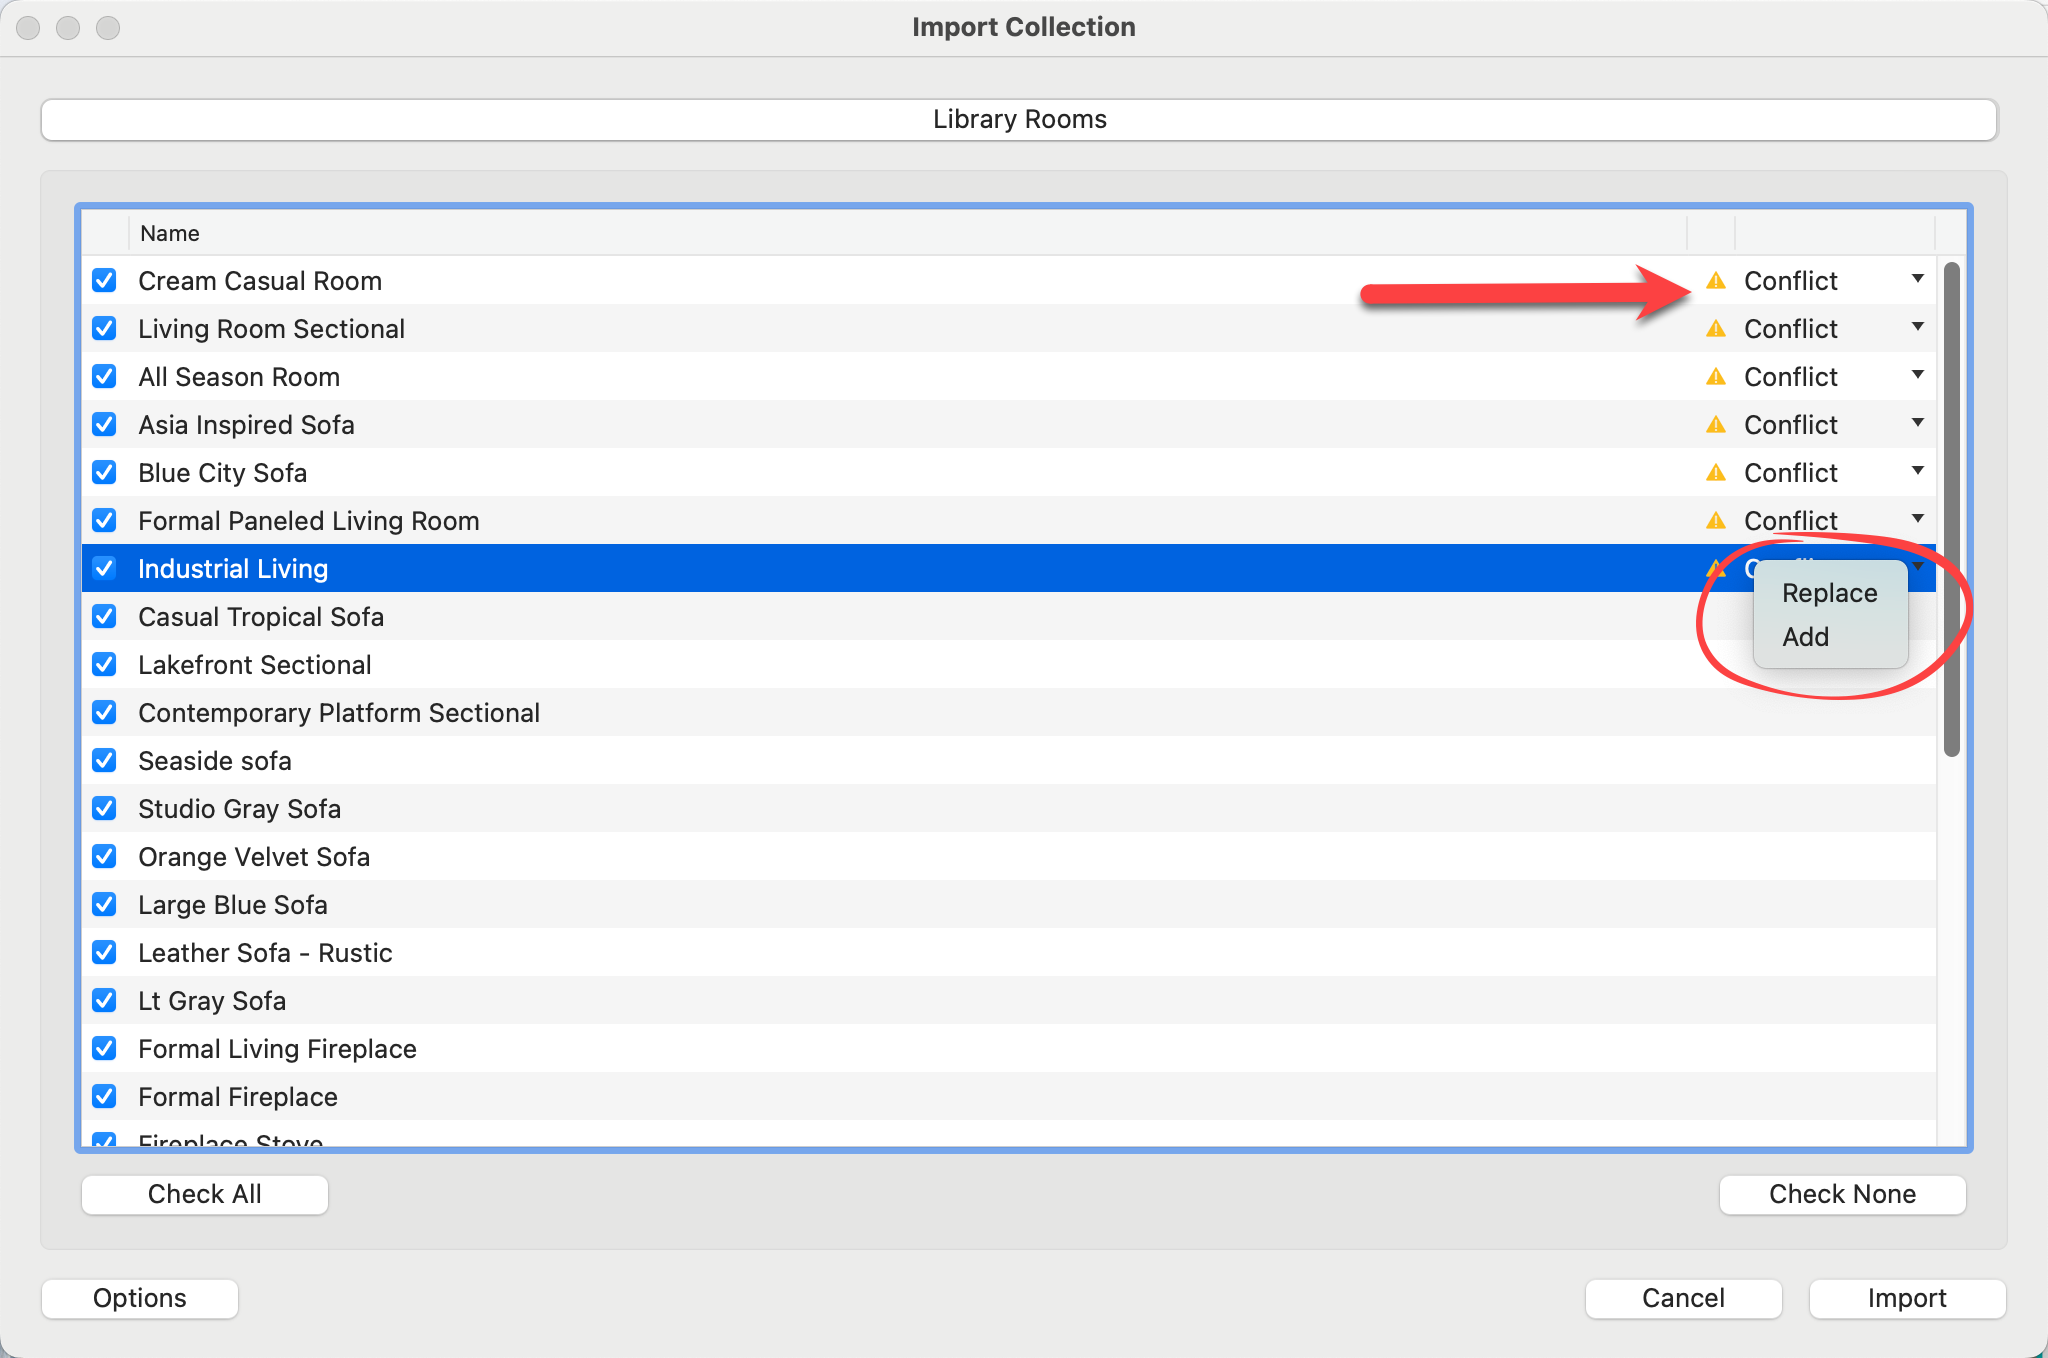
When adding a new group, ProSelect appends the current date (in YYYYMMDD format) to the name of the imported group. This helps differentiate it from any pre-existing groups and assists in managing multiple versions or variations of similar items.
ProSelect automatically backs up your data to help protect against accidental loss or mistakes.
- Whenever changes are made to the ProSelect_Data.xml file—where essential data like settings and prices are stored—the updated file is automatically saved in the ProSelect folder.
- If more than 15 minutes have passed since the last change, up to nine previous versions of this file are saved in the Data_Backups folder. These backup files are sequentially named from ProSelect_Data_bk1.xml to ProSelect_Data_bk9.xml.
- Whenever you update to a newer version of ProSelect, a backup copy of your data file is saved. Backups are stored in the Data_Backups folder. These are saved with the latest version number on the end—for Example: ProSelect_Data_24_1.xml.
If a significant error occurs, such as accidentally deleting a price list, you can recover data from these backups. You have two options for recovery:
- Use the “Import data from” feature to select a backup file.
- Restore directly via the Reset window.
This system ensures that you can revert to data from at least two hours earlier, minimizing potential disruptions to your workflow.
ProSelect automatically saves a backup of your data file prior to importing a collection. In addition to this automatic backup, you can manually create backups at any time. This manual backup is always advised should there be a failure within the ProSelect configuration folders holding those backups.
- Go to the top menu, File > ProSelect Data > Export Data to.
- Save the data file (.xml) to your computer or external drive.
Make a folder on your desktop “ProSelect Data Backups”. Each time you make a backup file, add the date into the file name: 2023-08-31 ProSelect_Data.xml. Save the backups to this folder. Doing so will give you an ongoing history of backups should you ever need to step back. These files require very little storage space.
It is important to regularly back up your ProSelect Resources Folder to protect against data loss caused by computer failure, accidental deletion, or other system issues.
- Go to the top menu, Resources > ProSelect Resources Folder > Show in FinderExplorer.
- This will open the location of your current ProSelect Resources Folder.
- Copy the entire folder (not just the files inside) to a secure backup location:
- An external drive
- A second computer
- A cloud storage service (e.g., Dropbox, Google Drive)
- A USB flash drive
To restore a backup of your Resources Folder
- Go to the top menu, Resources > ProSelect Resources Folder > Show in FinderExplorer.
- This will show you your current Resources Folder.
- Replace the existing Resources Folder with the backup version.
- Launch ProSelect. It will automatically start using the replacement Resources Folder.
 Quick Tip
Your templates, price lists, orders, and other key data are stored separately in your ProSelect Data File. See Backing Up Your Data File for full instructions on protecting your core data.
If you have created a backup of your data file and wish to return to your previous setup:
- On the top menu, go to File > ProSelect Data > Import Data from.
- Find and select the data file (.xml) on your computer.
- ProSelect will replace its current data file with the selected data file.
You can also restore from an auto backup should ProSelect fail to start or stall during the initialization process. Click on Reset ProSelect for more information.
ProSelect Data Archives provide a convenient way to create a snapshot of your current ProSelect data file and settings. These archives are useful for transferring or restoring your ProSelect setup between computers or users. Using Data Archives ensures that your important setup information, such as pricing, products, templates, and more, is saved and easily restorable if needed.
Why Use a Data Archive?
Creating a data archive allows you to:
- Save a point-in-time snapshot before making major changes.
- Transfer your setup to a different computer.
- Restore your studio’s configuration after data loss or corruption.
- Share a working setup with another ProSelect user.
What’s Included in a Data Archive
When exporting a data archive, ProSelect includes the following:
- Product & Pricing setup
- Room setups and templates
- Styles, layouts, and mats
- Slideshow settings
- Custom sizes and paper sizes
- Frame and mat data
- Book templates
- Any embedded resources (logos, images, etc.)
Optionally, you can include your Preferences, which cover:
- Application settings
- Display and interface options
- File locations and folder defaults
Note: Including preferences is useful when transferring your environment to another system. However, you may wish to exclude them if only the product/pricing setup is being shared.
Exporting a Data Archive
To create and save a data archive:
- Go to the top menu, File > ProSelect Data > Export Archive to...
- Choose a name and save location for the archive file.
- In the export dialog, check whether to include Preferences.
- Click "Export" to save the archive to your computer.
Importing a Data Archive
To restore your data from a previously saved archive:
- Go to the top menu, File > ProSelect Data > Import Archive from...
- Select the archive file (.psa) from your computer.
- If the archive includes Preferences, choose whether to import them.
- Confirm the import: your current data will be replaced by the archive.
Importing a Data Archive will overwrite your current ProSelect data file. Be sure to export a data archive first if you wish to preserve your existing setup.
Data Archives vs. Resetting to Default Data
Importing a Data Archive is not the same as resetting to the default data. A data archive restores a custom snapshot of your studio’s setup, whereas resetting returns ProSelect to its original factory defaults with no customizations. Use Data Archives to preserve and reload your personalized configurations. Use the reset function only if you want to start from scratch.
Additional Tips
- Use descriptive file names for archives (e.g., StudioSetup_July2025.psa).
- Archive your data before updates or major changes.
- Data Archives are version-specific—import archives into a compatible version of ProSelect.
If you're using macOS and the Library folder is not visible under your user account, this will help you locate and access it. Starting with macOS 10.7 (Lion), Apple chose to hide the Library folder (the Library folder within your user directory) by default. This folder contains important application data, including ProSelect's setup files and ProSelect Resources.
Why You Need Access
Occasionally, you may need to access this folder to back up your data file or locate resource files.
How to Access the Library Folder
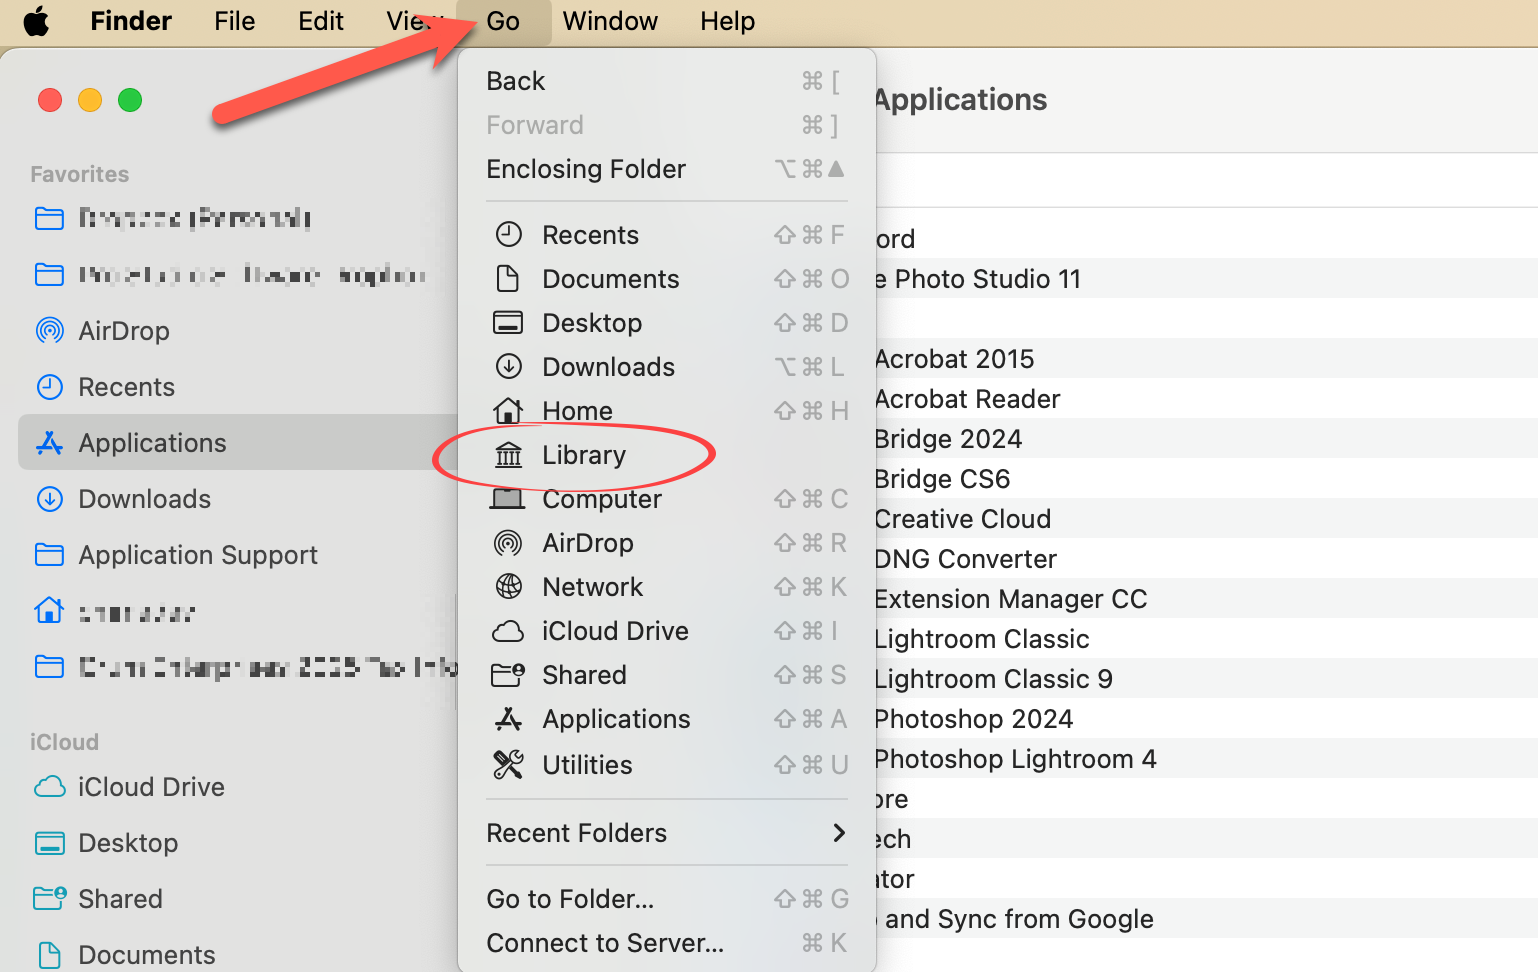
- Open a Finder window.
- Hold down the Option key.
- Go to the top menu, Go > Library.
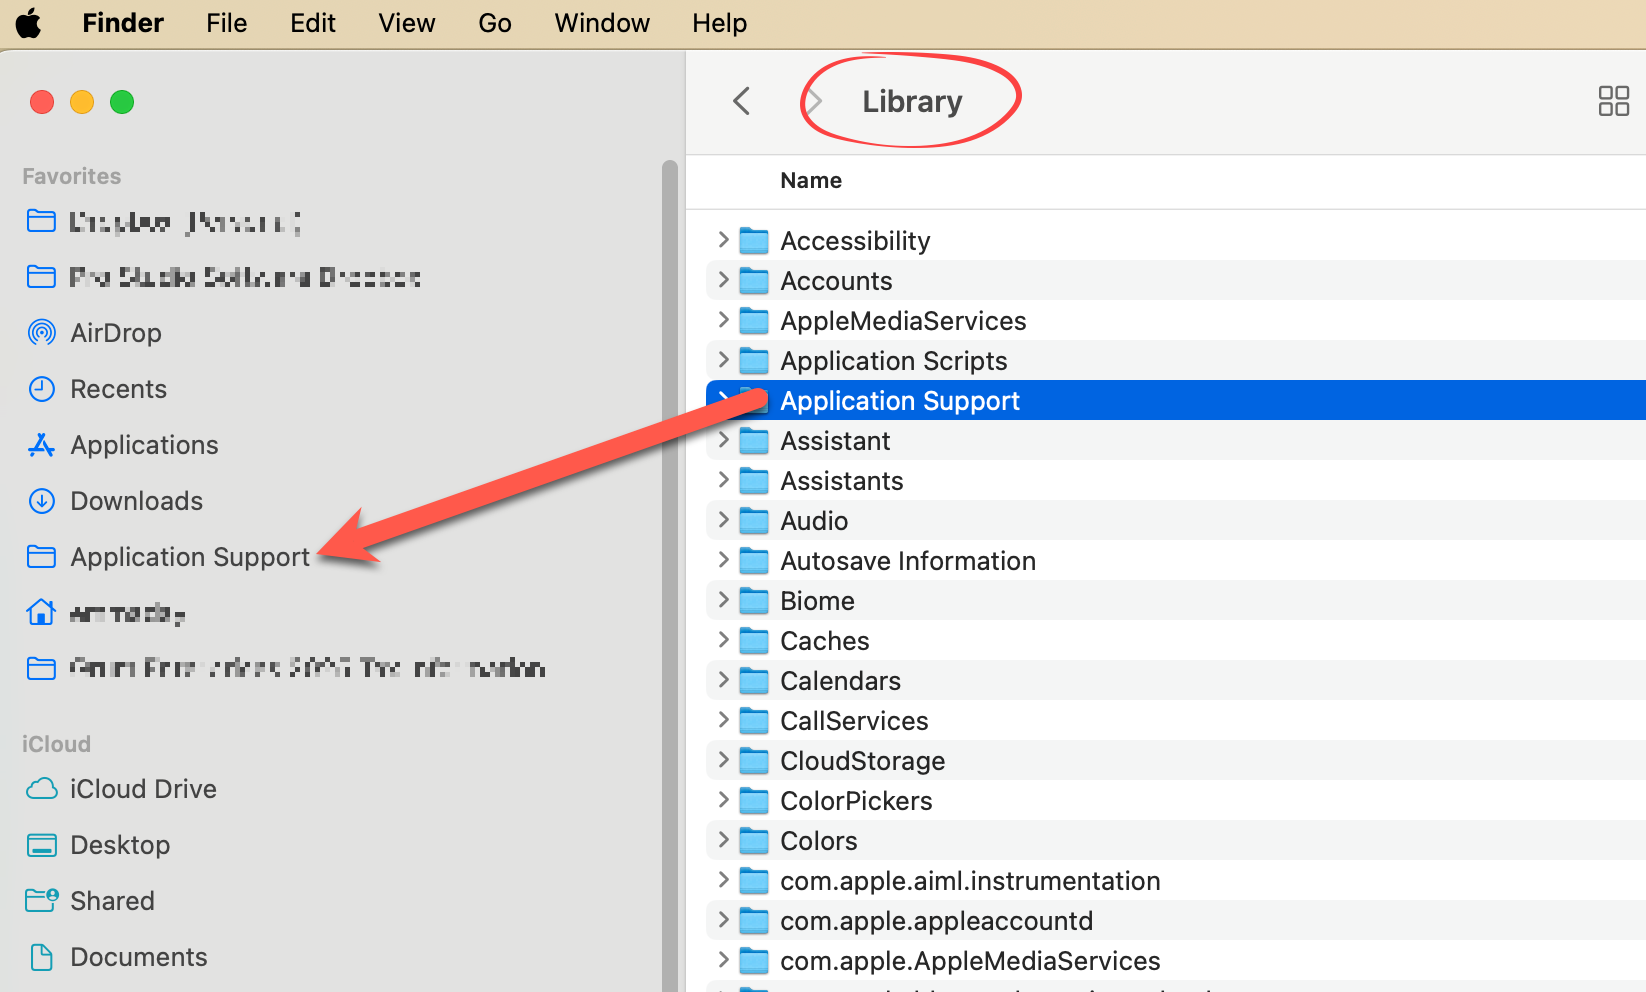
This temporarily reveals the Library folder. To make access easier in the future:
- Once inside the Library or Application Support folder, drag the folder icon from the top of the Finder window into the sidebar.
- This creates a permanent shortcut to the folder in your Finder window.
Quick Access from ProSelect
You can also access the folder directly from within ProSelect:
- Go to the top menu, Resources > ProSelect Resources Folder > Show in Finder.
- You are now in the Application Support Folder.
Windows may hide important folders like AppData or ProgramData by default. These folders contain essential ProSelect configuration and resource files.
To Access the AppData Folder
- Open File Explorer.
- In the address bar at the top, type: %appdata% and press Enter.
- This opens the Roaming folder inside AppData, where you’ll find the ProSelect and ProSelect Resources folders.
- You can also open File Explorer quickly by pressing Windows + E on your keyboard.
To Permanently Display Hidden Folders
- On Windows 10 or 11: In File Explorer, go to the View menu and check Hidden items.
- On Windows 7: Go to Organize > Folder and search options > View tab, then select Show hidden files, folders and drives and click OK.
*Be aware that enabling this setting may expose other hidden system folders. You can reverse this setting at any time.
Quick Access from ProSelect
You can also access the folder directly from within ProSelect:
- Go to the top menu, Resources > ProSelect Resources Folder > Show in Explorer.
- This opens the folder where ProSelect stores resource images and supporting data.
If the "ProgramData" Folder is Missing
If you're missing the C:\ProgramData folder used by ProSelect, it may be due to a non-standard Windows installation, such as one that was migrated from Windows XP. This issue can be fixed by updating a registry entry. Please proceed with caution or consult a technical support person.
- Click the Start button and search for regedit, then open RegEdit.exe.
- Navigate to the following path:
- HKEY_CURRENT_USER\Software\Microsoft\Windows\CurrentVersion\Explorer\User Shell Folders
- Double-click on AppData in the right-hand panel.
- Change the value from: %USERPROFILE%\Application Data to: %USERPROFILE%\AppData\Roaming
- Click OK, then exit the Registry Editor.
- Restart ProSelect or the ProSelect Network Server.
* Only perform this change if the value is currently set to %USERPROFILE%\Application Data. If it's already set to %USERPROFILE%\AppData\Roaming, no action is needed.