Troubleshooting
If you're experiencing issues sizing products in a room, there are a few likely causes.
1. Try Changing the Presentation Option
The Presentation Option you currently have selected may not have sizes associated with it.
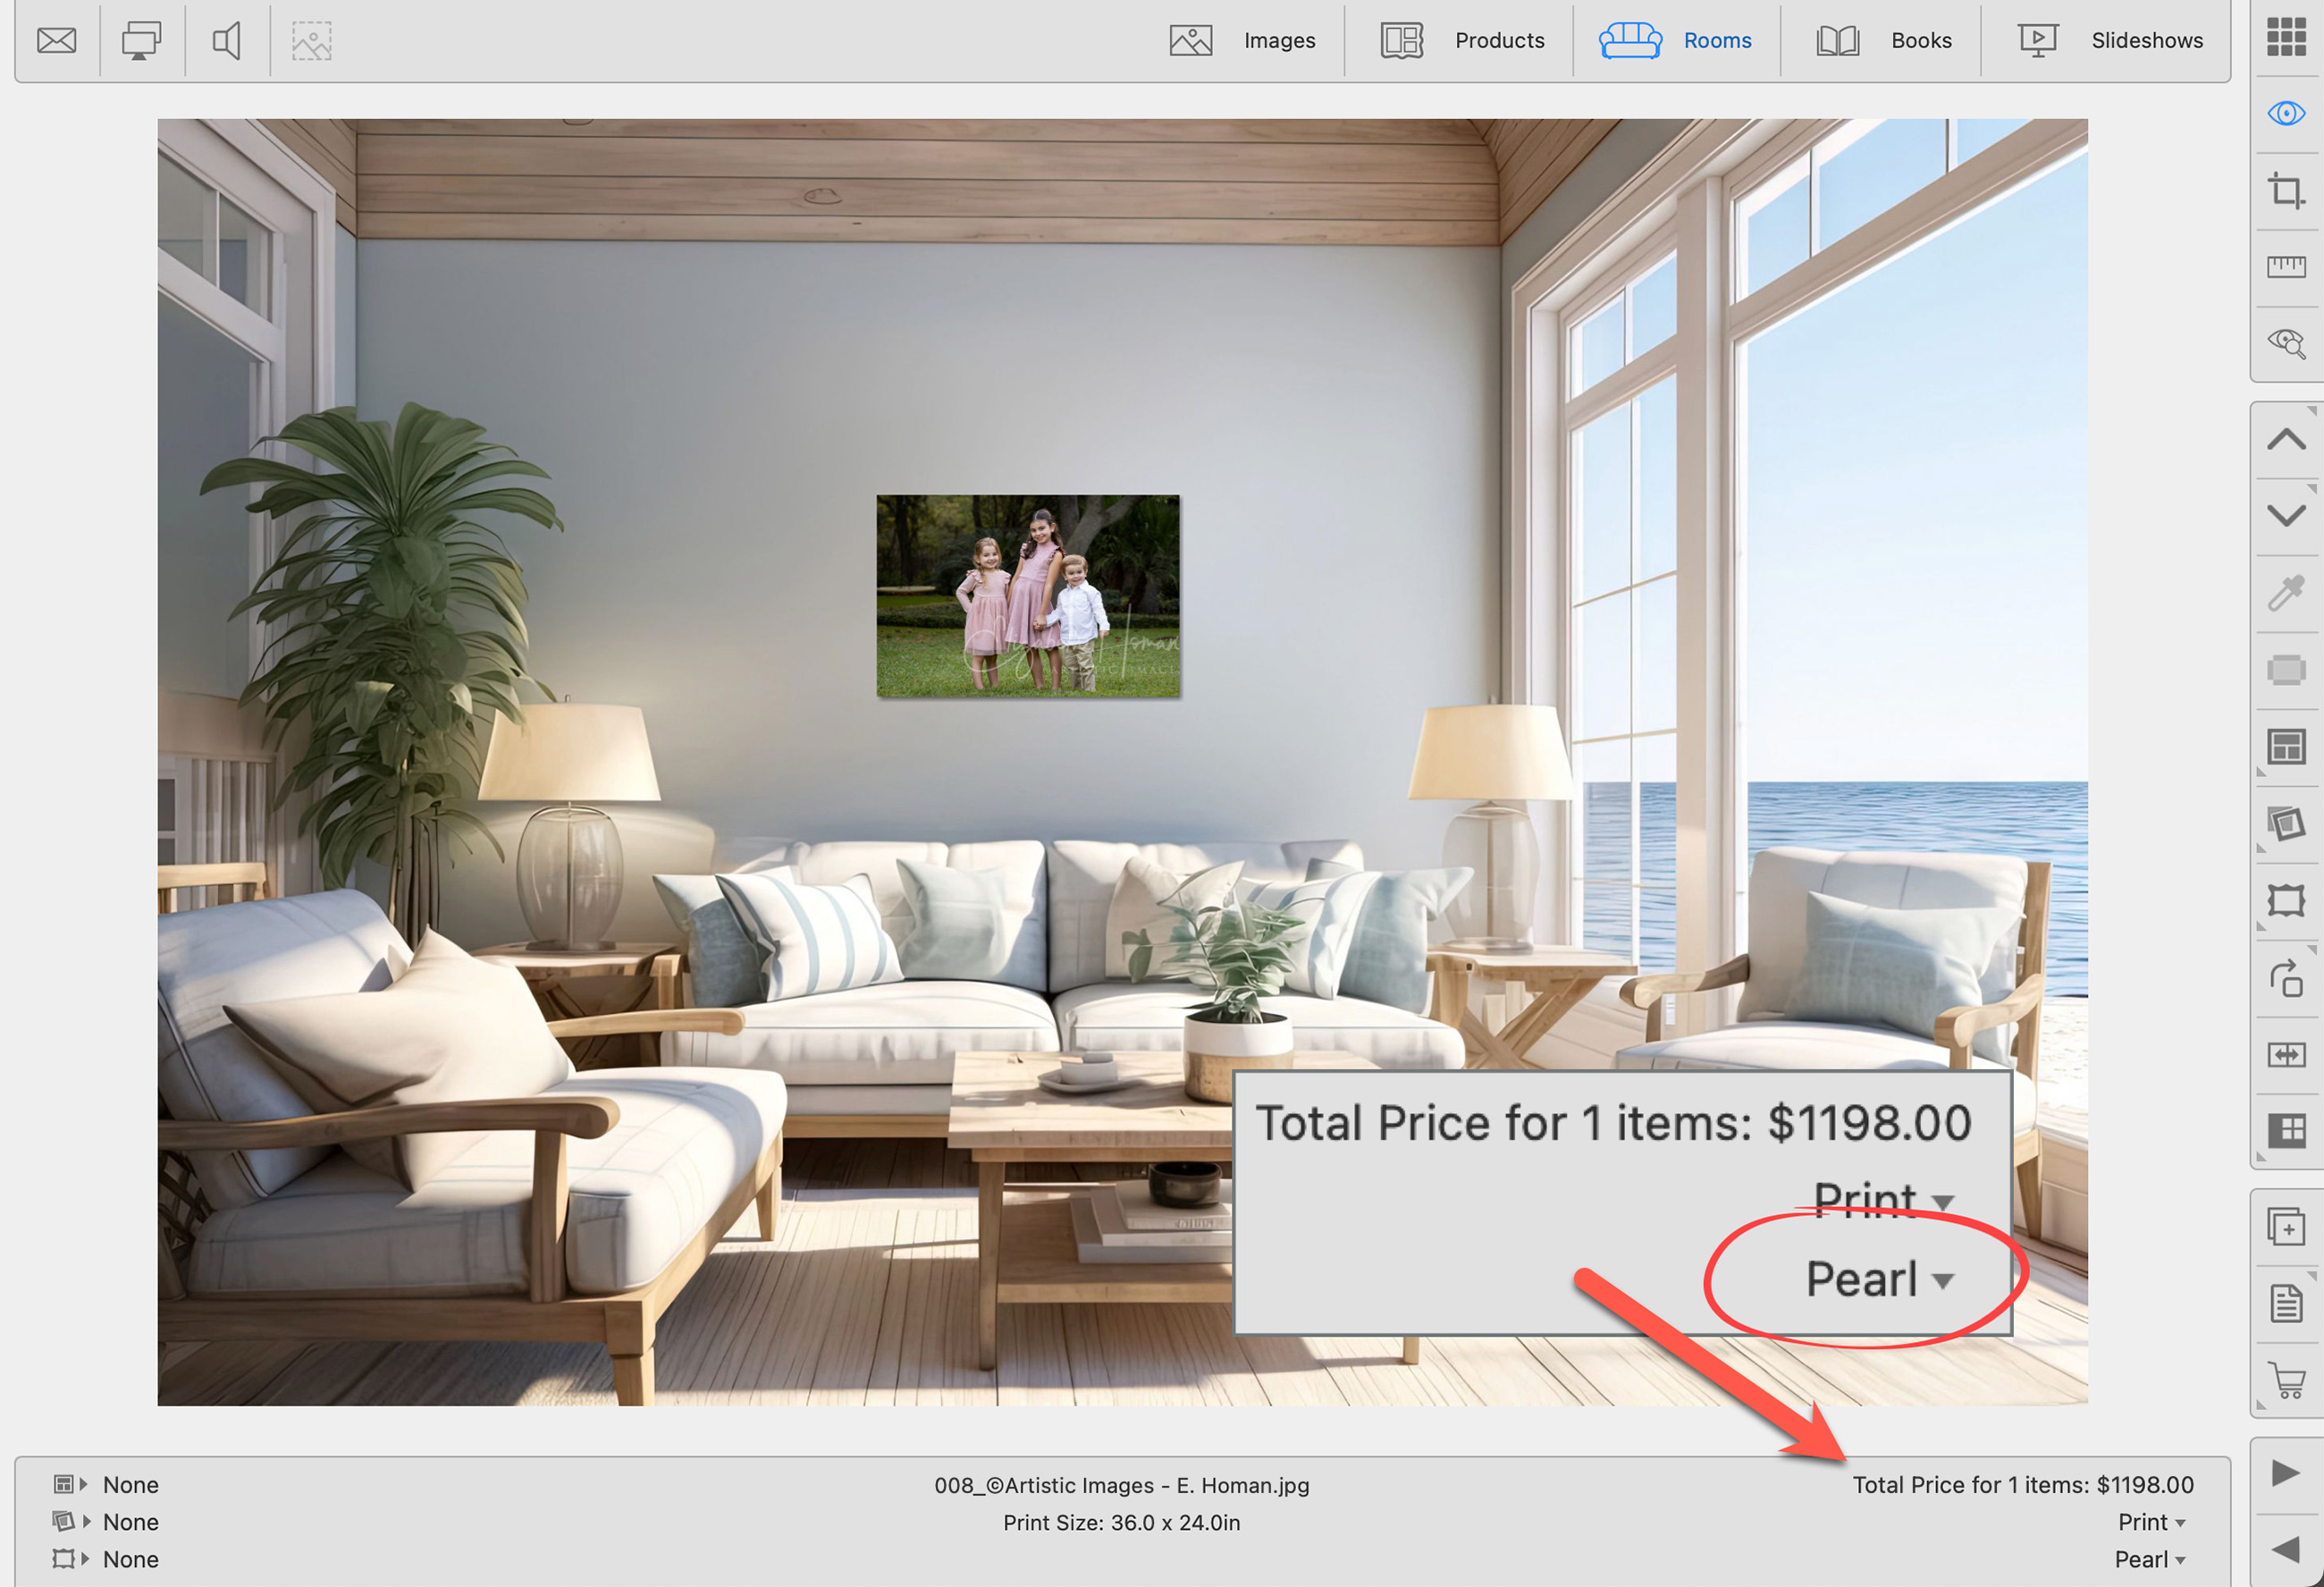
- When in Room view, click on the currently applied Presentation Option (on the info bar).
- Select a different Presentation Option.
- Alternatively, right-click on the image or product in the room. Select a Presentation Option from the drop-down list.
- Try changing sizes.
- Learn more about how to use Presentation Options here.
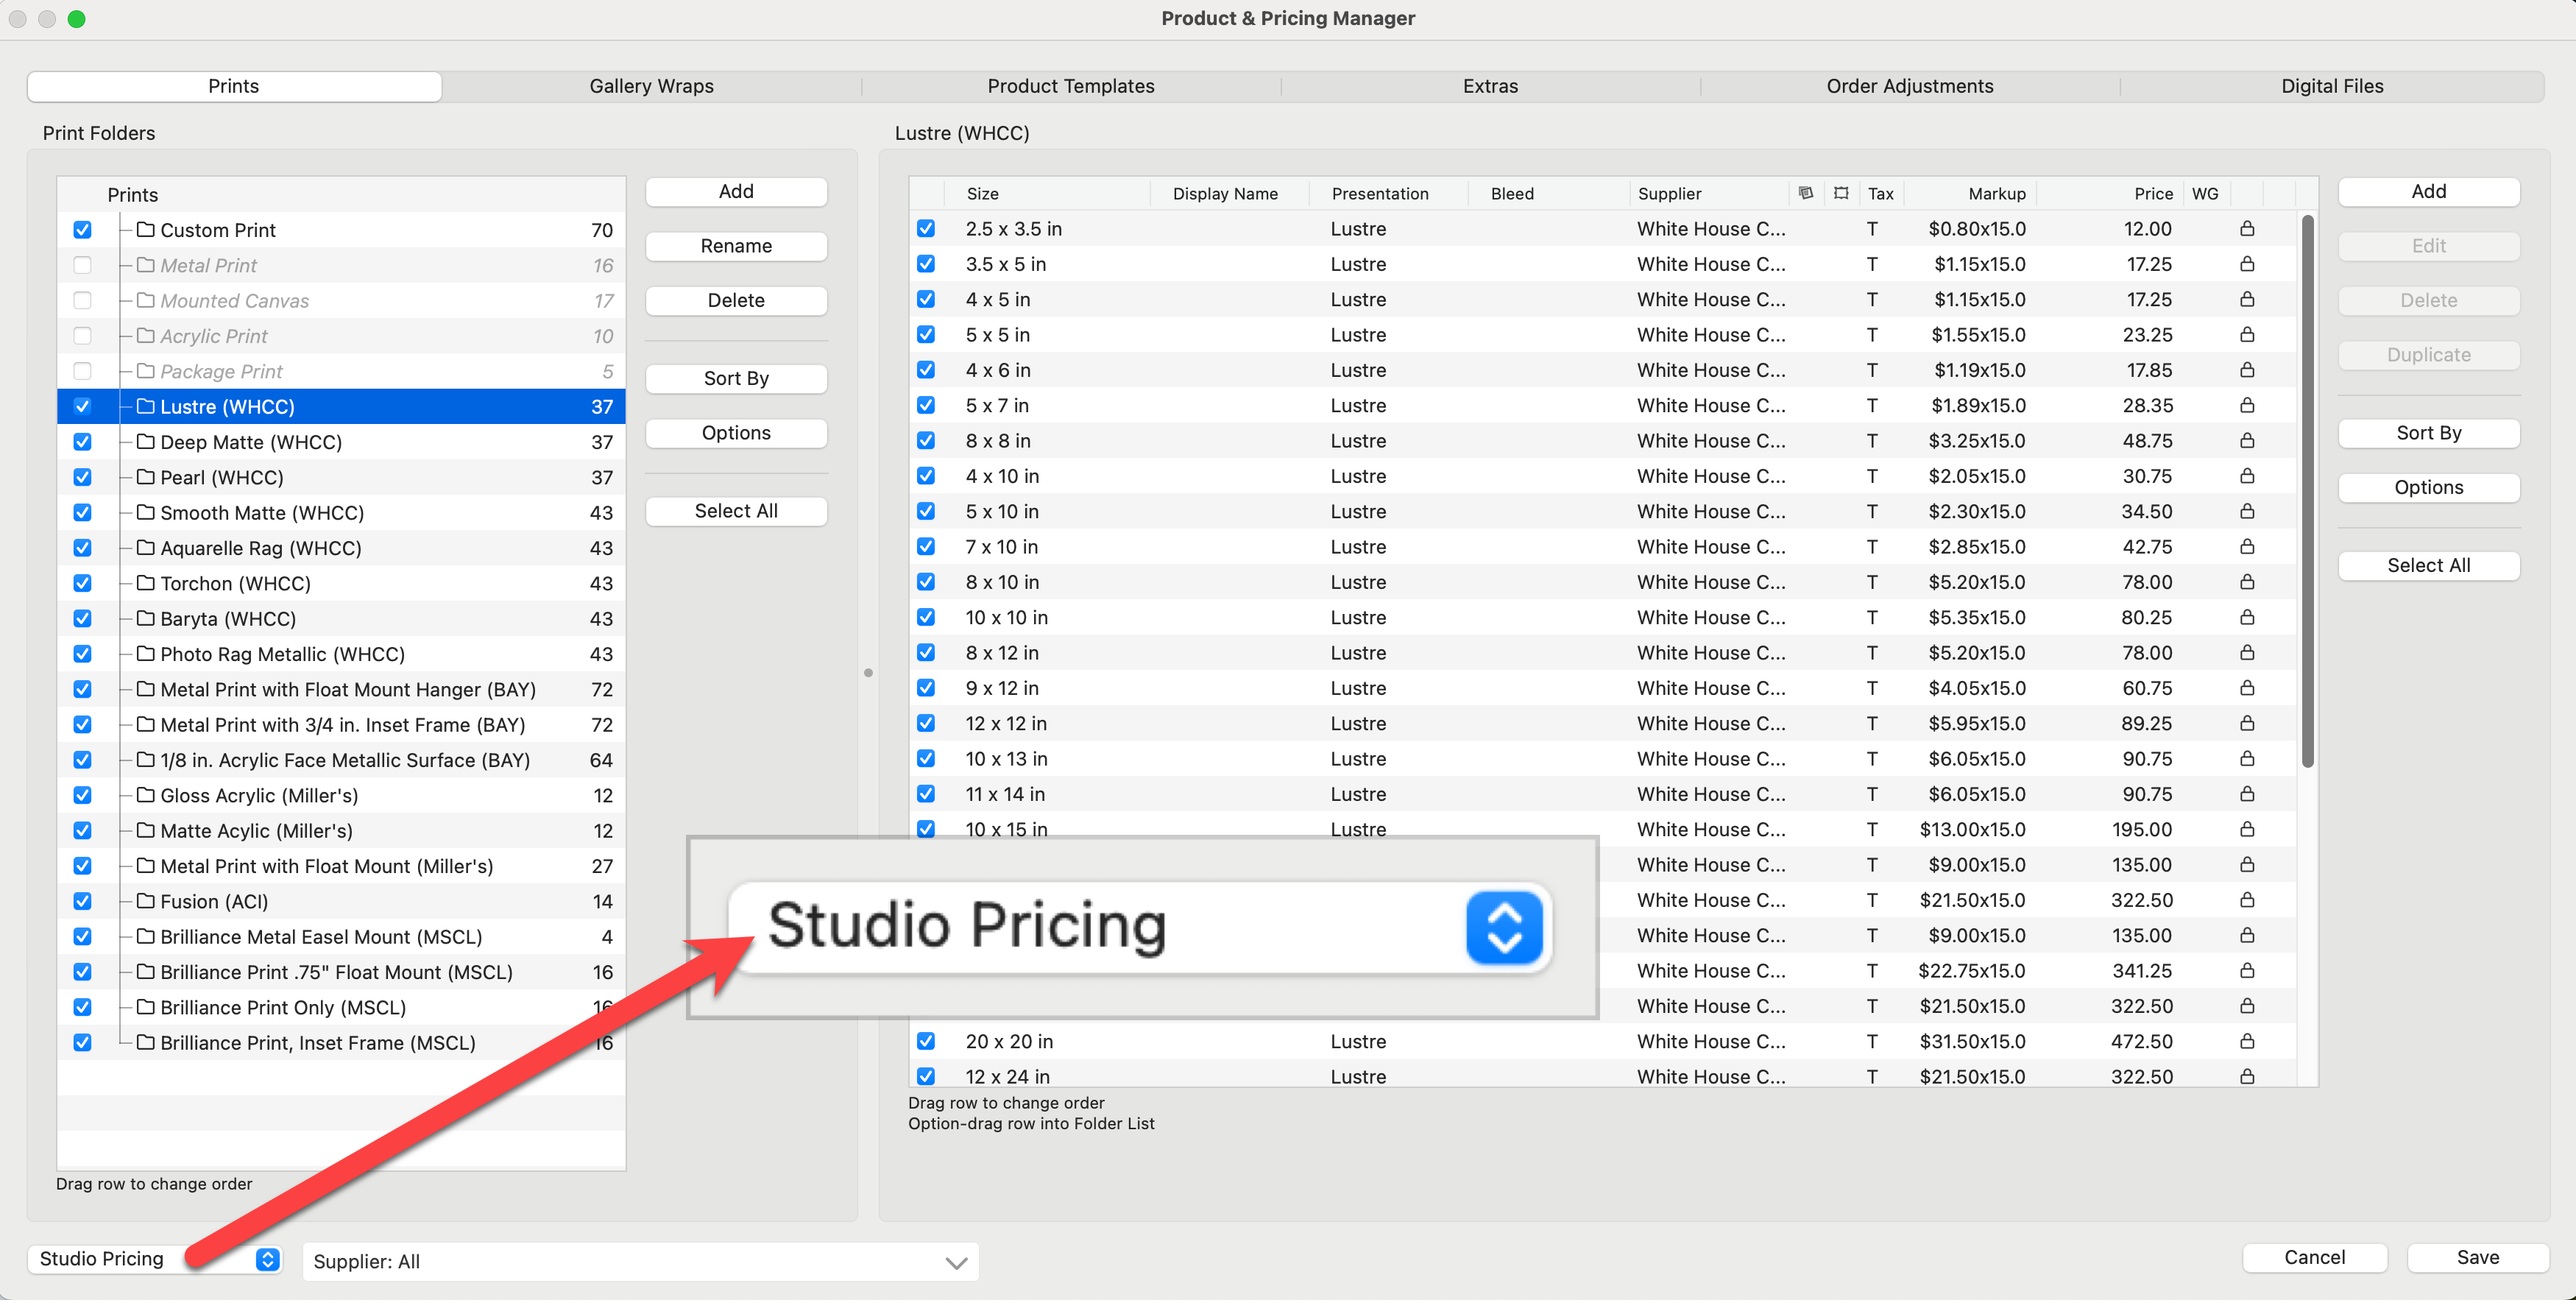
2. Set up Pricing
If there are no sizes attached to the Presentation Option, it's possible they have not been priced. Only priced sizes will appear as options when using Room view.
- Go to the top menu, Products > Product & Pricing Manager.
- Find the Product you want to work with.
- Follow the steps to add pricing. The Introduction to Pricing page reviews all the necessary steps to manage and price your products.
3. Change Paper Size Folder
When browsing different sizes in ProSelect, the system stays within the same Paper Size folder. If a size you expect isn't appearing, it may be located in a different Paper Size folder. This structure is completely user-configurable under Products > Paper Sizes.
- Right-click on the Previous
 or Next
  size tool.
 - Your Paper Size folders appear here.
- Click on the drop-down arrows to reveal sizes in other Paper Size folders. Select a size from the list.
- Once you select a size from a different folder, you can move through all the sizes within that particular folder.
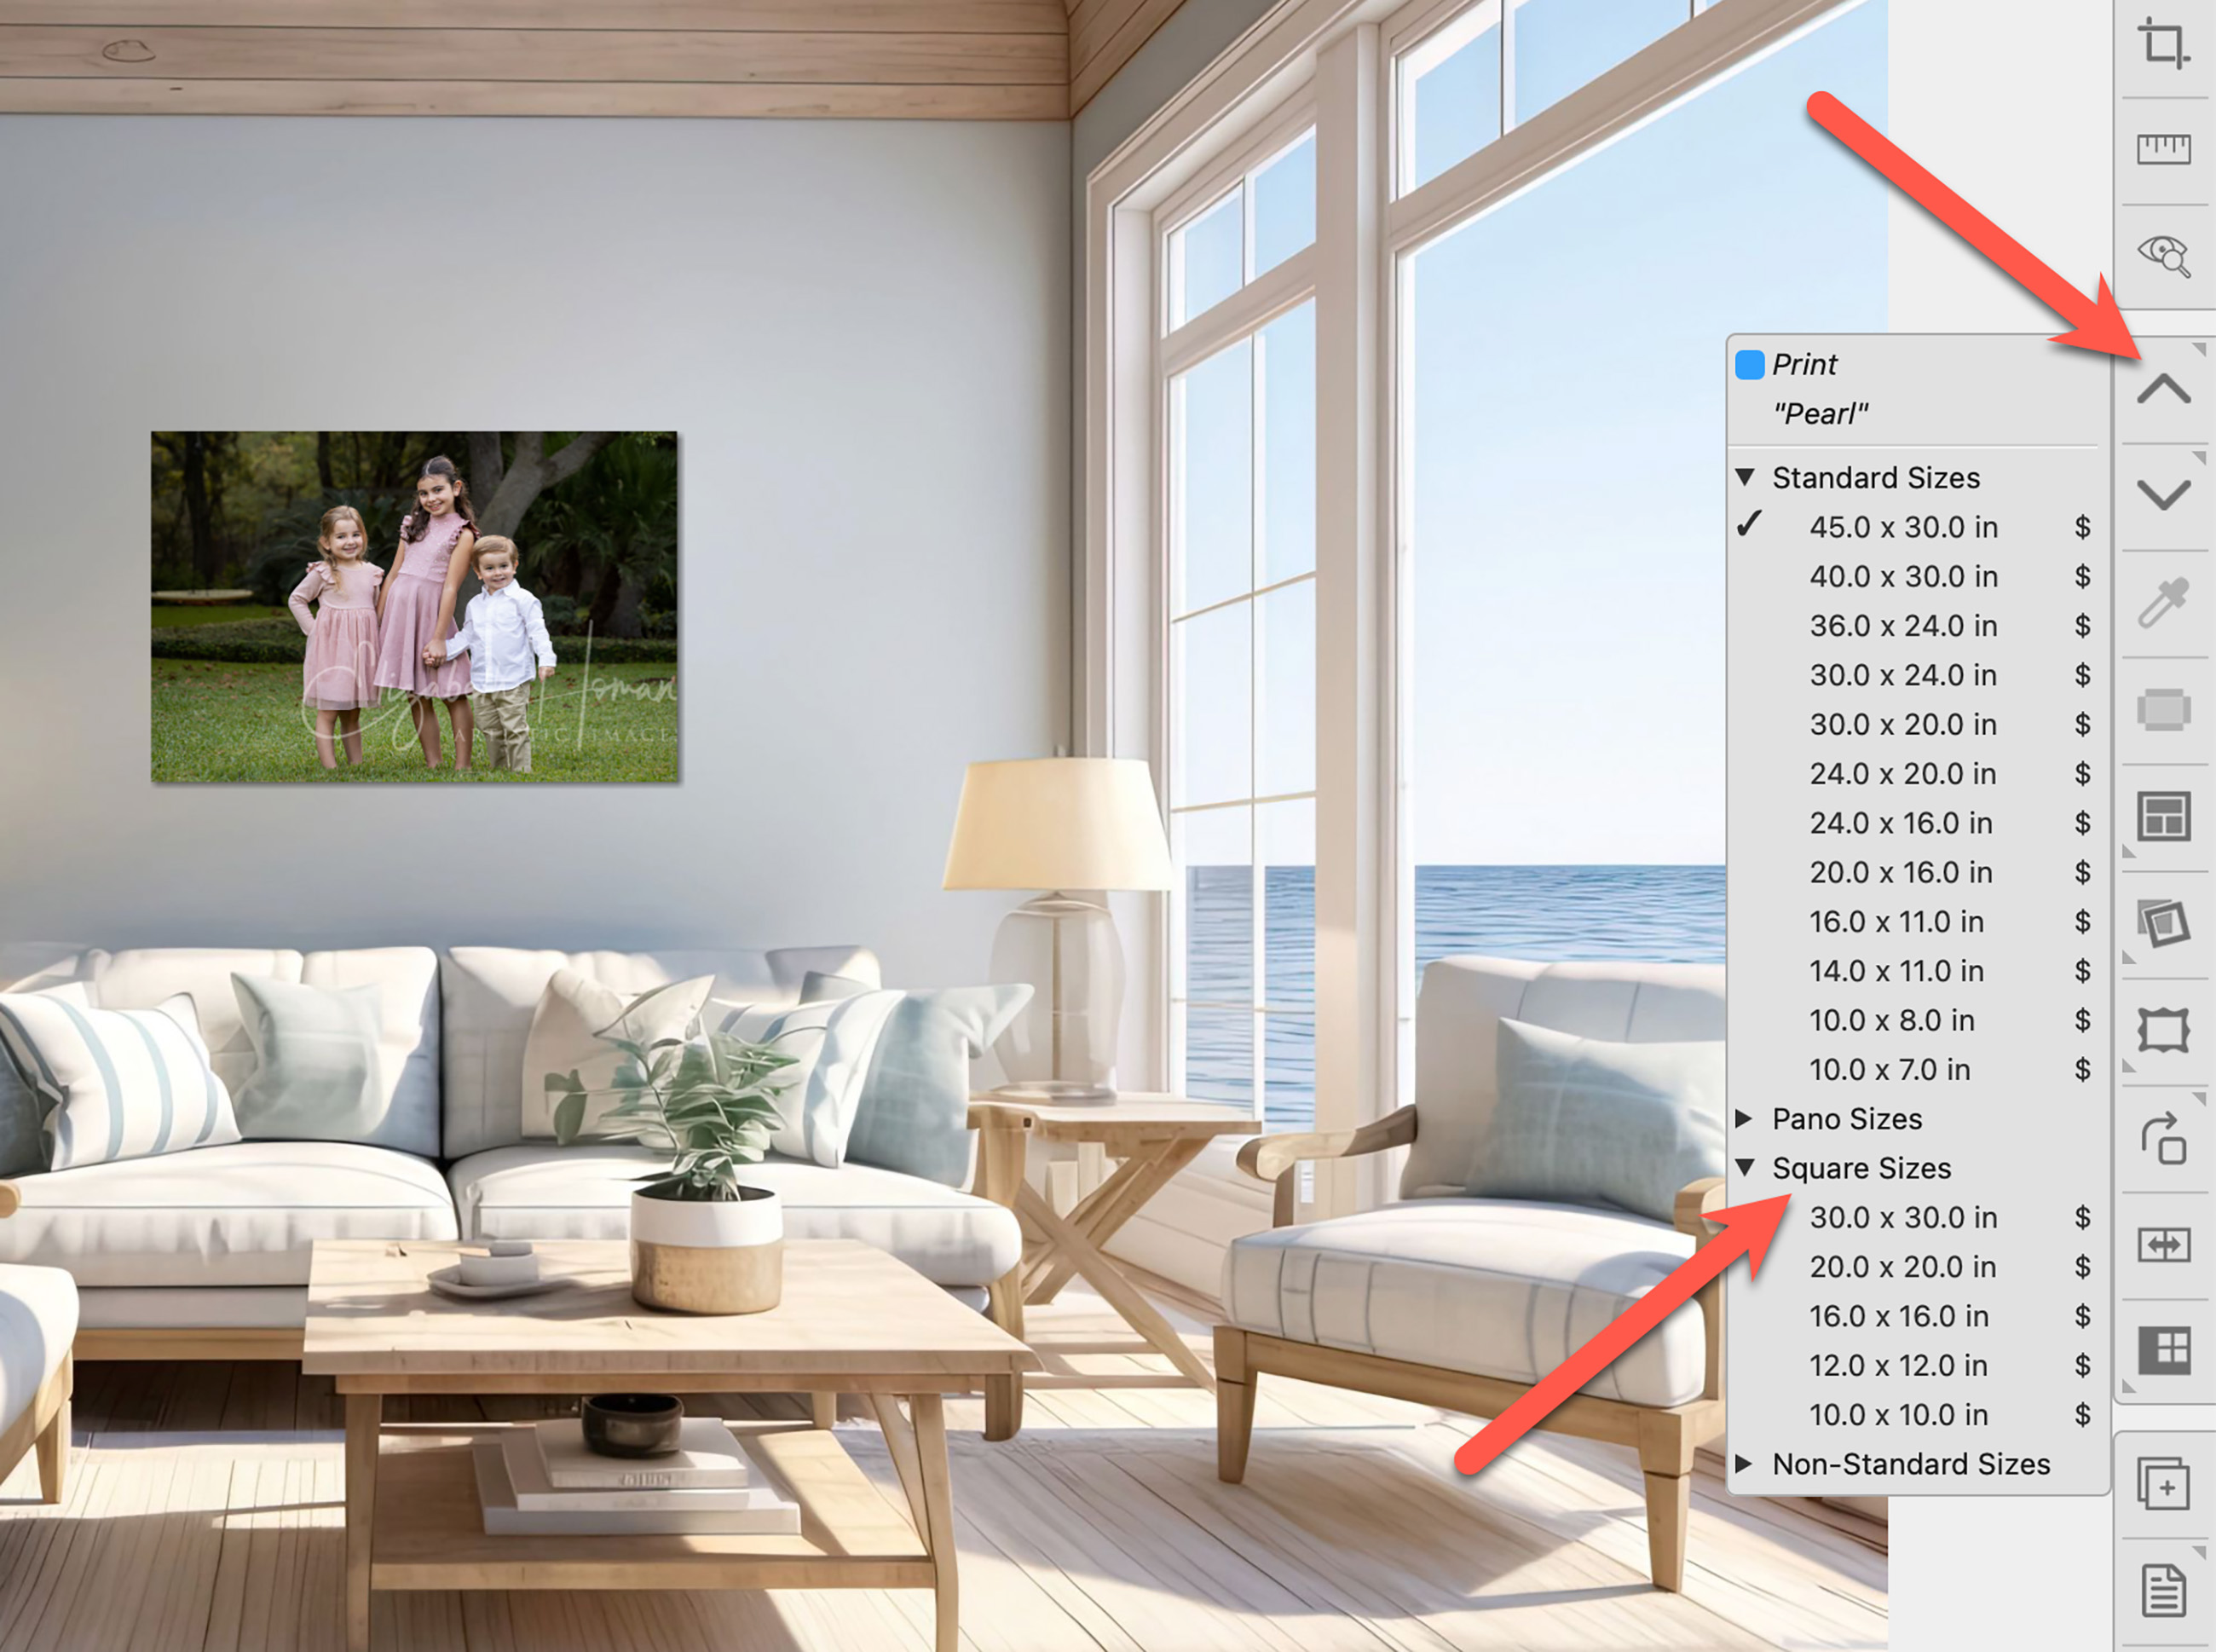
This structure is completely user-configurable under Products > Paper Sizes. You can move sizes between folders to suit your needs. The default setup is designed this way based on the most common sizes, and the sheer number of sizes could be overwhelming if they appear as a flat list. Alternatively, while in Room View, you can hold OptionAlt and right-click on the Previous or Next tools to view all available sizes directly.
If the Presentation Option you want to apply to a product in a room isn't listed or the options appear empty, several factors could be at play. This might occur if the incorrect price list has been selected, the specific presentation option is not available for the chosen size of the product, or the desired presentation option has not been properly configured or enabled for that particular product type.
1: The Selected Size is Not Available
Only sizes set up in the Product & Pricing Manager will appear in the ProSelect main interface. It is possible you have selected a paper size which is not available in the desired Presentation Option.
- Hold down the OptionAlt key and click on the presentation option currently assigned (on the bottom right-hand side of the info bar).
- All presentation options will be revealed. Select the desired Presentation Option.
- Now use the up and down arrow keys or the toolbar to select a producible size.
- See the page Understanding the Presentation Options Menu List for more information.
2: Check Your Price List
Make sure you are using the correct price list. You may be using a price list in which that particular option has not been set up.
- On the top menu, go to Orders > Select Price List.
- Alternatively, you can click on the Order Product tool
 and choose your price list from there.
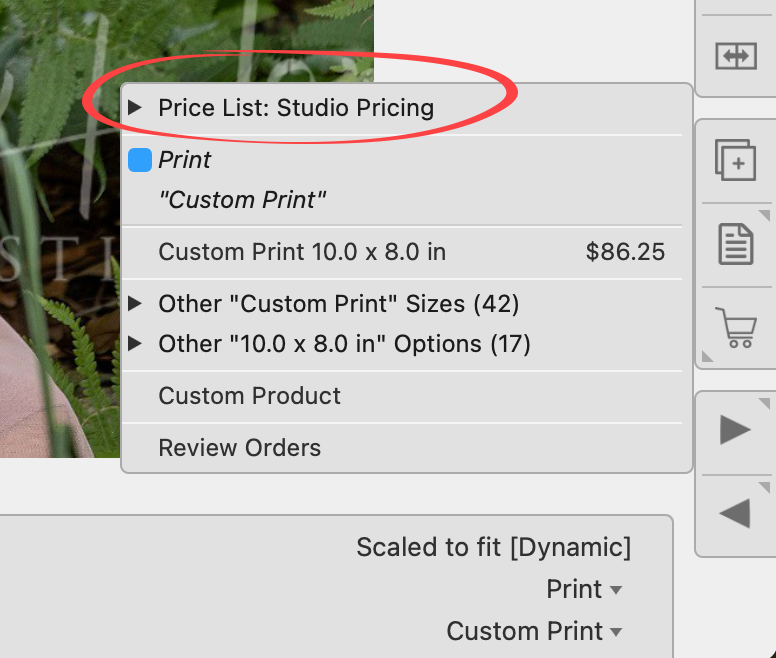
- The price list you have selected to use when building orders in Pro Select directly reflects what you set up in the Product & Pricing Manager.
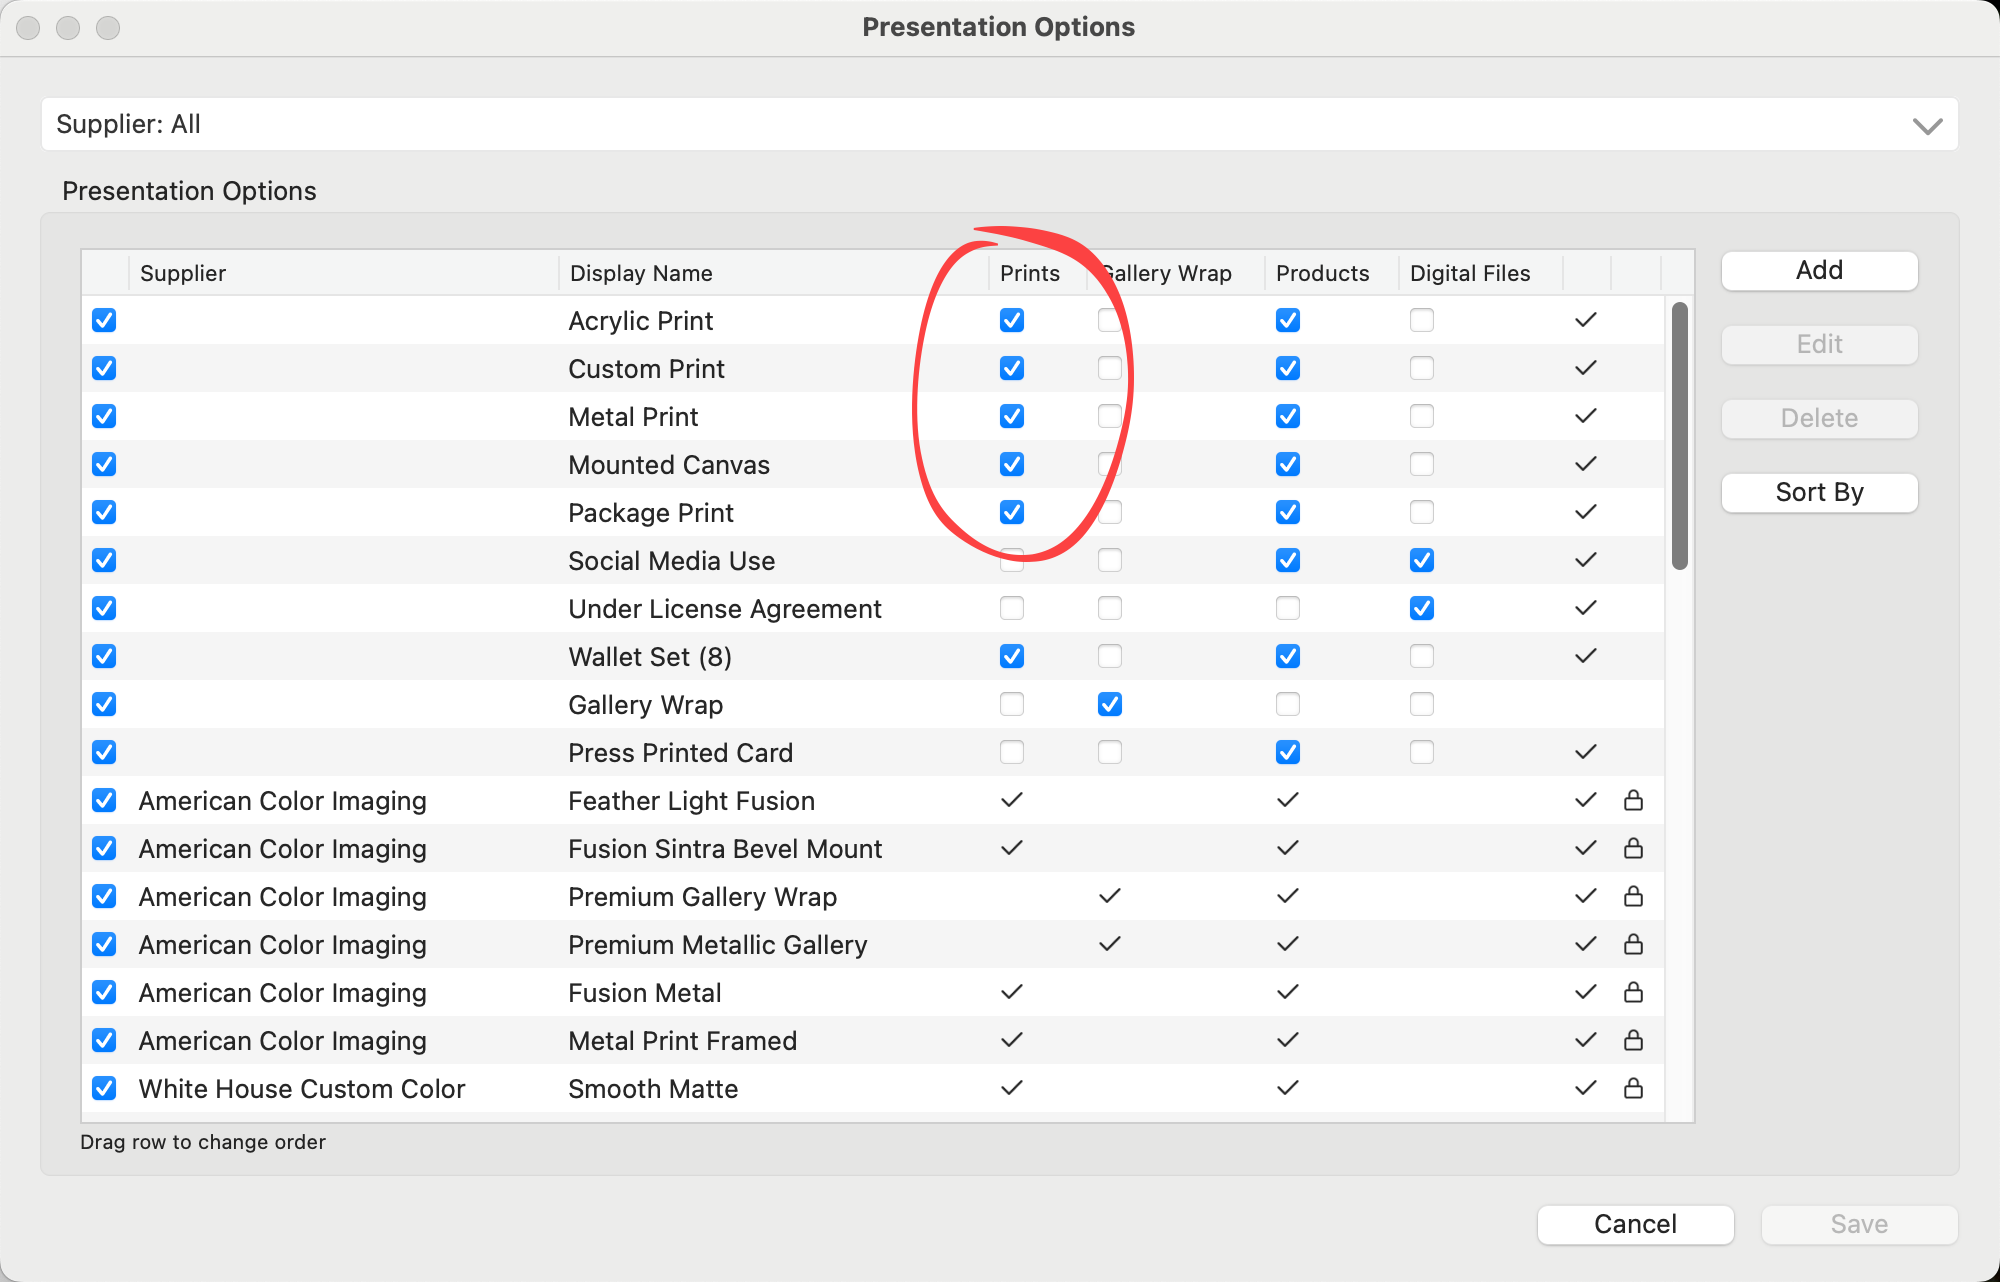
3: Ensure the Presentation Option is Enabled
Presentation options need to be "turned on" for the specific product type. If you are selecting a presentation option for a print, you must check the boxes under the "print" column in the Presentation Options dialog.
- On the top menu, go to Products > Presentation Options.
- Use the checkboxes to enable the presentation options.
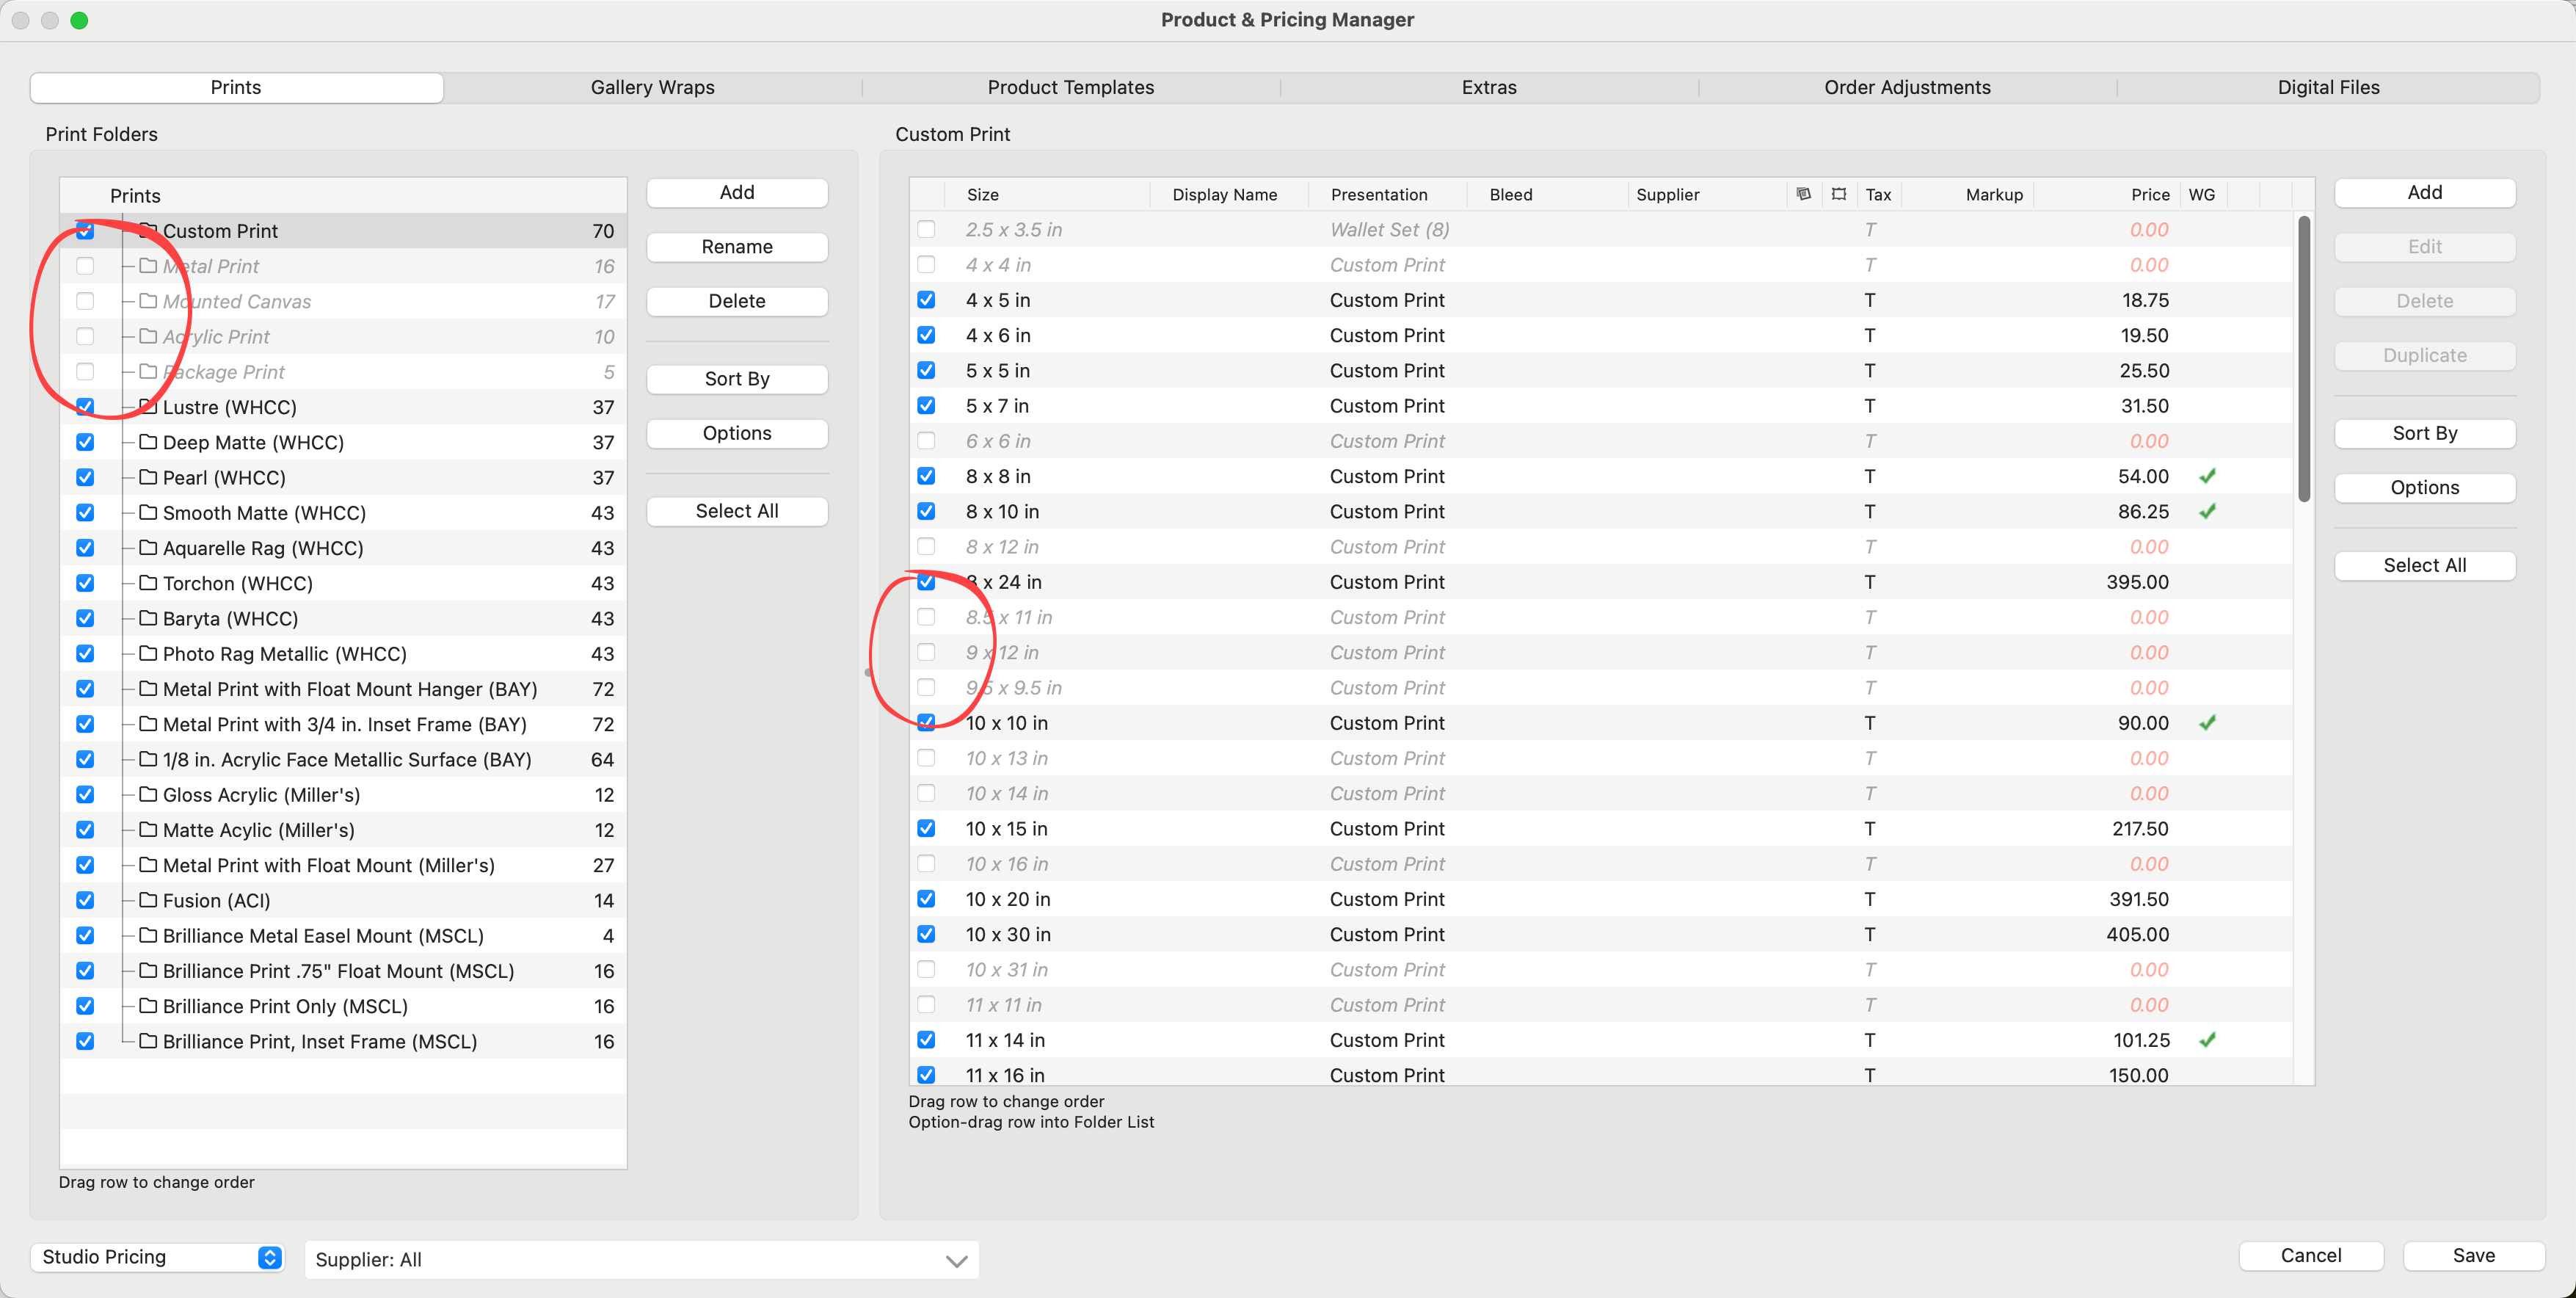
4: Ensure the Product is Enabled
Products can also be "turned on or off." Make sure the boxes are checked in the Product & Pricing Manager if you want to offer a specific product and have it appear in the main interface. If a line item is grayed out, it will not appear on the main interface.
- On the top menu, go to Products > Product & Pricing Manager.
- Ensure the checkbox of your particular product is checked (turned on).
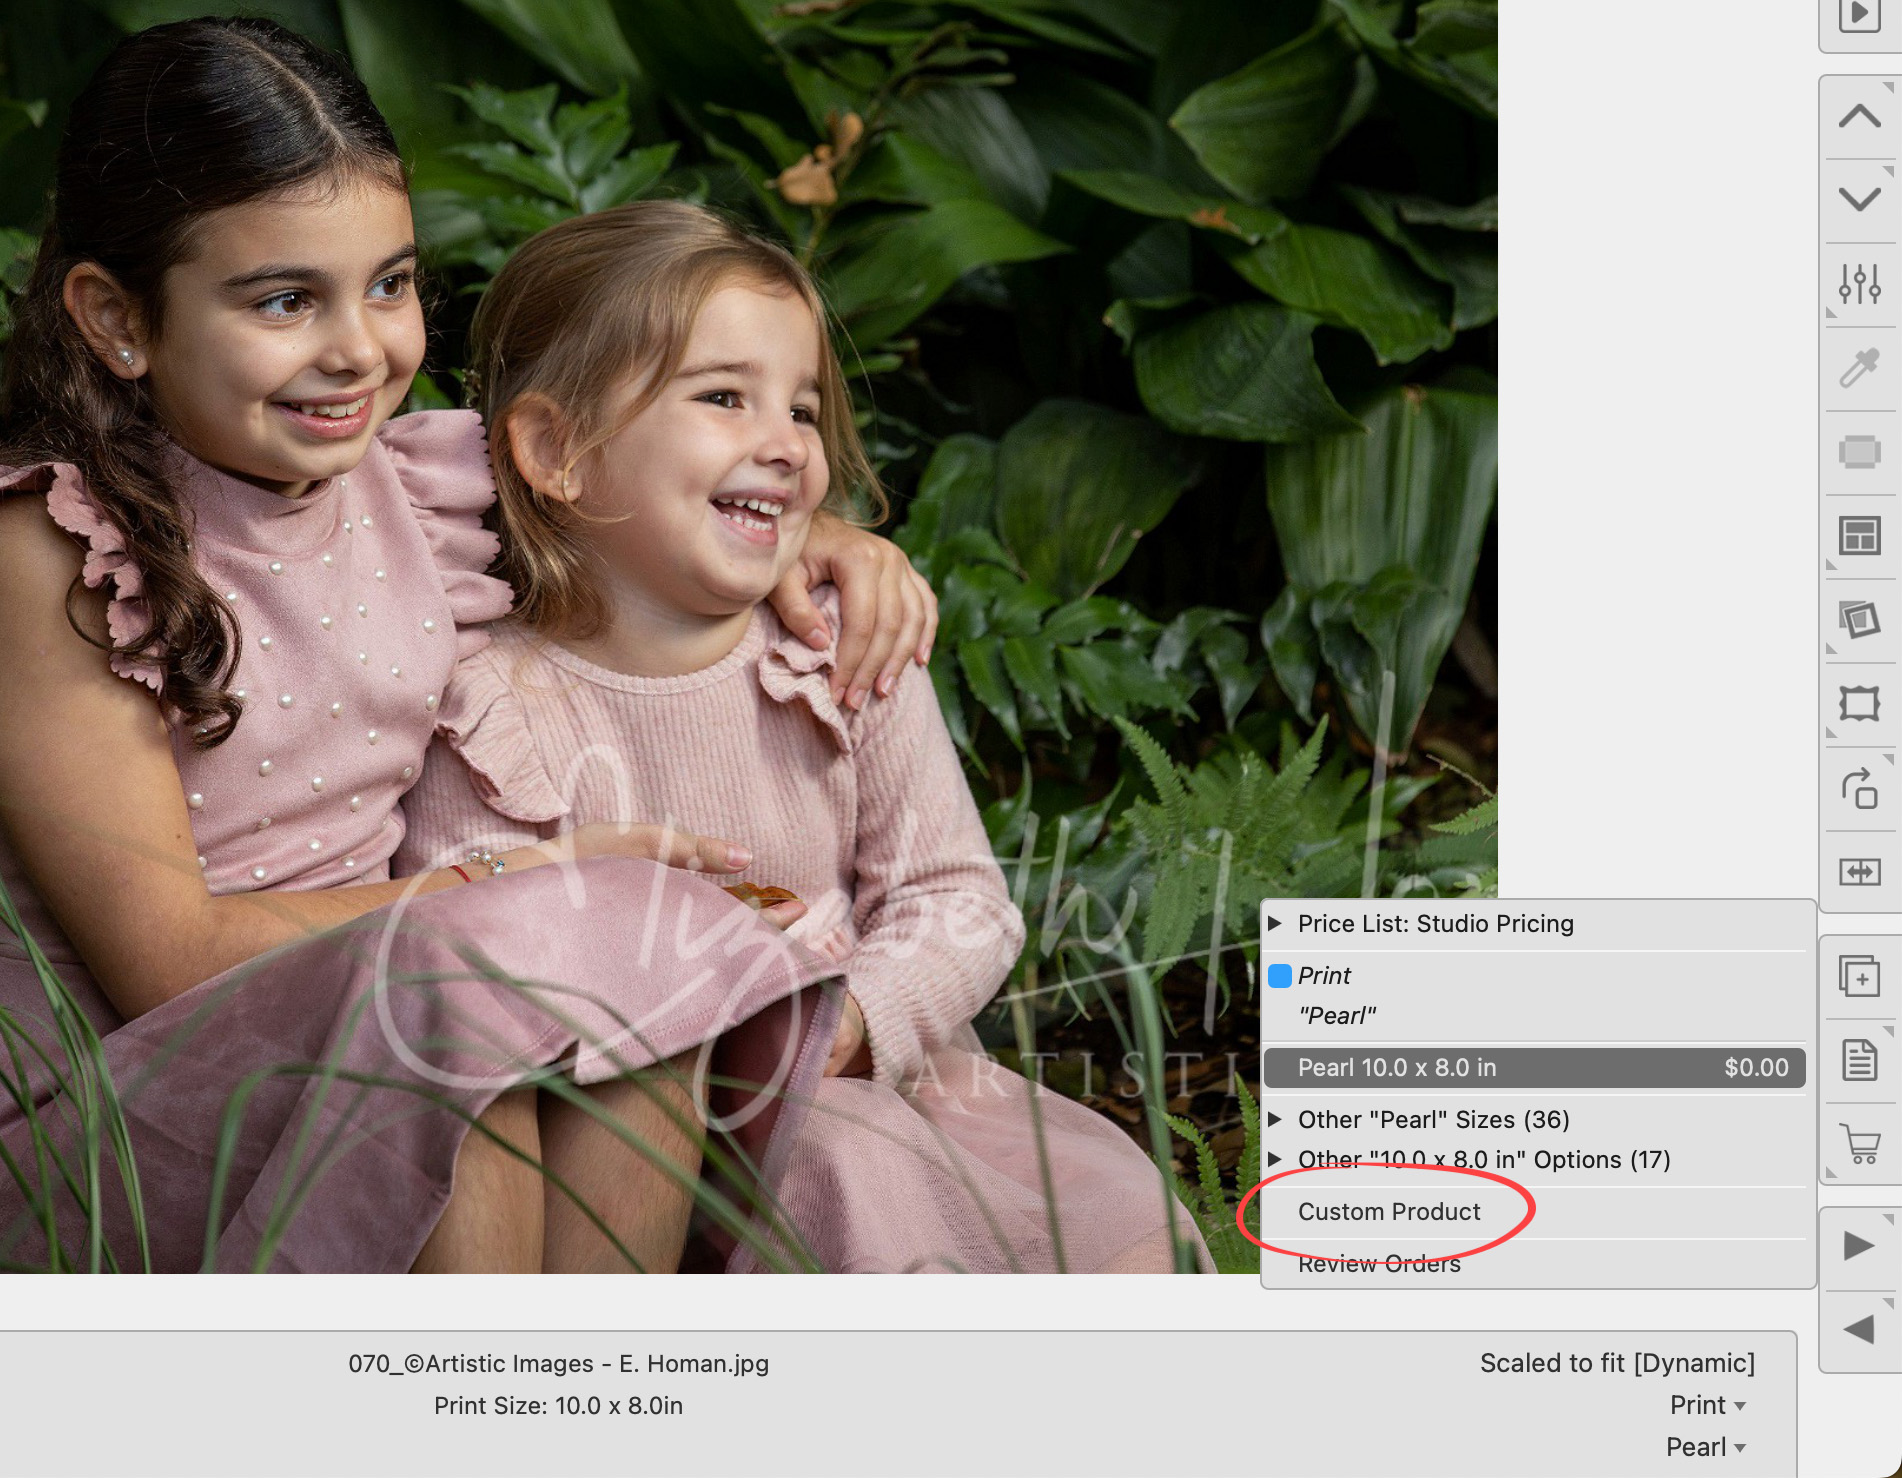
If the dollar sign ($) next to a presentation option appears in red, it means that the option is available for the product but is priced at $0.00. You can still choose and order this option; the red text simply serves as a warning about the zero pricing. See the page Understanding the Presentation Options Menu List for more information.

Solution
Option 1: Select the presentation option and order the print as a Custom Product. You can manually type in a price.
Option 2:
- Right-click on the product, and select "Go To Pricing" from the drop-down list.
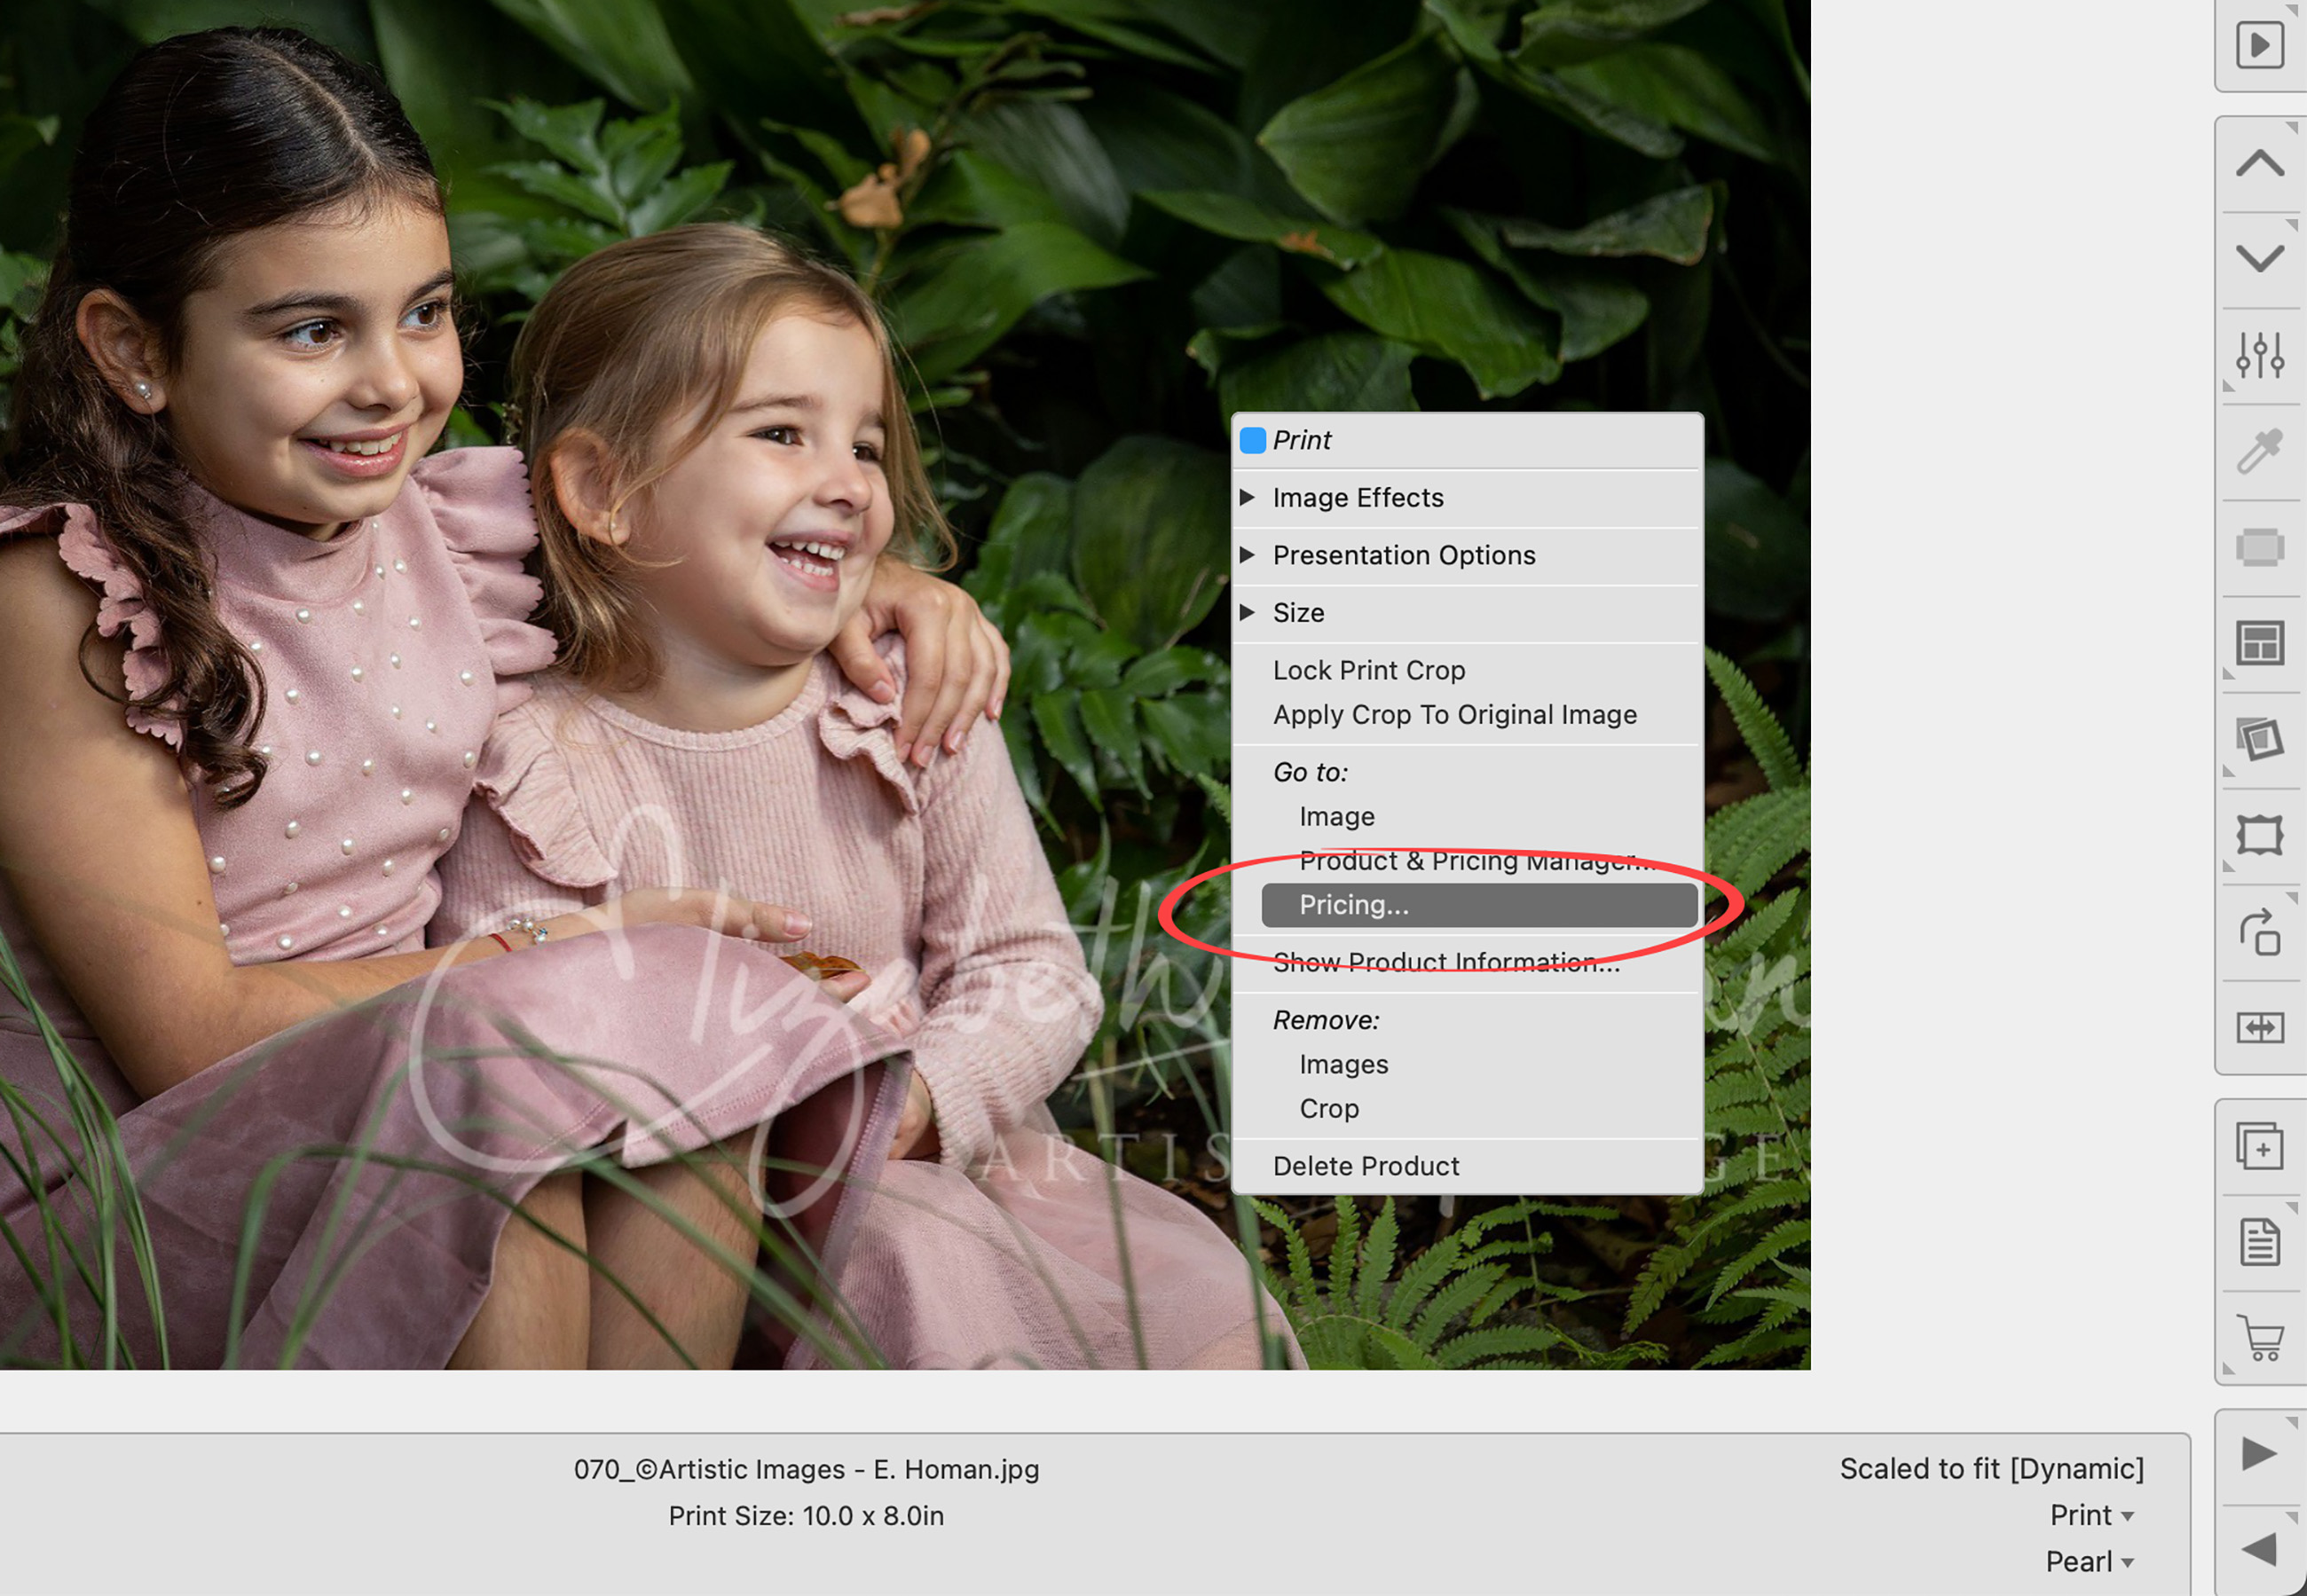
- Type in a price for the product.
- Click "Change Item."
- Once the print is priced, the red dollar sign will be replaced with a black one.
When browsing different sizes in ProSelect, the system stays within the same Paper Size folder. If a size you expect isn't appearing, it may be located in a different Paper Size folder. Also, only priced sizes will appear as options. To see all available sizes with dynamic templates, make sure those sizes are set up with pricing.
- Right-click on the Previous or Next size tool.
- Your Paper Size folders appear here. Click on "Square Sizes."
- Select a desired size from the list.
- Now that you have selected a square size, you can move through all the sizes within that particular folder.
- If a size still isn’t showing, make sure it has a price attached to the presentation option you’re currently using.
This structure is completely user-configurable under Products > Paper Sizes. You can move sizes between folders to suit your needs. The default setup is designed this way based on the most common sizes, and the sheer number of sizes could be overwhelming if they appear as a flat list. Alternatively, while in Room View, you can hold OptionAlt and right-click on the Previous or Next tools to view all available sizes directly.
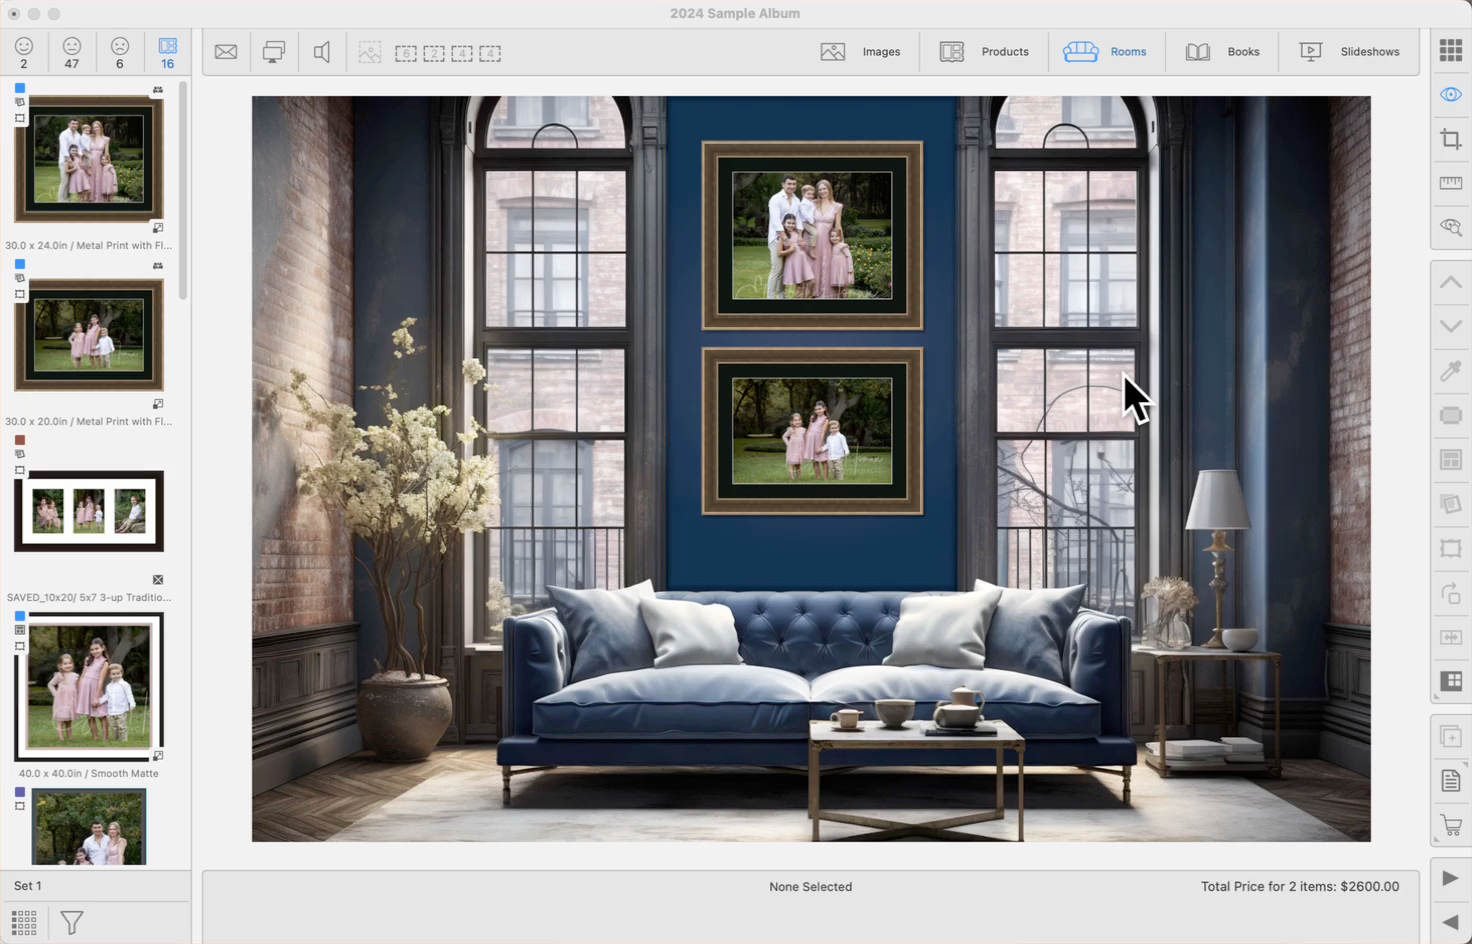
When you switch from one room image to another, the items previously placed in the room might not fit within the boundaries of the new room image. This can cause the items to appear as if they extend beyond the edges of the room, distorting their perceived size and placement. The room may also look "zoomed in" with the warning "Displayed Items are too large to show actual size" visible above the info bar. Such distortions can make the items look disproportionately sized or awkwardly positioned relative to the new room’s dimensions.
To correct this, you should select all affected items and adjust their size and/or position to ensure they fit comfortably within the visible area of the new room image.
If you crop an image in Working with Images, then add it directly into a room, you may notice the image appears uncropped. When an image is moved into a room, ProSelect treats it as a product and applies the default Starting Product. Cropping of original images and products remains independent by design. If the crop is not locked, it will not carry forward into the room display. See How Cropped Images Move Through ProSelect for more.
- Return to Working with Images.
- Open Cropping View for the image.
- Lock the crop using the Lock Crop tool
 . (the crop box will turn red).
 - Re-add the image to the room.
- The image will now appear in the room with the intended crop applied, and ProSelect will apply a paper size to fit the crop.