 Working with Books - Introduction
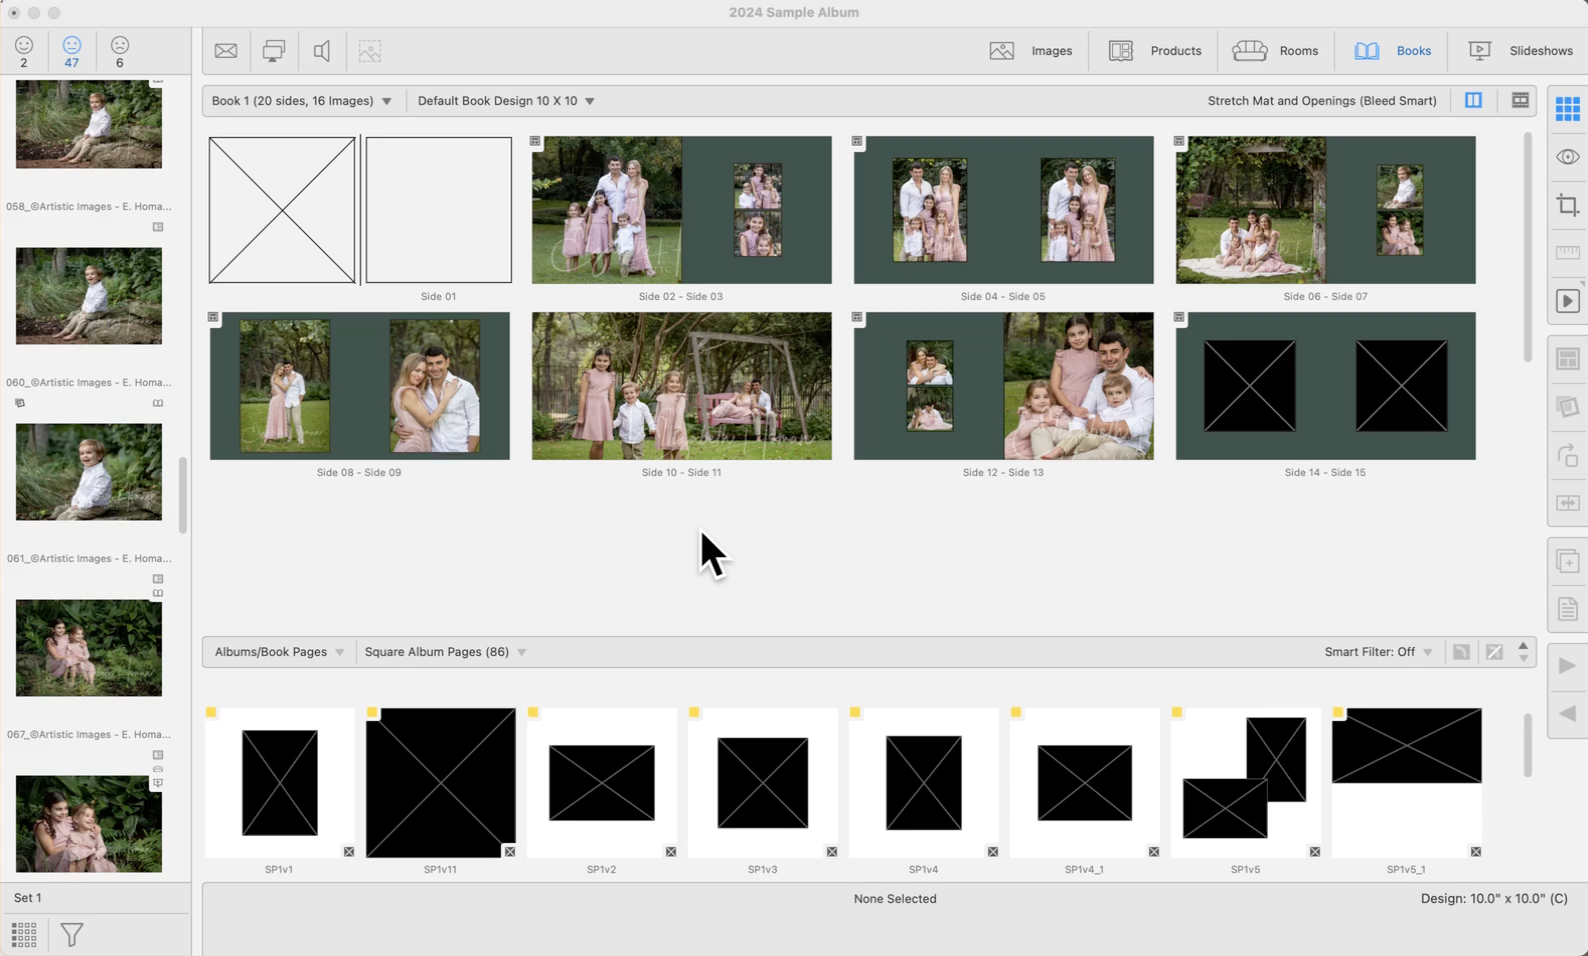
Working with Books works in a similar way to Working with Products. Once a book design is selected, drag and drop book page templates in Thumbnail view to create your spread.
- Book Page templates are designed and managed in The Book Page Manager.
- Books are not ordered using the Shopping Cart tool. See Pricing & Ordering Books for more information.
- Easily rearrange pages by dragging them.
- Pages can be viewed two at a time for double-spread albums in both Show Pages and Cropping View.
- Slideshows of your book pages can also be displayed, though the option to show pages at actual size is disabled due to the format of books.
- Book sizes and structures are defined through Book Designs.
- ProSelect has many Supplier book designs preloaded into the software. See Supplier Collections to view more options for download.
- Pages within books are automatically numbered in sequence, with double-spread layouts designed to start on the left side.
- If a Book Design specifies a minimum number of pages, placeholders will appear for any missing pages.
- You can print Book Page Proof Sheets and generate a Book Report for further review and presentation.
- Produce high-resolution images for upload to your lab using Pro Production.
- Copy or move book page templates to other product template types.
Working with Books is a Pro feature. Upgrade your subscription to Pro on the Pro Studio Software website.

You have the ability to create up to 5 different books. Books are located on the top left-hand side just above the thumbnails. They work in a similar way to Sets. This may be useful, for example, if you have created a book that you wish to display in more than one size.
Click on the drop-down arrow next to "Book 1" to reveal all books.
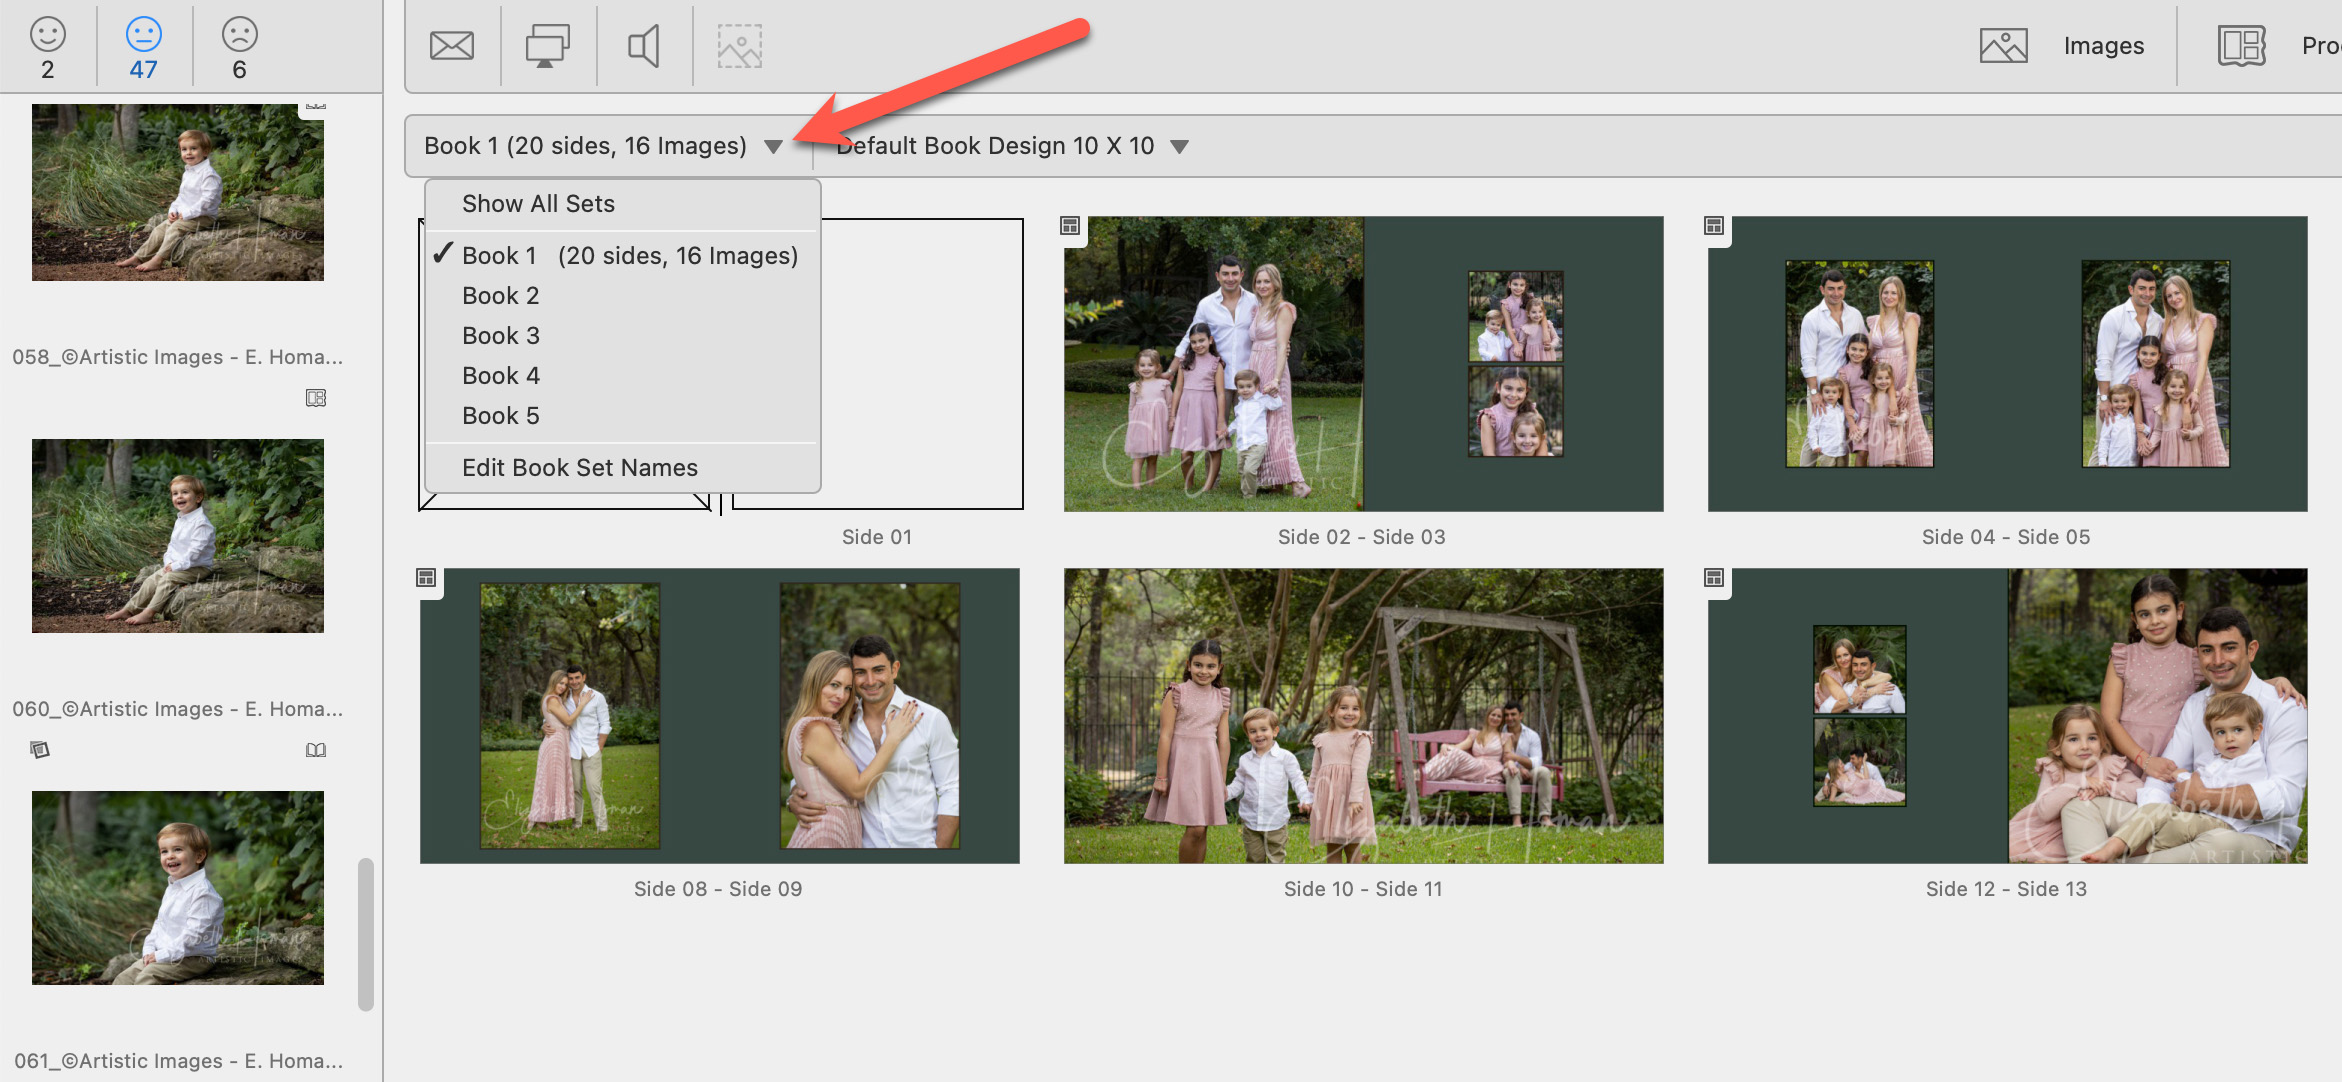
- From here you can select a book to view it, show all sets (books), or edit the book set names.
- By default, you will always be working within "Book 1."
- A checkmark appears next to the currently open book.
Show All Sets (Books)
Selecting "Show all Sets" will reveal all 5 books. Each book is represented by a folder.

- The currently selected book will be highlighted. The name of the book is shown to the right, followed by the book design.
- A checkmark on the folder indicates there are book pages in that set.
- Clicking on a folder will open the book and show all book pages in the Display Area below.
Moving/Copying Book Pages to Another Book
- Select "Show All Sets" from the drop-down menu.
- Select one or more book pages and drag and drop them into one of the other book folders.
- Alternatively, hold down the OptionAlt key while dragging to copy (make a duplicate) of the selected book page.
- A magenta box will appear around the book you are currently dragging items into.
Editing Book Names
Select "Edit Book Set Names" from the drop-down list. Alternatively, go to the top menu, File > Change Set Names. The Edit Set Name dialog will appear.
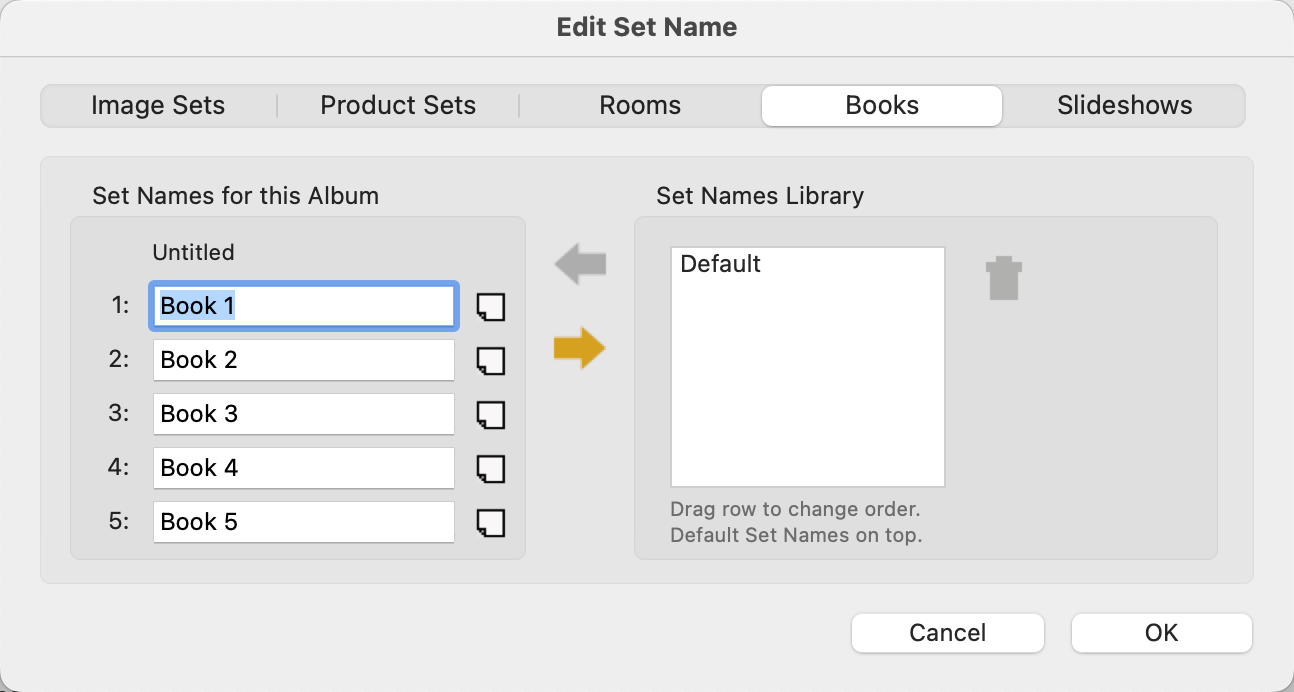
- You can either type in individual names for the books or select the names from the Set Names Library.
- Remember that "Book 1" will always be the default starting book.
Set Names Library
You can save frequently used Set names into the Set Name Library using the Save Arrow button (the lower one). Clicking on the arrow will make a copy of the set names you have created. You will be prompted to enter a name for the group. This group will then be saved and available to use in other working with modes.
Loading Set Names
By default, the top row of names in the Set Name Library is used when a new Album is started. To change this, drag the row of set names that you wish to use to the top row. To apply set names from the Library to your current Album, select the row of names that you want, click the Load Arrow button (the top one), and click OK.
Deleting Set Names
To delete a set of Set Names from the Library, select the row and click the Trash button![]() . You cannot delete the last set.
. You cannot delete the last set.
Set Notes
You have the option of adding notes to each set. Click on the Notes tag ![]() to open the Set Notes dialog.
to open the Set Notes dialog.
Producing two versions of the same book can be beneficial when you want to offer the same content in different sizes or styles.
- Go to Thumbnail view.
- Click on the drop-down arrow next to "Book 1" on the top bar. Select "Show All Sets."
- Select all the pages of the book you wish to duplicate.
- Hold down the OptionAlt key and drag them into another book "folder" on the top bar.
- This action duplicates all the selected pages into the second book.
- For best results, ensure that the aspect ratios of the pages in both books are similar.
- It is also important to select the Book Design for the second book before you start transferring pages.