Book Page Template Resource Area
Book Page Templates are created and organized in the Book Page Manager. This resource area works in much the same way as the Product Template Resource Area (Working with Products). The categories and groups you create for your templates are reflected here.
Right-clicking on a book page template provides a shortcut to:
- Edit Book Page: This will open the book page template in the Product Editor.
- Delete Selected Book Pages: This will delete the book page template from the Resource Area as well as the Book Page Manager.
- Go to Book Page Manager: This will open the book page template in the Book Page Manager.
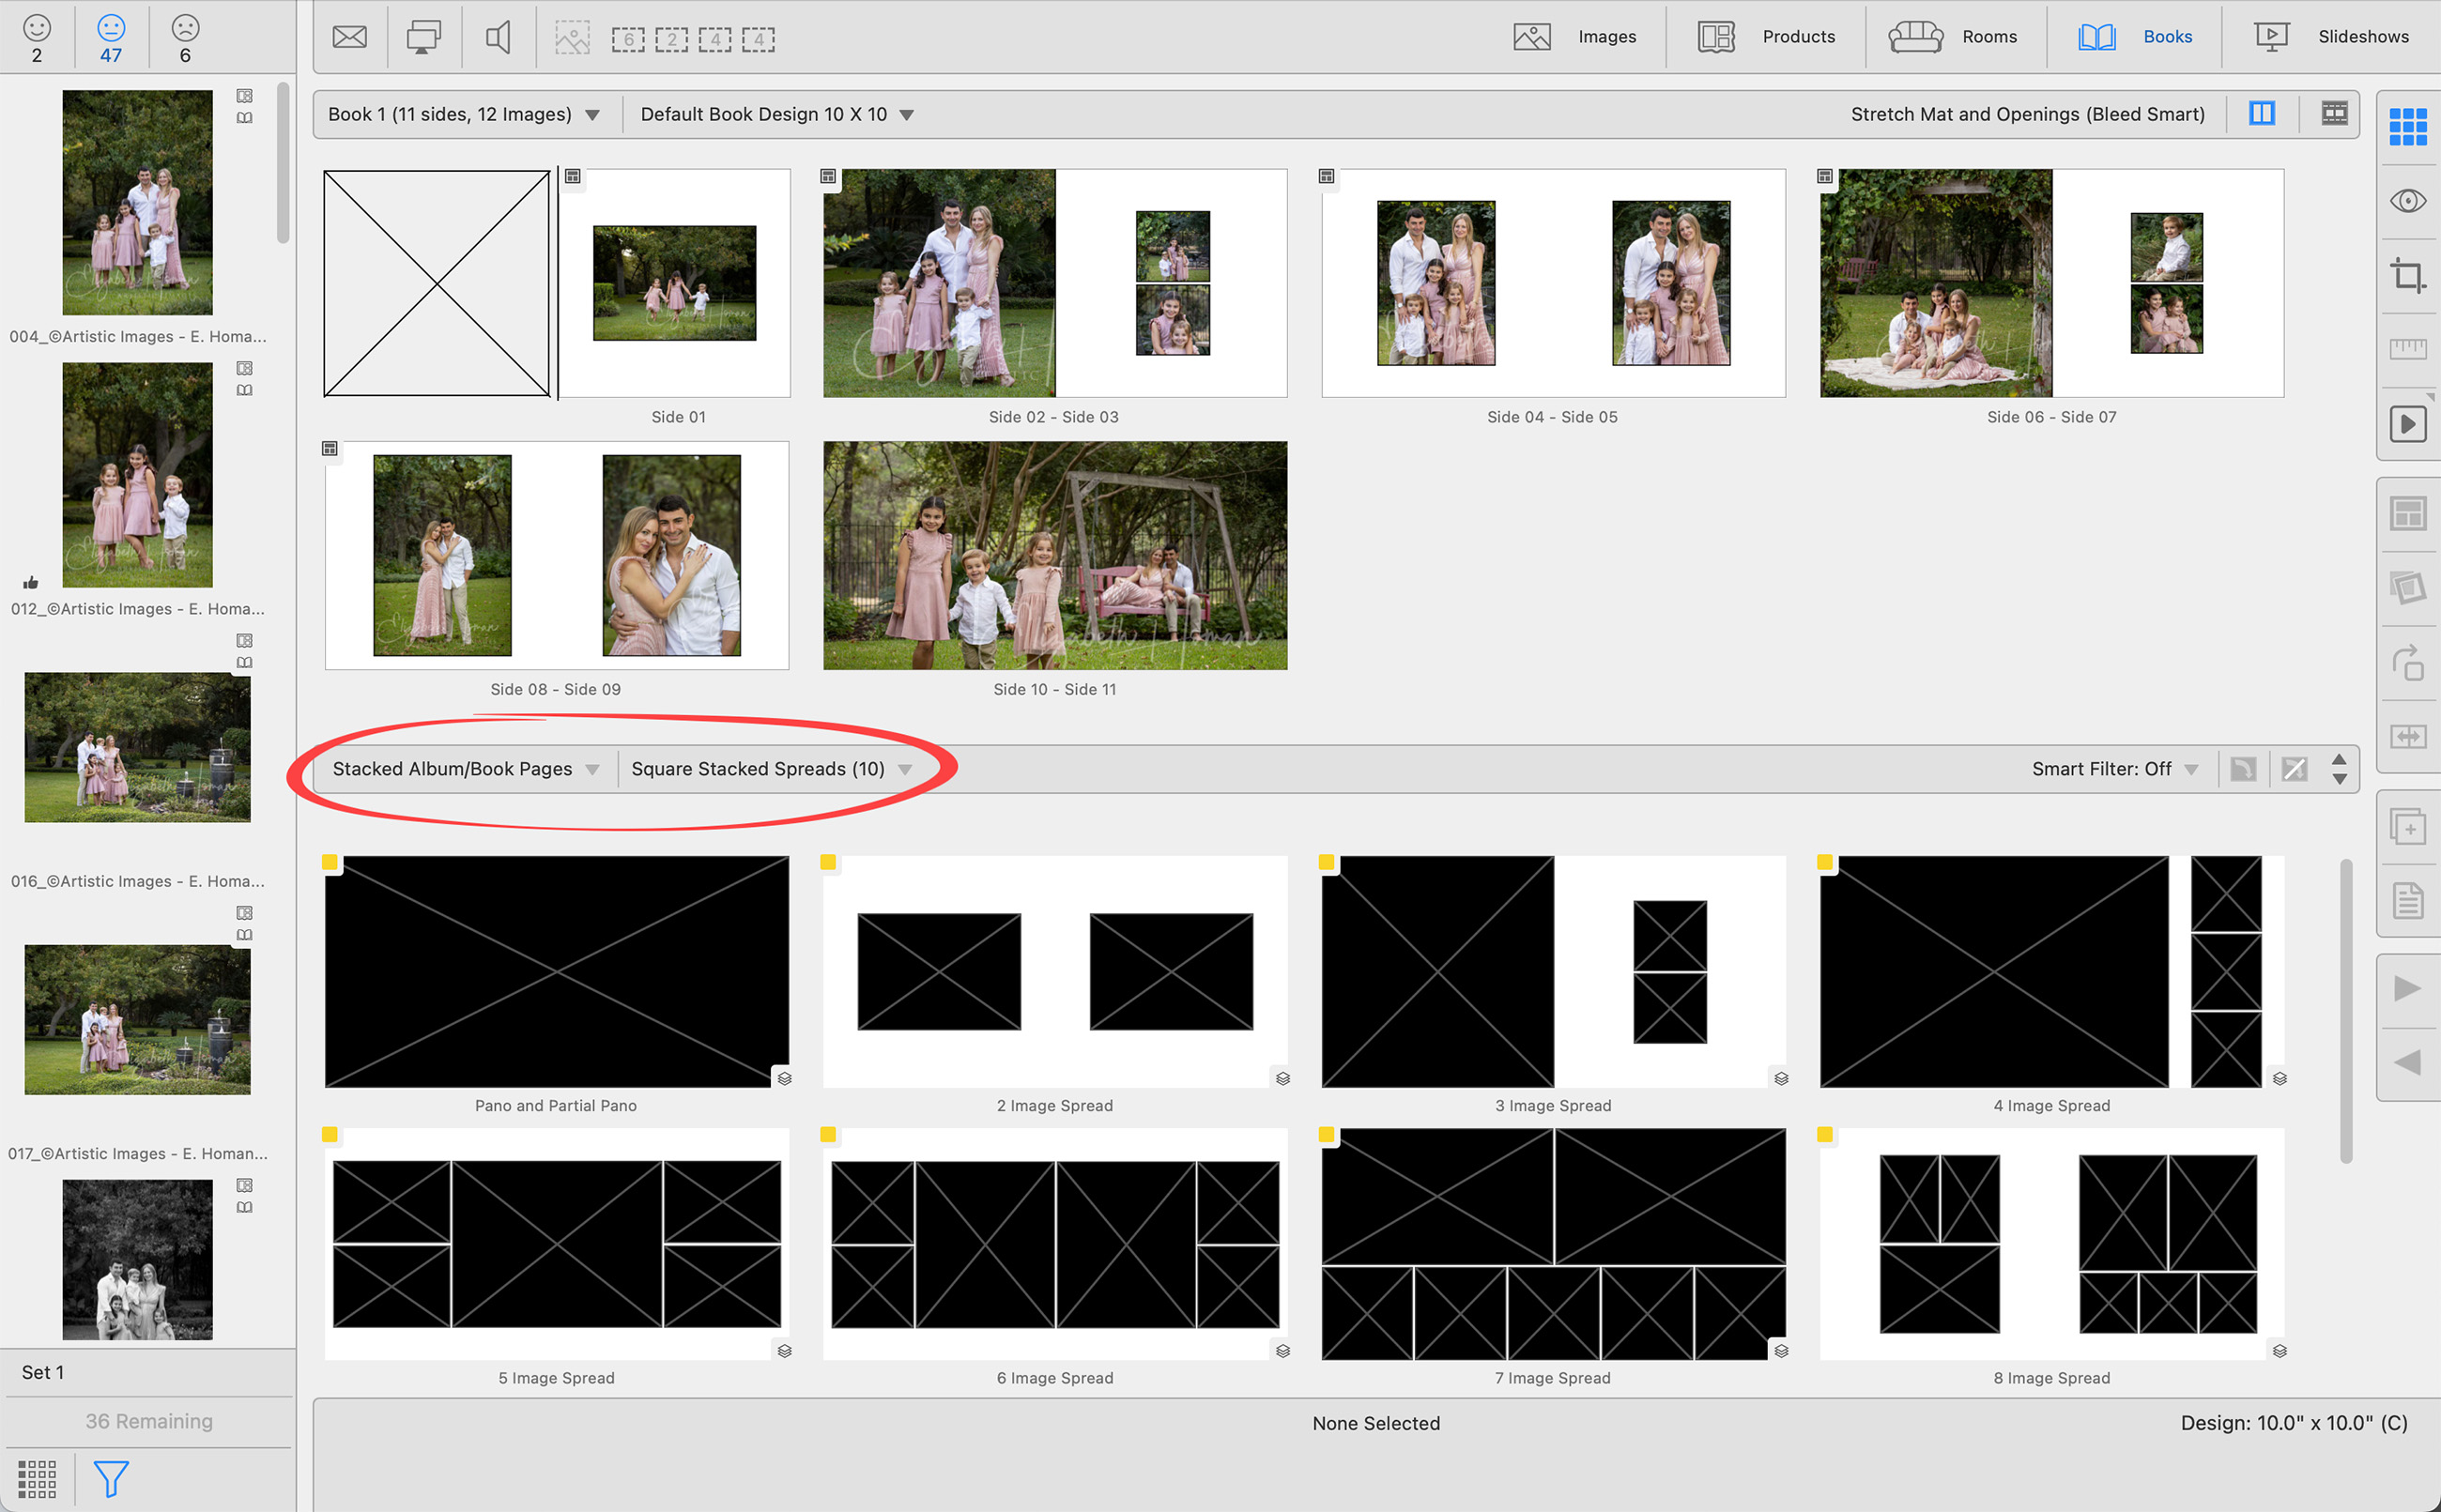
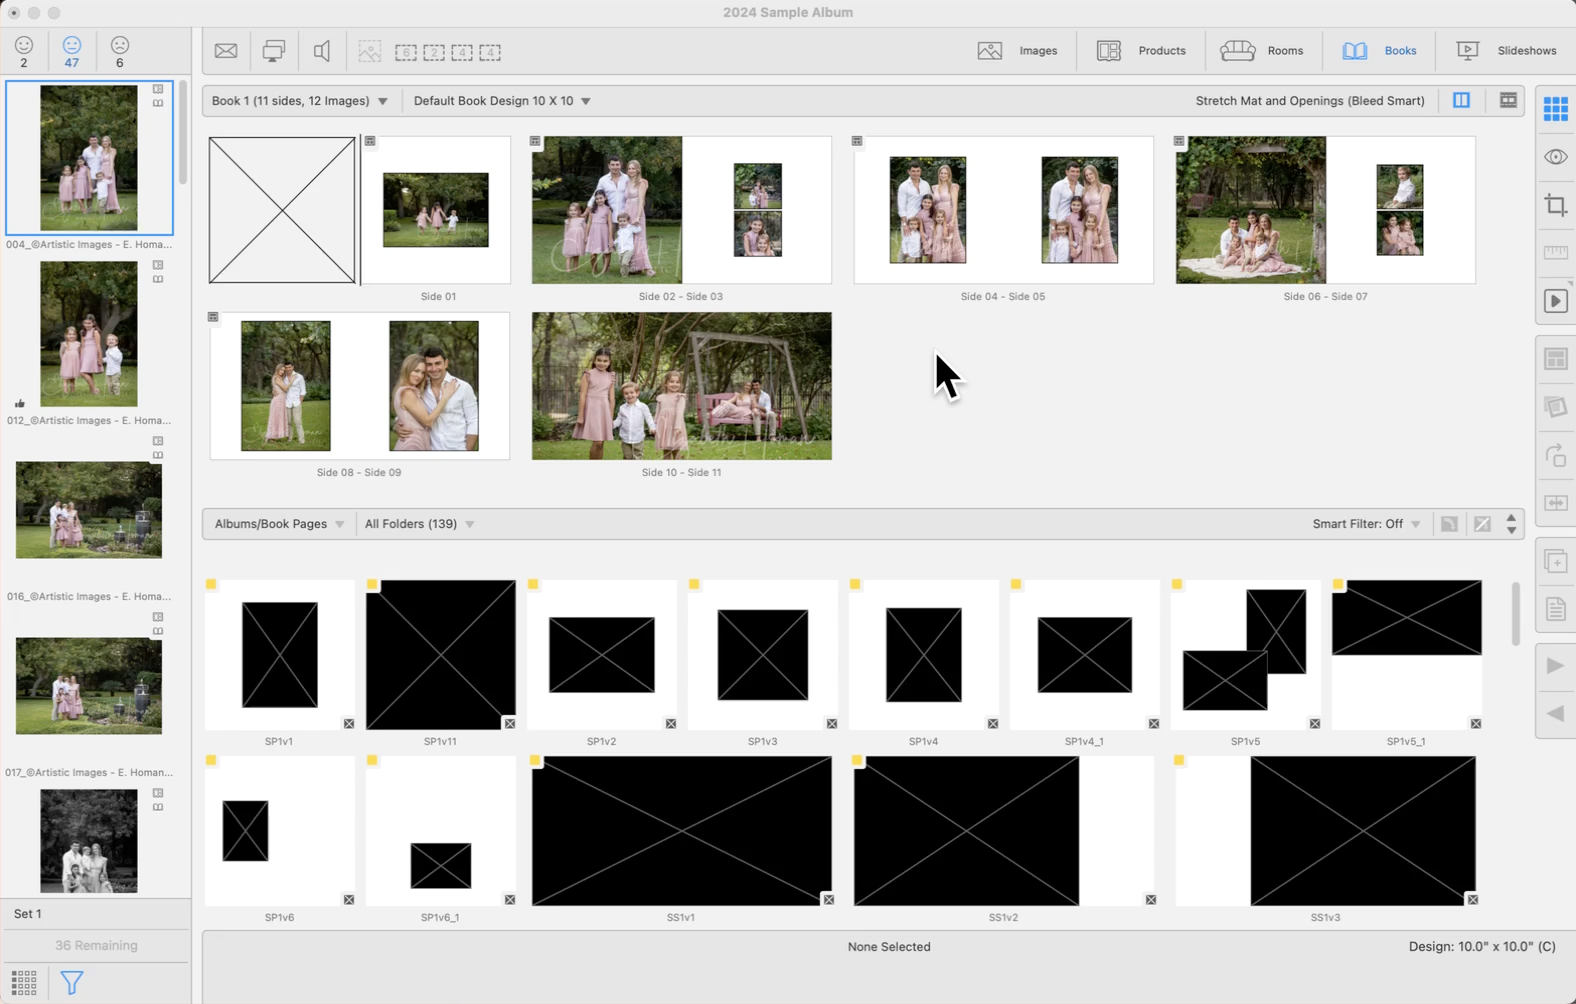
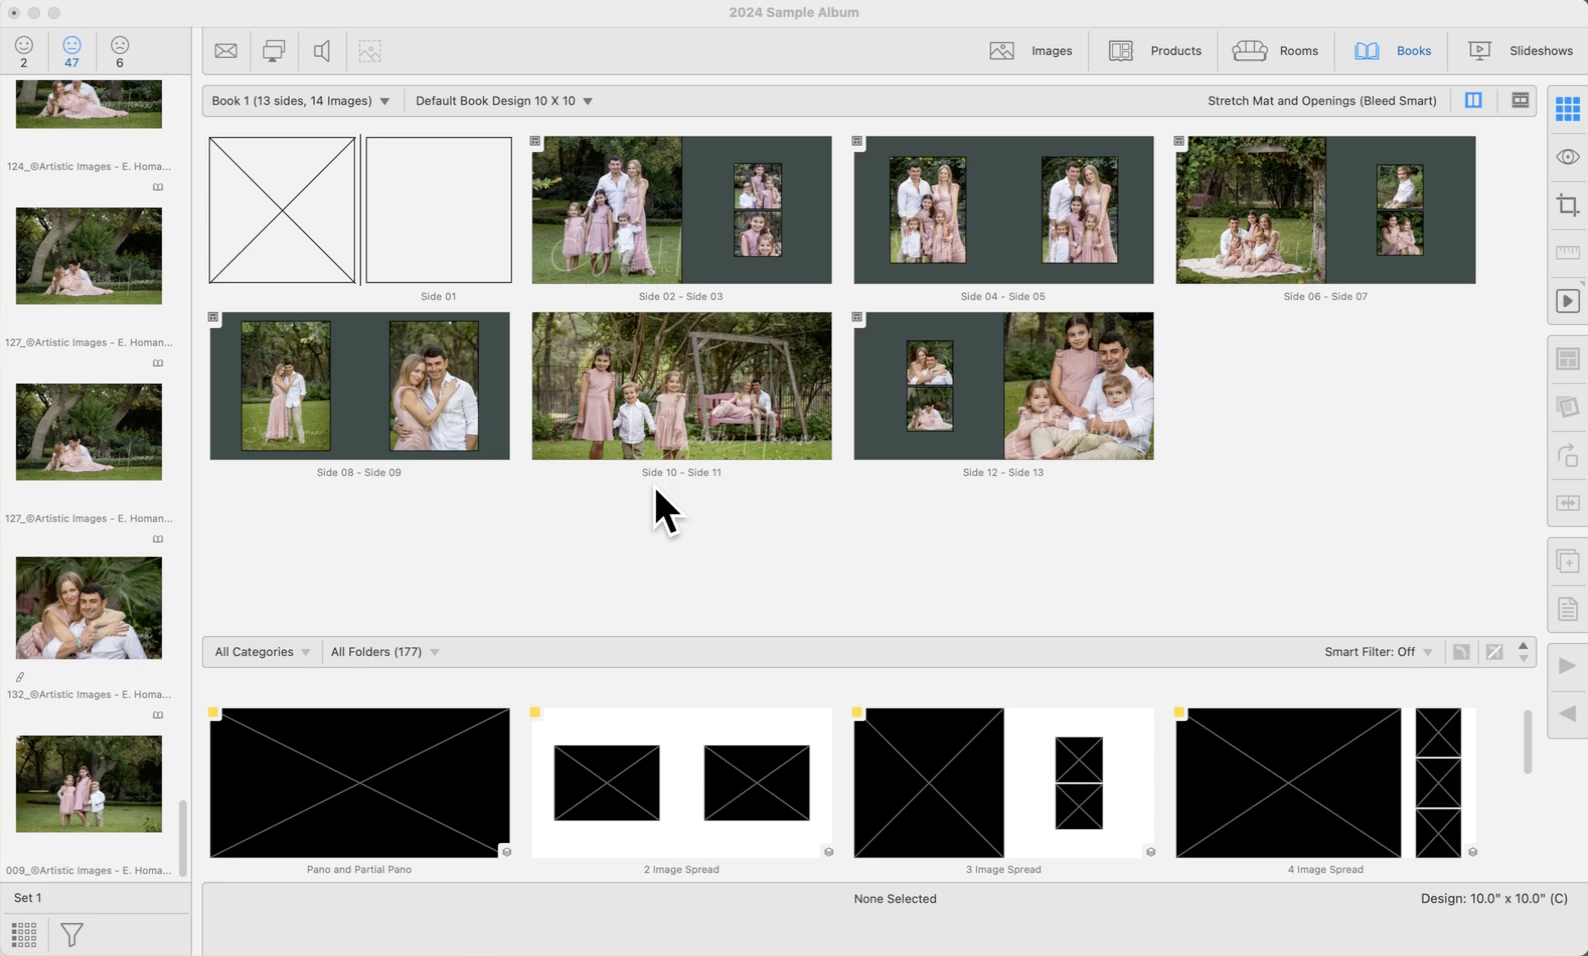
When working with stacked book page templates, templates with the same number of openings are grouped together. This allows you to quickly populate a page spread and easily browse through different configurations within the stack. However, if you need to view or select a specific page template individually, you should choose "Album/Book Pages" as the category. This will display each template separately, unstacked, for more precise selection.
The Resource Selection Bar is designed to efficiently organize the available book page templates, making navigating through the various options easy.

- Use the "All Categories" drop-down list to select which category of book page templates you wish to display.
- Once a Category has been selected, use the "All Folders" drop-down list to select which folder to view.
- Selecting "Manage" from the list will direct you to the Book Page Manager.
Categories and Folders Match the Book Page Manager
The order in which book page templates appear within the Categories and Folders is directly mirrored from the order you have set up in the Book Page Manager. If you change the order of templates in the Book Page Manager, the resource selection bar will reflect that change.
- Unchecked Categories and Folders (grayed out) will not appear in the Resource Selection Bar.
Selecting a Template
- If you can't find a book page template in the Resource Area, ensure that it's set to be visible. To do this, visit the Book Page Manager and check if the boxes next to the Category, Folder, and Page Template are marked. These need to be checked for the template to appear in the Resource Area.
- Also, many book page templates are "Stacked." This means one template encompasses many options. For example, select a "2 image spread" book page template. Once it is in the display area, you can move through the different sizes (configurations) within the stack.
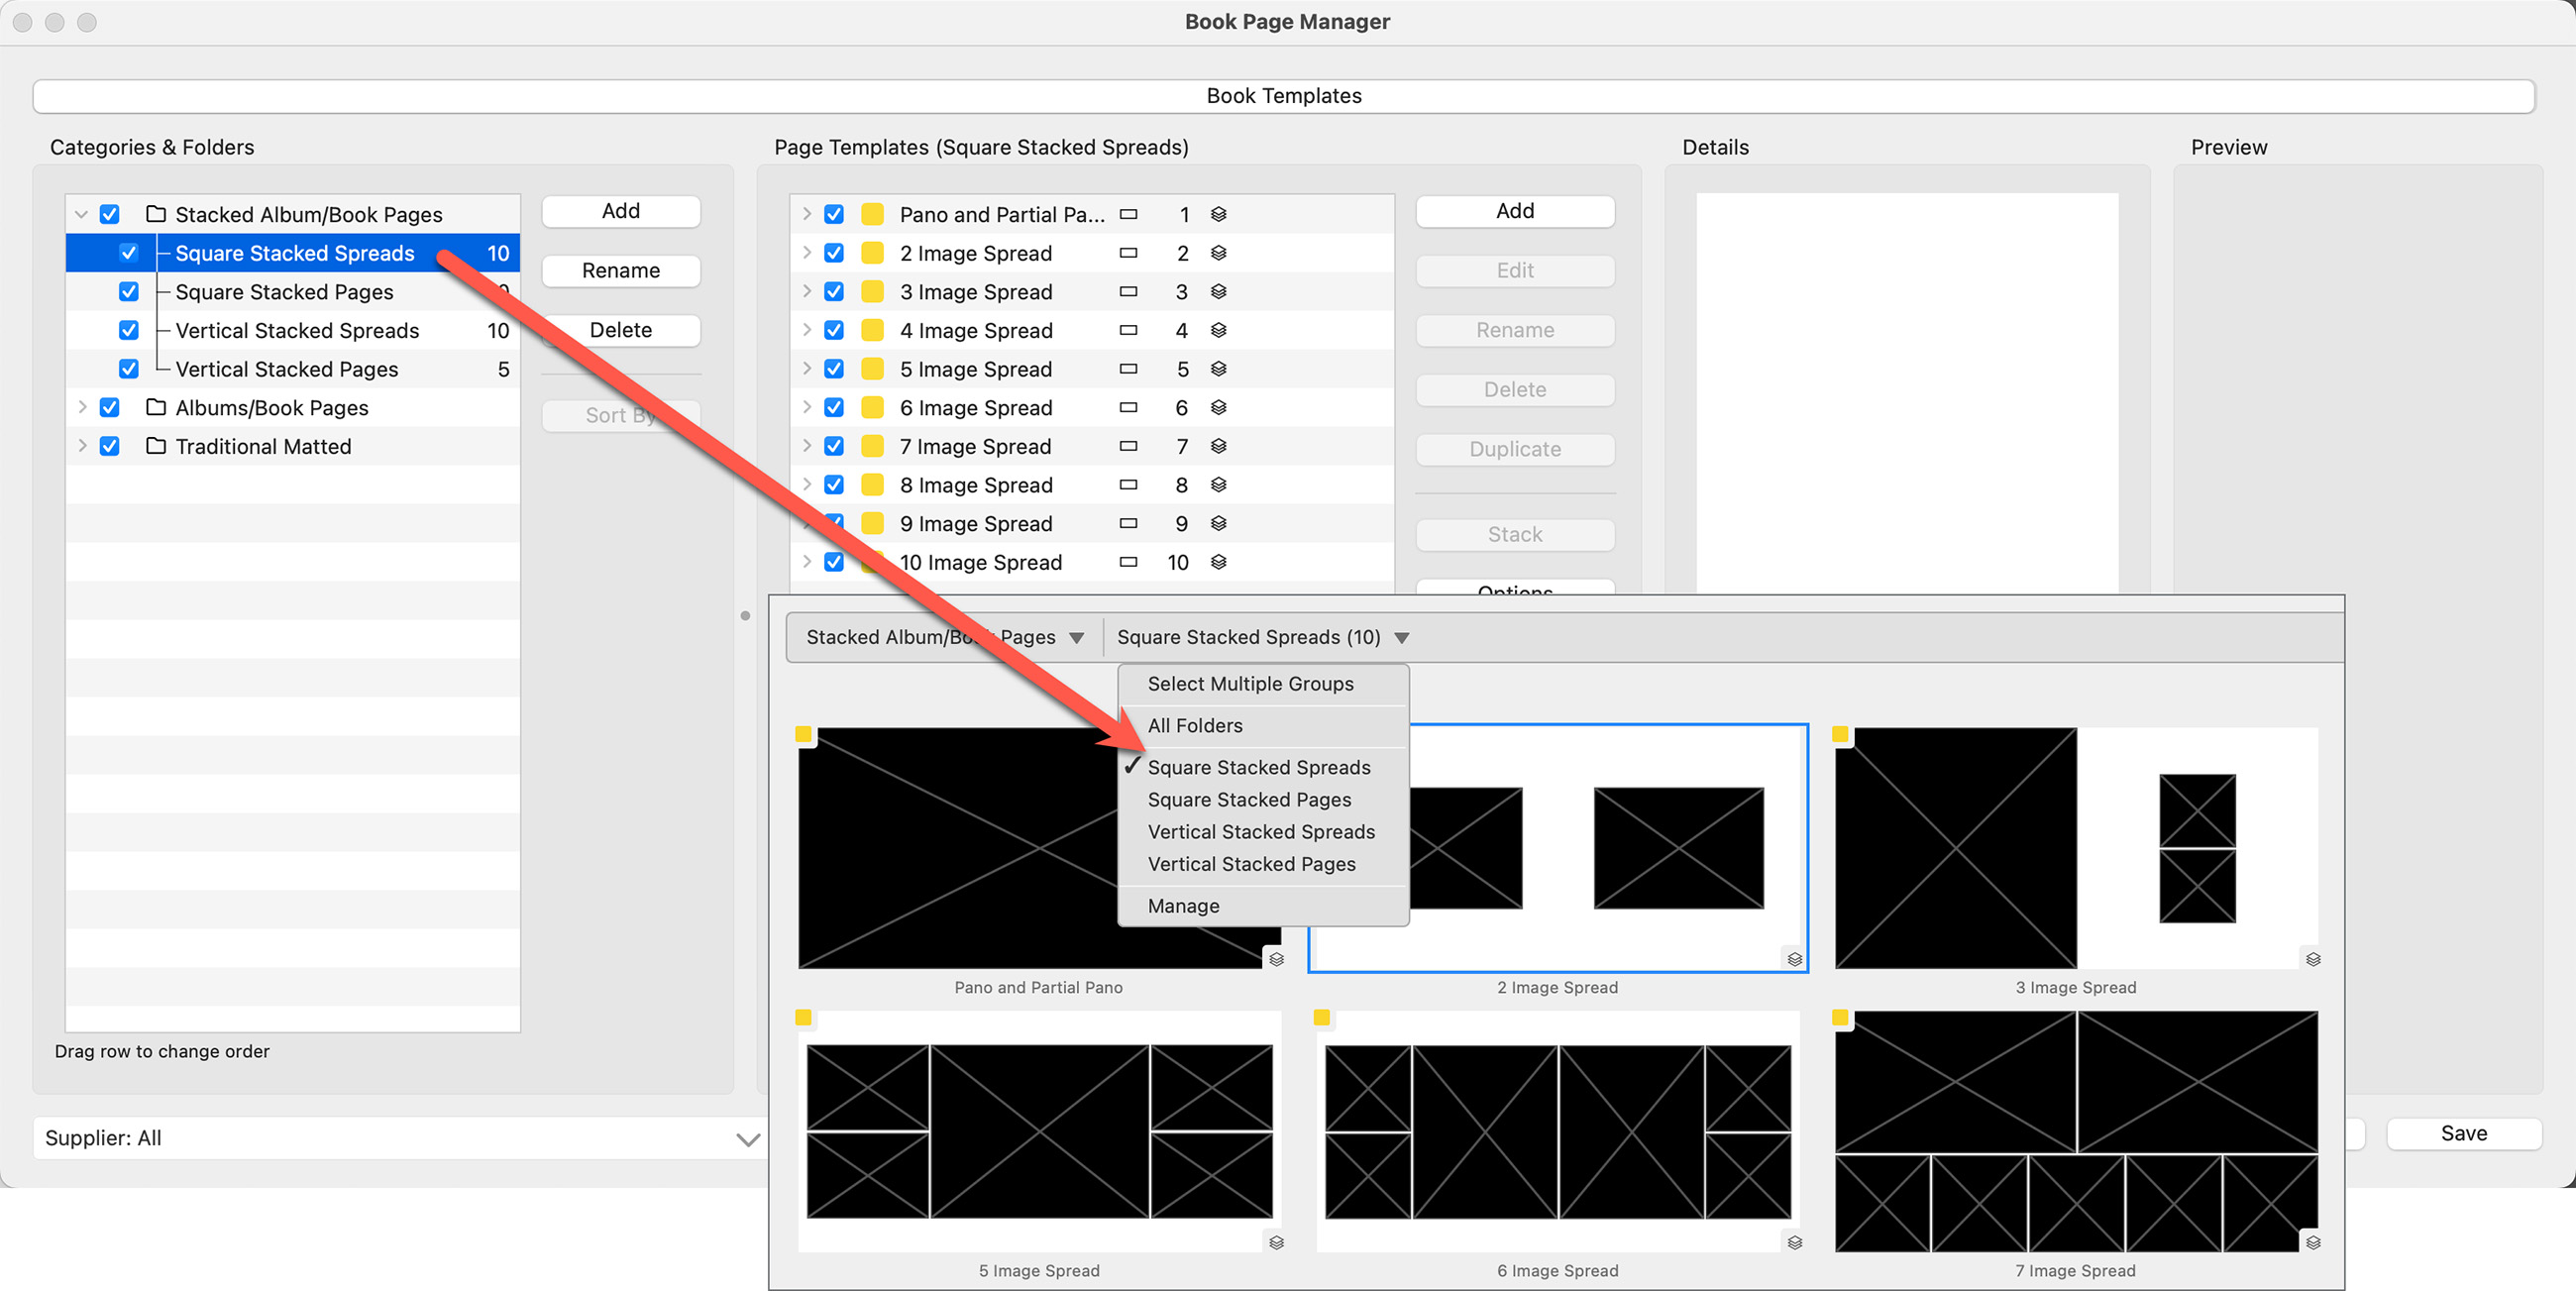
Selecting Multiple Groups
To display the book page templates of more than one group, choose Select Multiple Groups from the All Folders dropdown menu. You can then check the boxes of the templates to display.
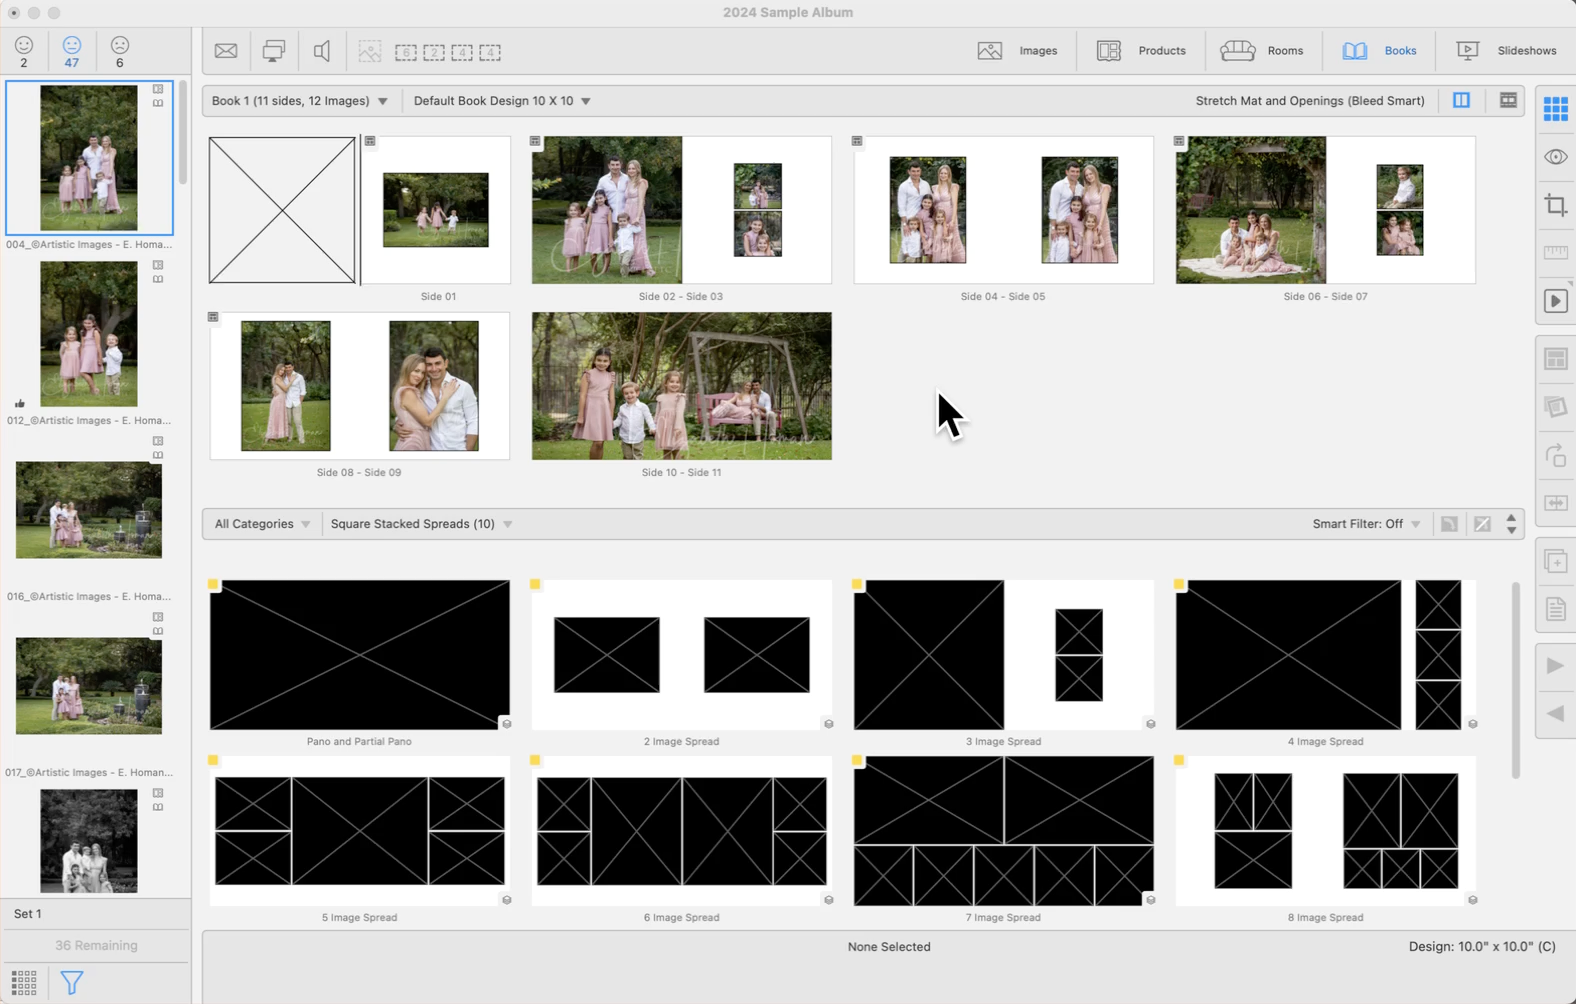
When using stacked page templates, the various stacked sizing options created can be viewed using up and down arrow keys, or the Previous/Next Stack tools ![]()
![]() . This allows you to cycle through the different page layout options available.
. This allows you to cycle through the different page layout options available.
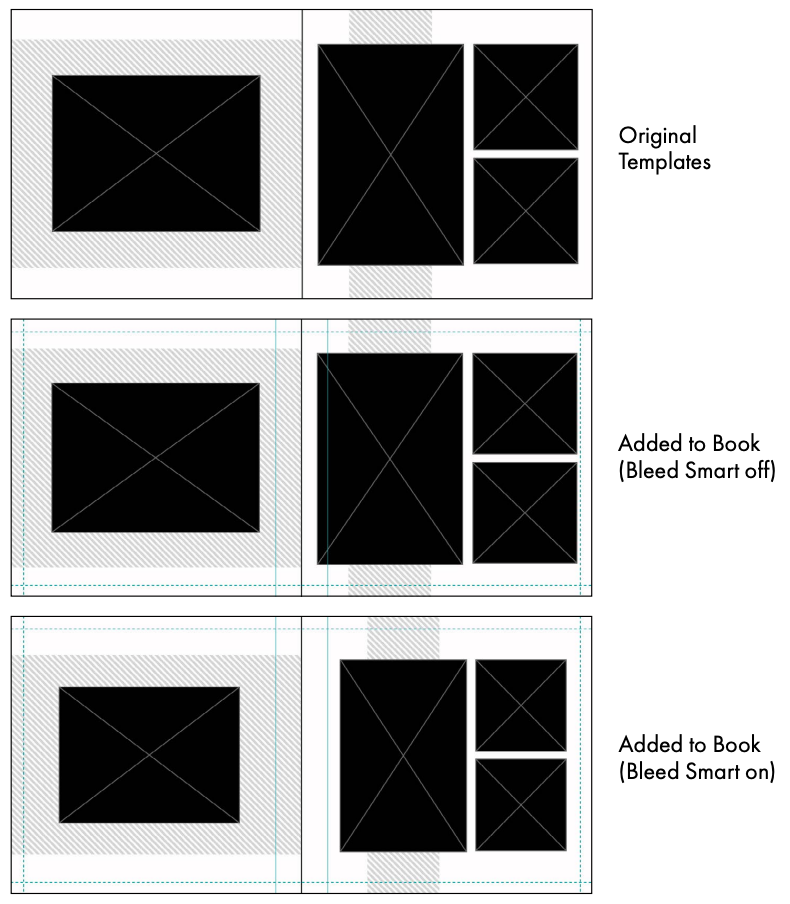
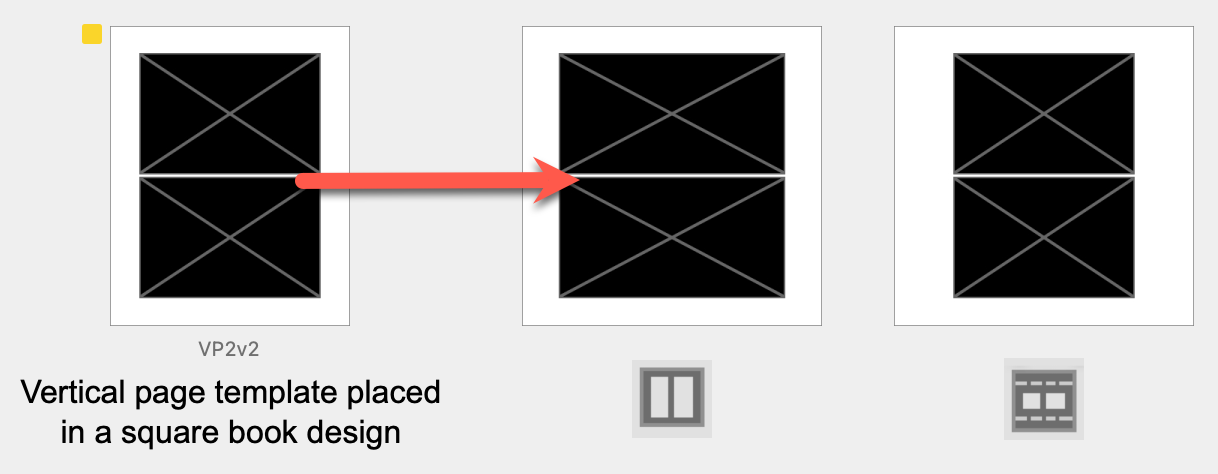
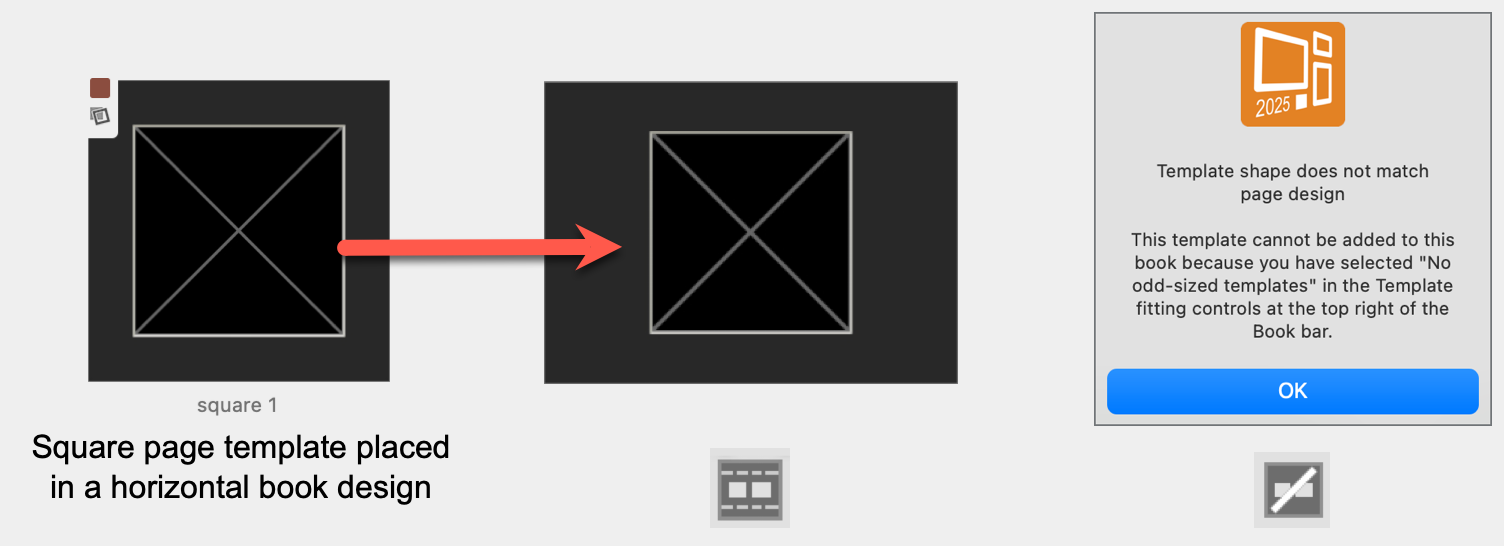
Generally, it is best to match square page templates with square book designs and vertical page templates with vertical book designs. *Currently, there are no specific templates for horizontal book designs in the default data; however, both square and vertical page templates can be adapted for use in them.
- Templates that do not initially match the specified book design can be adjusted to fit the page shape.
- This adjustment process is controlled through fitting options located at the top right corner of the Display Area.
- ProSelect's Bleed Smart technology further fine-tunes these adjustments by considering bleed and gutter areas, ensuring a precise fit.
Composite Book Designs
Page templates can be stretched to cover unused parts of the page, either by stretching both the mat and the template openings or by expanding only the mat area to fill gaps. This allows for a full-page visual impact, which is particularly useful when using overlay images that should span the entire page.
![]() Stretch Mat and Openings (Default): Both the mat and openings will be stretched in the appropriate direction to cover the entire page area.
Stretch Mat and Openings (Default): Both the mat and openings will be stretched in the appropriate direction to cover the entire page area.
![]() Stretch Mat: Just the mat will be stretched to cover the entire page area, leaving the openings at their intended size.
Stretch Mat: Just the mat will be stretched to cover the entire page area, leaving the openings at their intended size.
When creating books that include pages with overlay images, it's typical to produce them as Composite Books. This format allows you to select the "Stretch Mat and Openings" option, ensuring that overlay images extend across the entire page. However, be mindful that this setting also stretches any text included in the overlay, which may affect the appearance. To avoid distortion, especially for designs that contain critical elements or texts, consider using overlay images only with book designs that correspond precisely to the template's shape. This alignment ensures the overlays fit perfectly without any alteration.
Traditional Matted Book Designs
Traditional matted books generally use templates that correspond to standard sizes of prints and the book page itself. If your album supplier can read ProSelect's Production Report files for cutting mats, you can easily use custom template designs. ProSelect can adjust these templates to ensure they fit precisely without altering the print sizes.
![]() Stretch Mat (Default): This option works the same as with Composite book designs. Only the mat will be stretched to cover the book page. Openings remain at their intended size.
Stretch Mat (Default): This option works the same as with Composite book designs. Only the mat will be stretched to cover the book page. Openings remain at their intended size.
![]() Same Size Only: Templates added must exactly match your book page size. If they do not, a warning will be displayed.
Same Size Only: Templates added must exactly match your book page size. If they do not, a warning will be displayed.
When designing traditional matted templates, it's important to set the opening sizes in the Product Editor to match the dimensions of your final prints, not the actual mat openings. Mat openings are typically slightly smaller to accommodate the print's mounting overlap. By configuring the template openings to the full size of the intended print, such as designing a 5"x7" opening for a 5"x7" print (even though the mat opening may measure 4.7"x6.7"), you ensure that the correct print size is maintained during Pro Production. This approach guarantees that the final prints fit perfectly within the mats without any unexpected cropping or sizing issues. For more on mat overlap, click here.