 Creating & Pricing Stacked Templates
Stacked sizing allows users to load and populate multiple products simultaneously. This feature is particularly useful when offering products in different sizes with varying aspect ratios. Wall groupings, for example, work best when stacked, as they can consist of small, medium, and large sizes. Stacked sizing is ideal for wall groupings that contain multiple images and transition from one size to another, such as going from a large (24x30) to a medium (20x24), where the aspect ratios differ slightly.
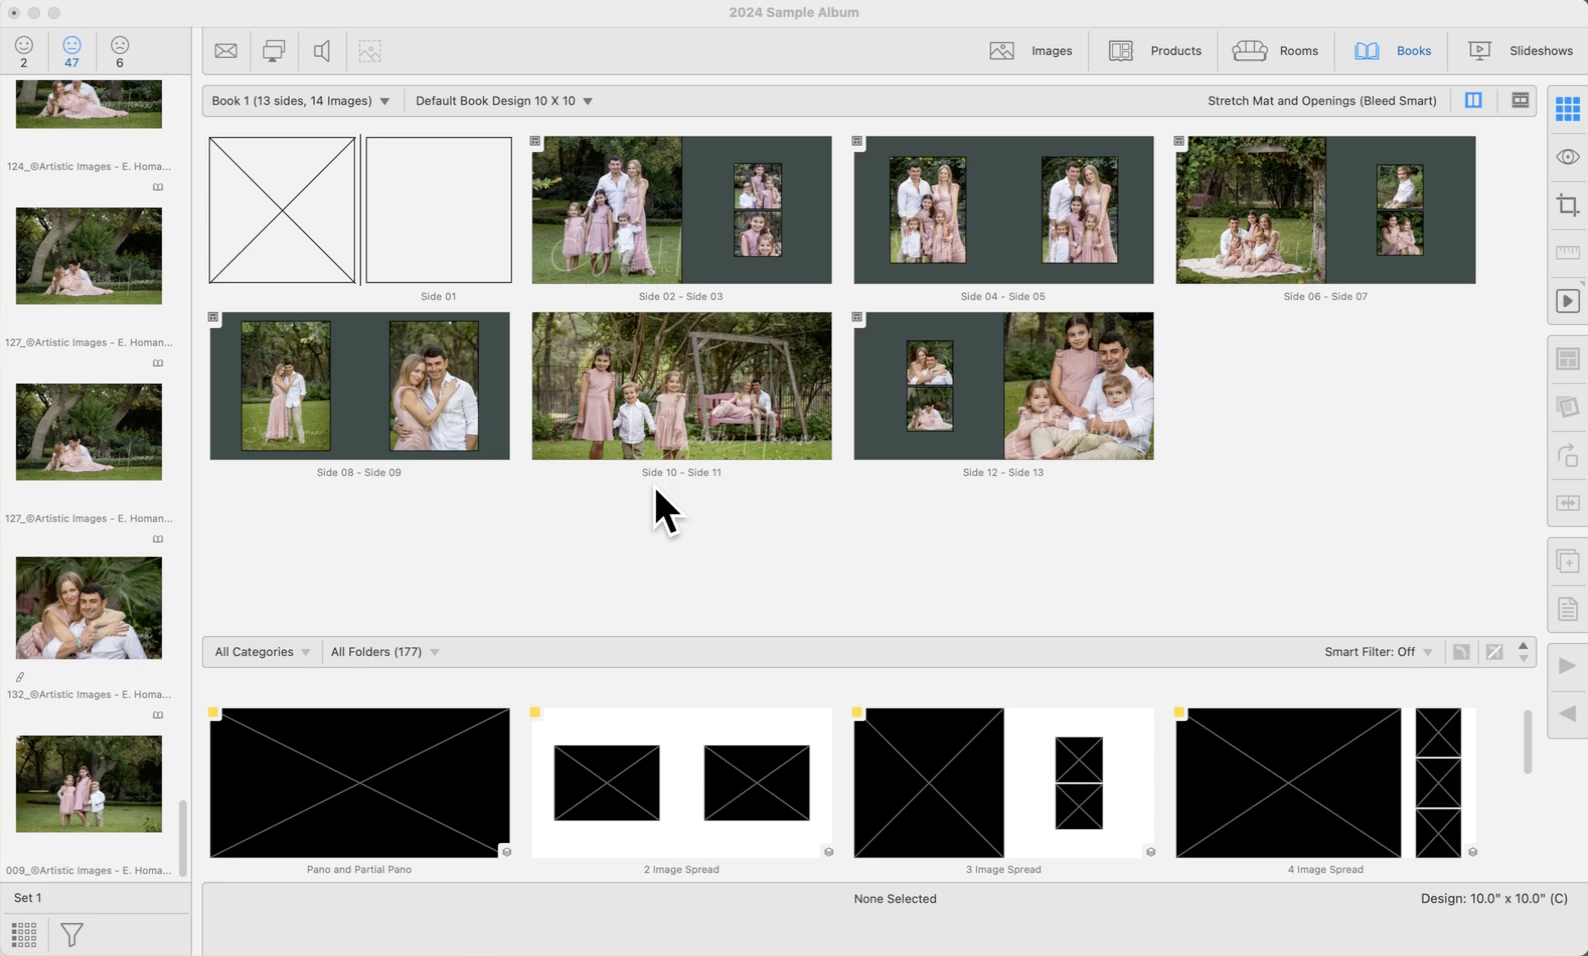
Book Pages also utilize stacked sizing. This makes it even easier to move through different page layouts.
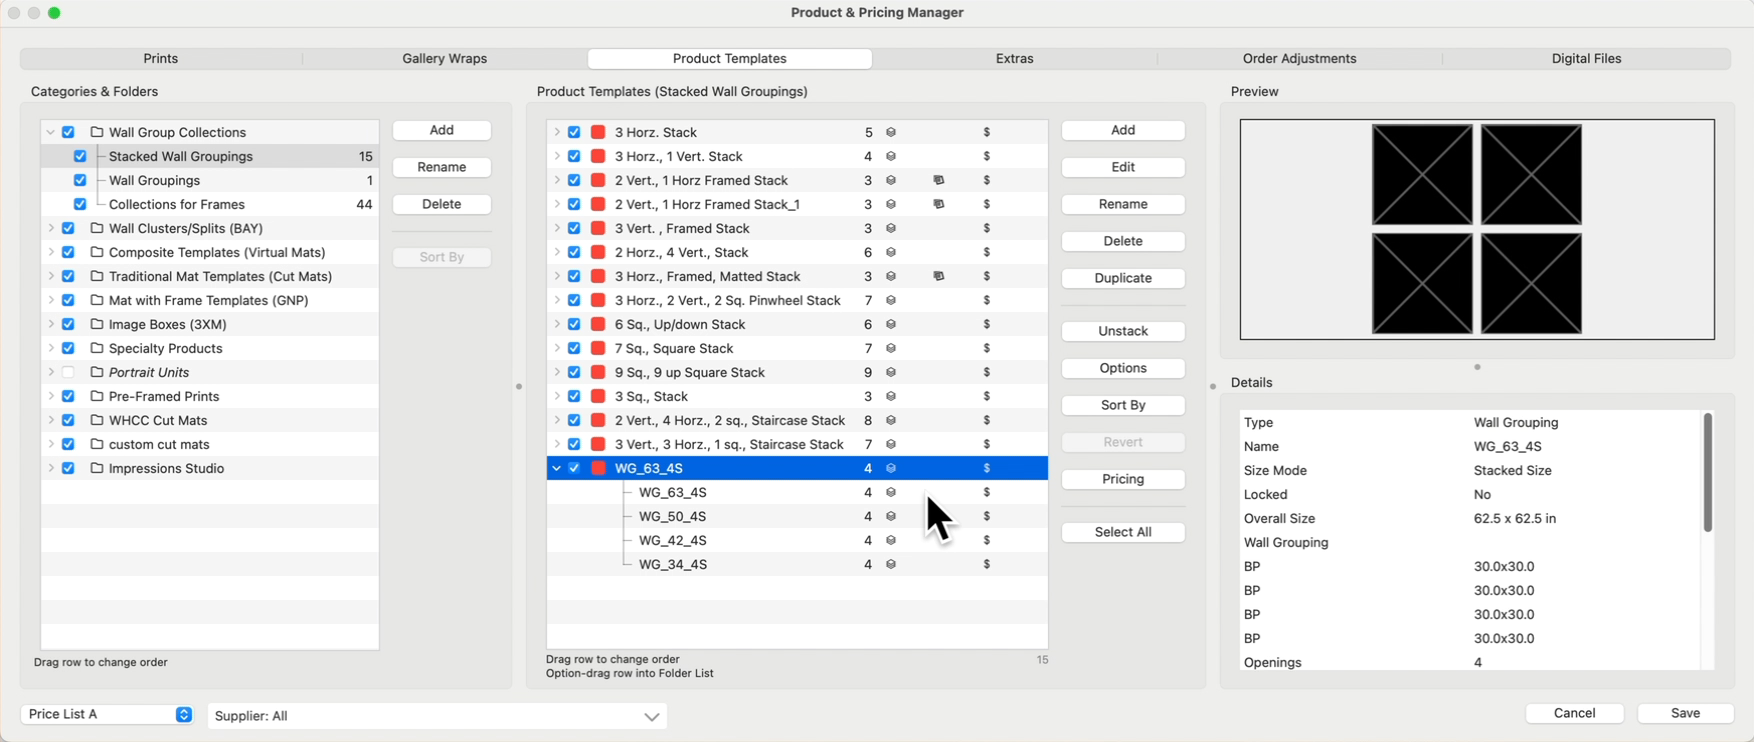
Each template within a stack is treated as a separate layer. These templates are initially created as individual items and later combined to form a stack. While a template stack might appear as a single entity, the presence of a stack tag ![]() signifies that it comprises multiple layered items.
signifies that it comprises multiple layered items.
Templates using Stacked Sizing have specific characteristics and requirements:
- Each template must have the same number of image openings.
- Image opening numbers should correspond to the relative image positions in the other templates within the stack.
- A stack can consist of as few as two templates or as many as needed.
- If a frame and/or mat is applied at the top-level template in a stack, it will be applied to the corresponding opening in all templates.
- If a frame and/or mat is applied at a lower-level template in a stack, it will only be applied to that specific opening.
- Wall Grouping stacks can have varying configurations (refer to Stack Configurations).
- Each template in the stack can have its own price and pricing method. *Note that book pages do not support pricing.
- Each template in the stack must use a “Fixed Size” sizing mode.
Stacked Sizing can be created within a single Product Editor window or built as individual product templates and then combined into a stack (suggested method). Before stacking, ensure that all selected templates:
- Are of the same template type.
- Have the same number of openings and graphic blocks.
- Are not already part of an existing stack.
Stacking
- Select the templates and click the Stack button.
- When templates have been stacked, a grey drop-down arrow will appear on the left-hand side. Click on the arrow to expand and view the stacked templates.
- An "Unstack" option will appear if you have selected a Stacked template.
Select a template within the stack, and click the Unstack button to remove it.
Wall Groupings are always a fixed size. In order to show different sizing options, you can create Stacked Sizes. Wall Groupings also support different configurations of the same items. Create your Stacked Sizes and configurations in the Product Editor.
- Use the up and down arrow keys to cycle through your stacked sizes.
- Click on the Previous
 or Next
  Stack tools to go up or down a size.
 - Right-Click on the Previous or Next Stack tool and choose a size from the list.
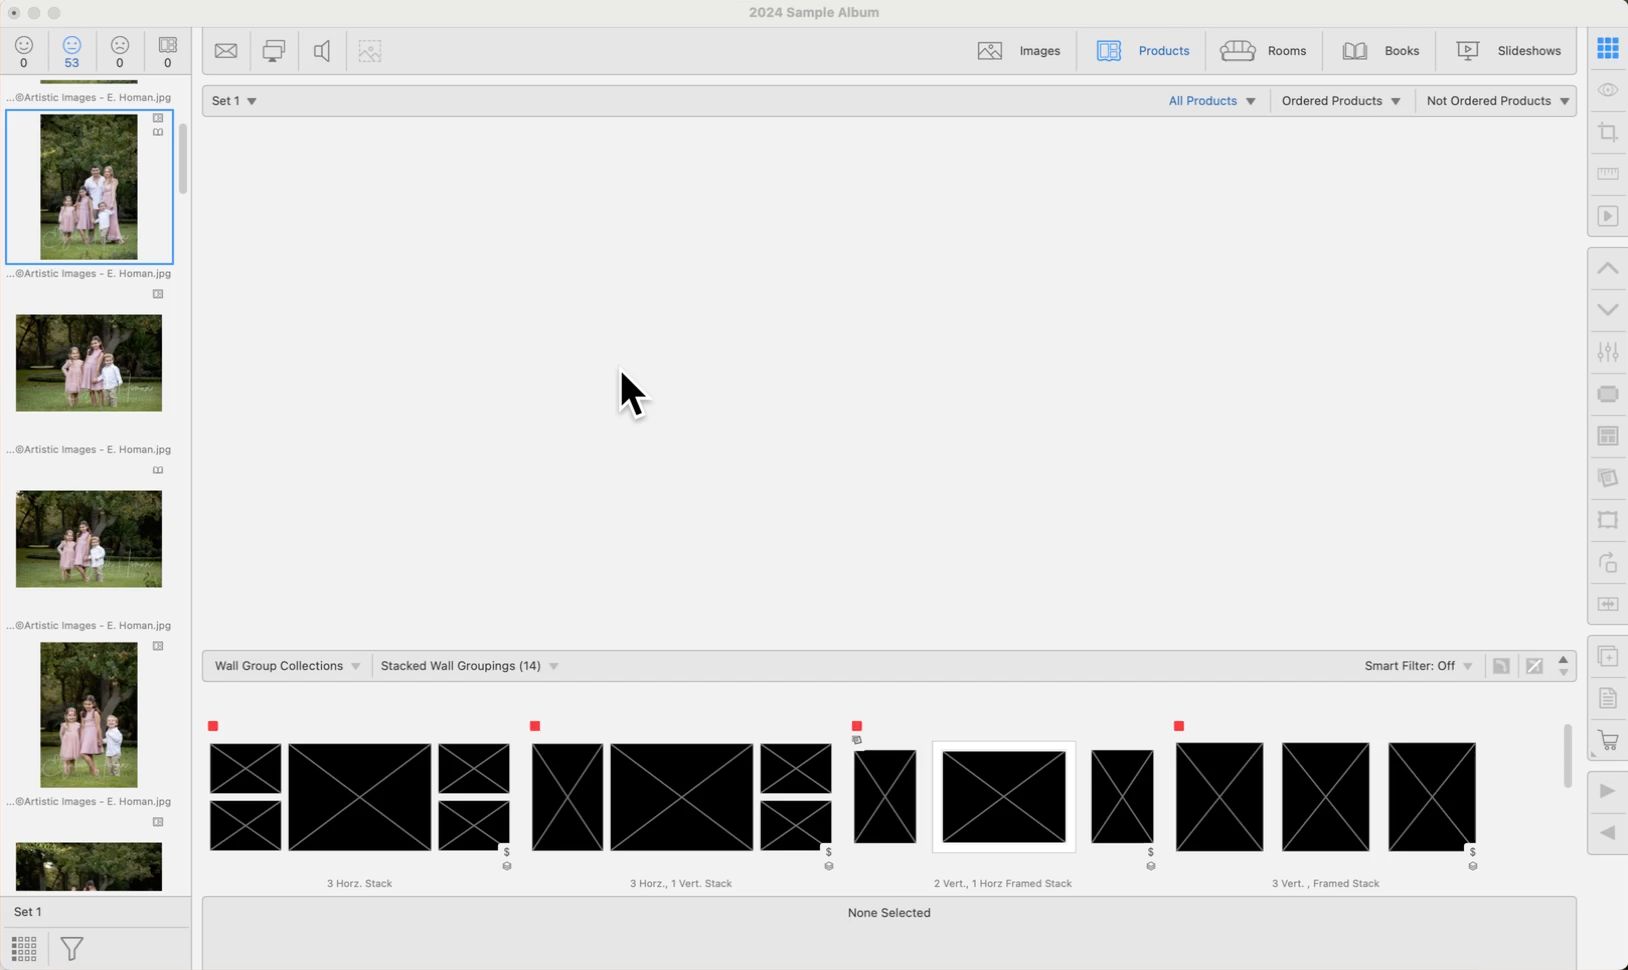
When using stacked templates, the various stacked sizing options created can be viewed using up and down arrow keys, or the Previous/Next Stack tools ![]()
![]() . This allows you to cycle through the different sizing options available. This works in Working with Products, as well as Working with Rooms.
. This allows you to cycle through the different sizing options available. This works in Working with Products, as well as Working with Rooms.
When using stacked page templates, the various stacked sizing options created can be viewed using up and down arrow keys, or the Previous/Next Stack tools ![]()
![]() . This allows you to cycle through the different page layout options available.
. This allows you to cycle through the different page layout options available.
Pricing Stacked Wall Groupings is done in a very similar way to Pricing Wall Groupings, with the additional step of pricing each wall grouping size in the stack.
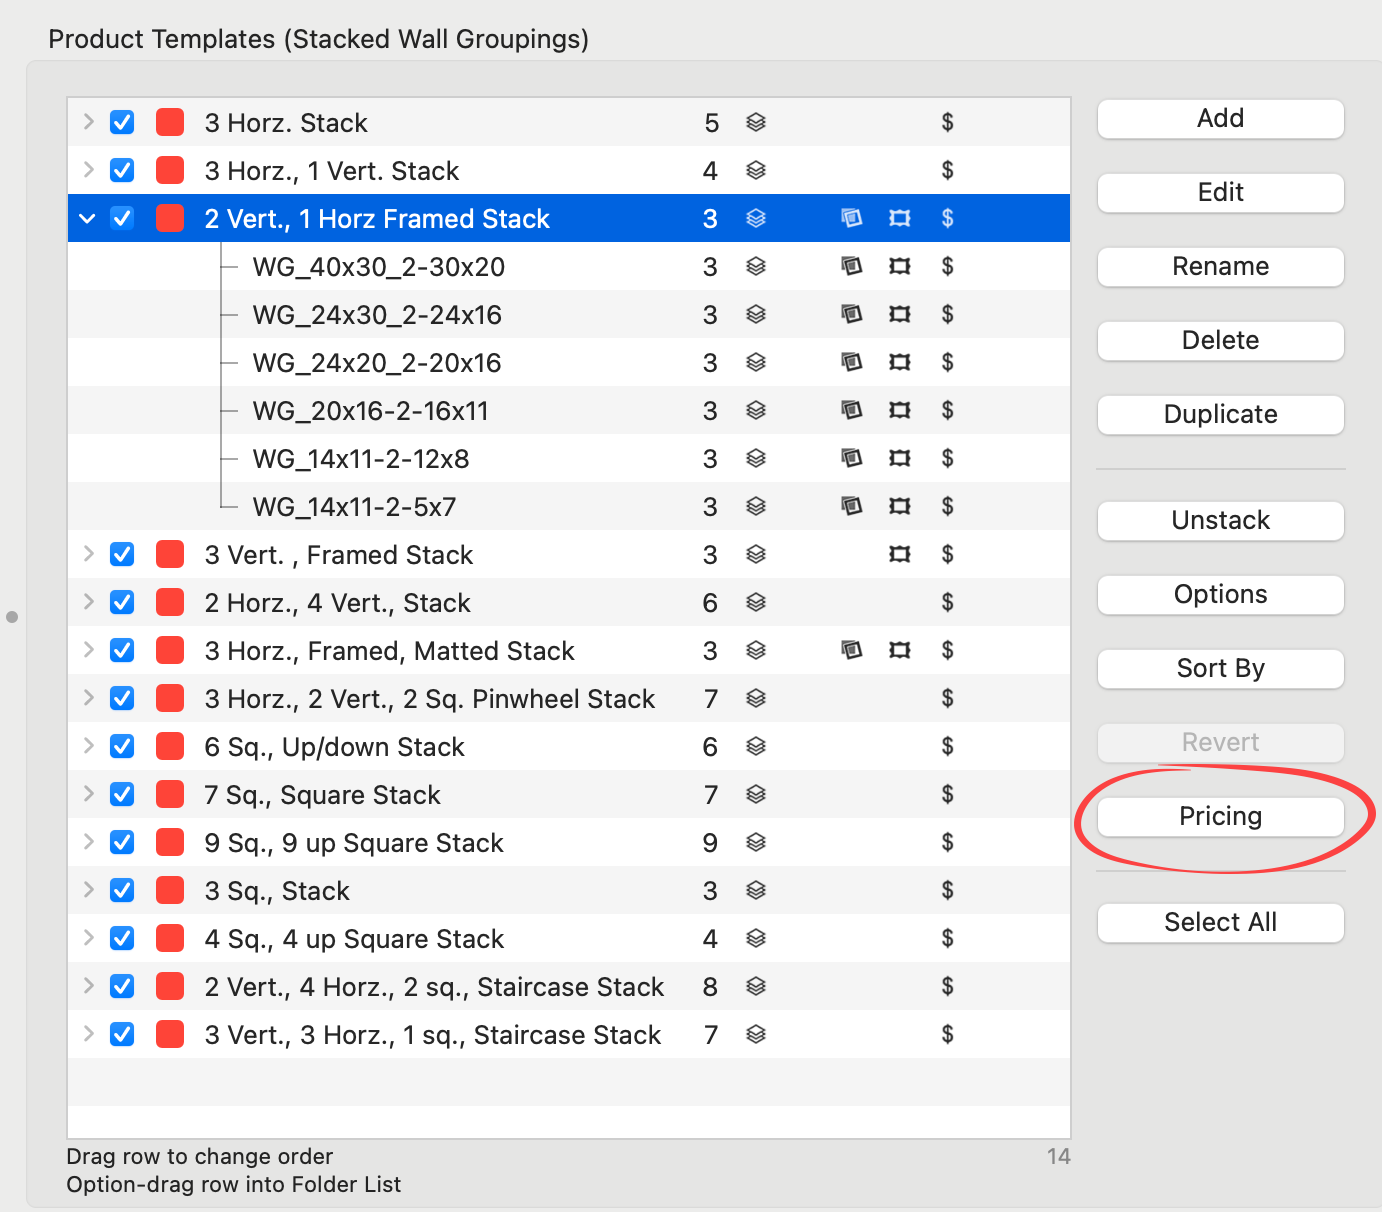
- Select a Stacked Wall Grouping from the Product Templates Panel.
- Click the Pricing button to open the Price List Items dialog.
- Choose a Pricing Method from the drop-down list. The same pricing method must be used for all stacked sizes within the grouping. To learn more about the different pricing methods, click on Wall Groupings.
- "Sum of Parts" is the default, recommended pricing method. Once selected, all sizes within the stack will use this pricing method.
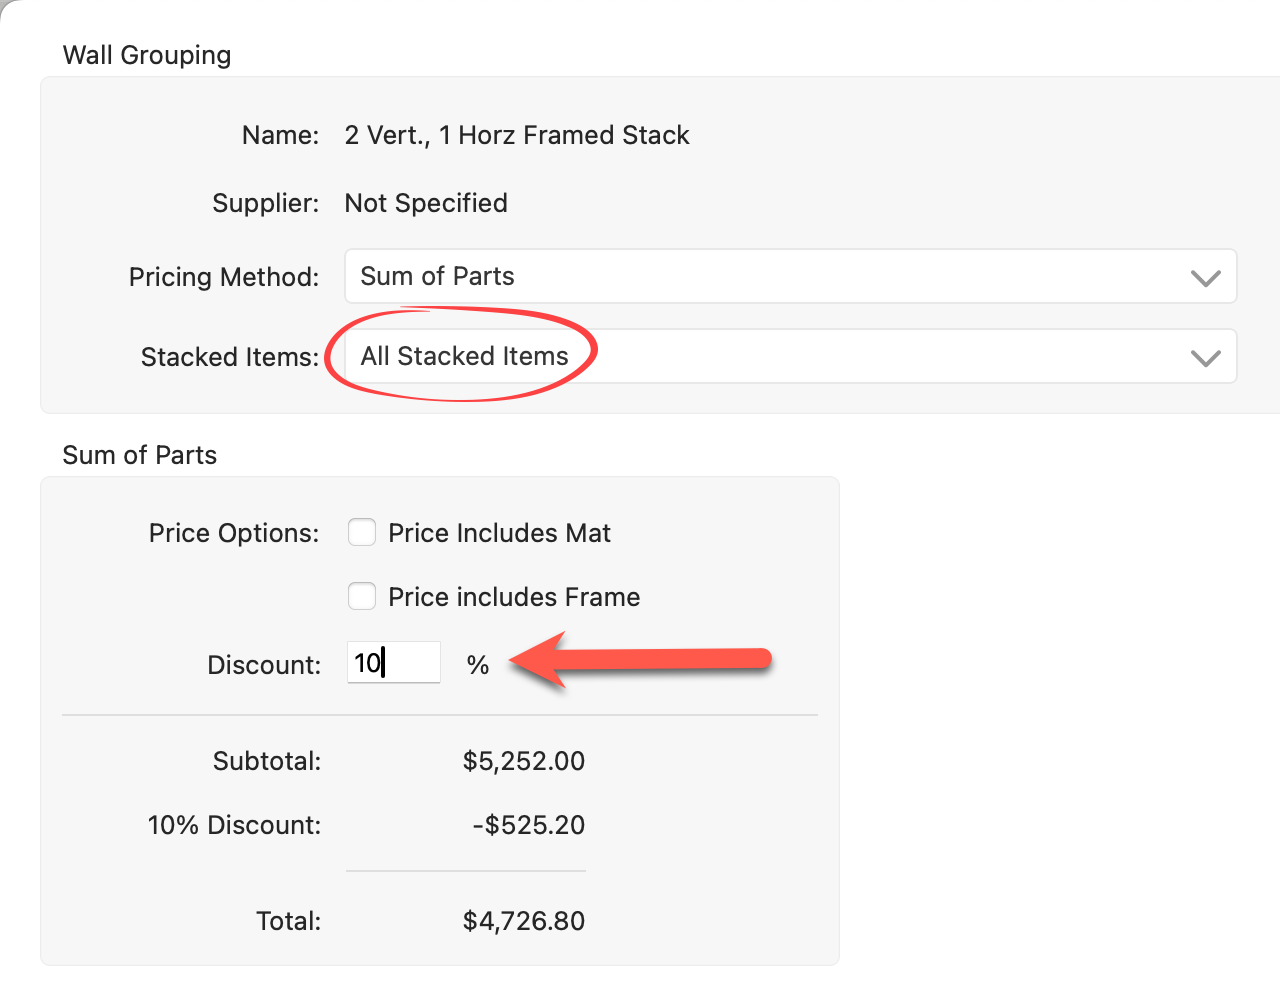
 Quick Tip - "All Stacked Items"
When setting prices for stacked product templates, you can manage pricing for each stacked item individually or apply changes to all stacked items at once by selecting "All Stacked Items." Choosing this option means that any changes you make, such as applying a discount, will affect every item within the stack uniformly. For instance, if you decide to apply a 10% discount to a Wall Grouping and you have "All Stacked Items" selected, this discount will automatically be applied to each individual grouping within that stack.
- Select the first stacked item using the "Stacked Items" drop-down list. Cycle through each grouping within the stack to ensure each item has a price assigned.

- If you have chosen a different pricing method, cycle through each grouping within the stack and price individually.

- To apply a discount to all stacked sizes, select "All Stacked Items" from the drop-down list. Type a discount into the Discount box. The discount will now filter down to every grouping within the stack.
- To discount a single grouping, select the grouping first from the "Stacked Items" list. Once selected, you can apply the discount. It will only apply to the currently selected grouping.
- Click the Save button.
- To see how the pricing methods affect Wall Groupings when ordered, click on The Appearance of the Order Menu.
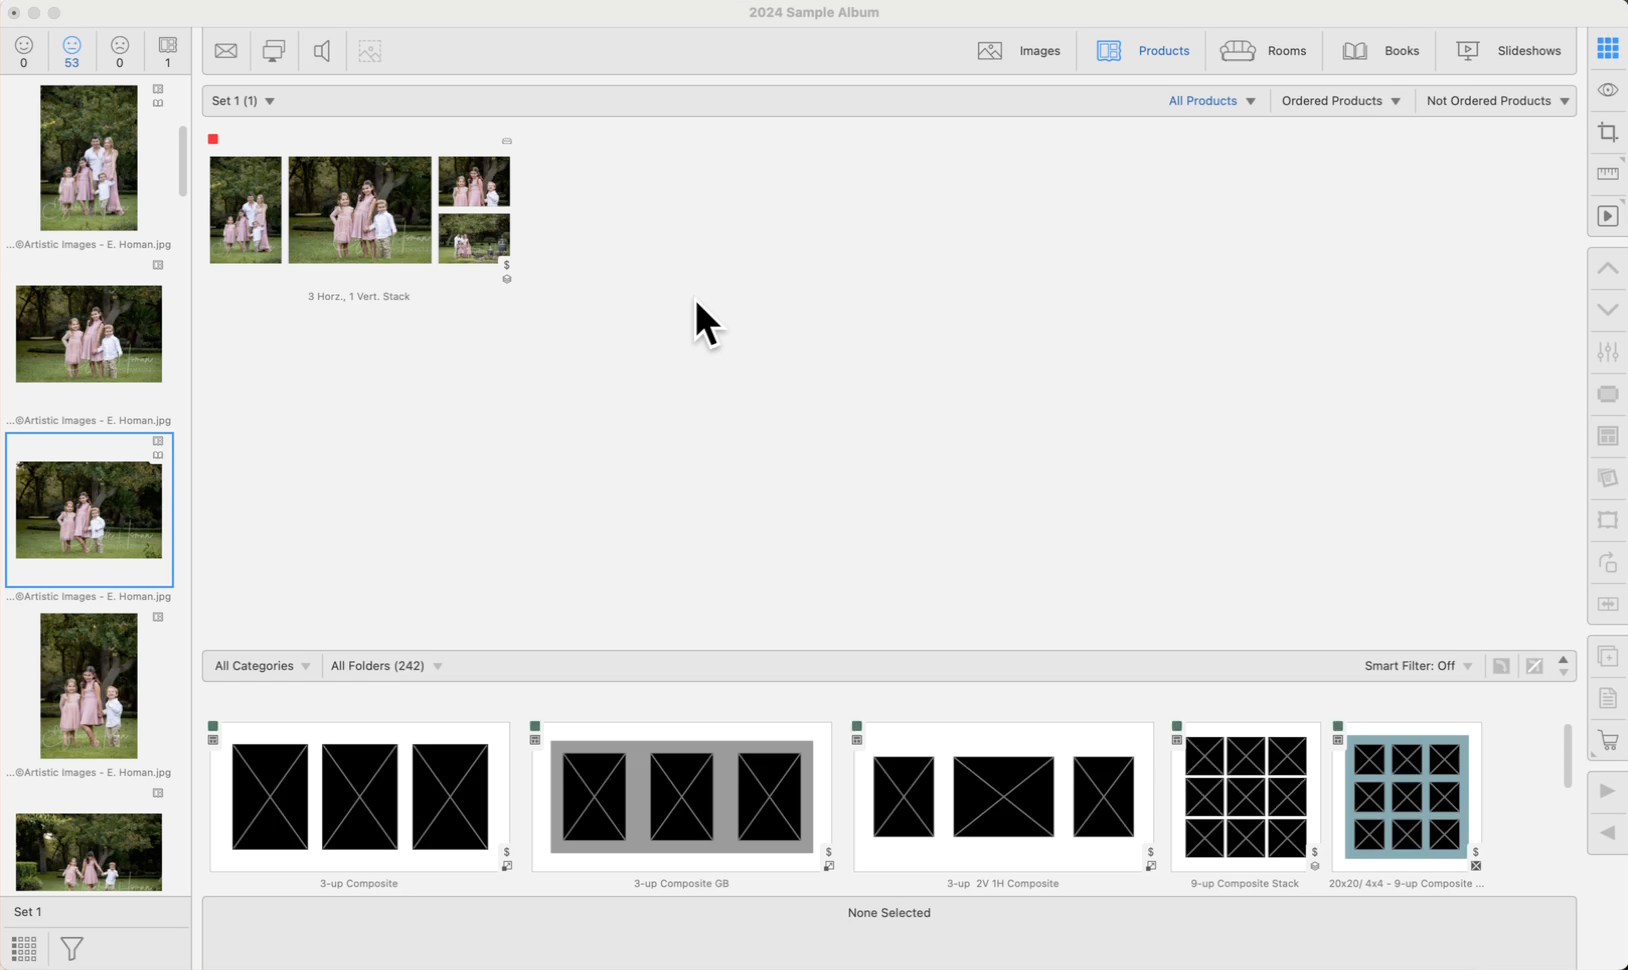
Stacked templates can also be priced using either "Sum of Parts" or "Fixed Price by Presentation Option". The method is the same for all products using stacked sizing.
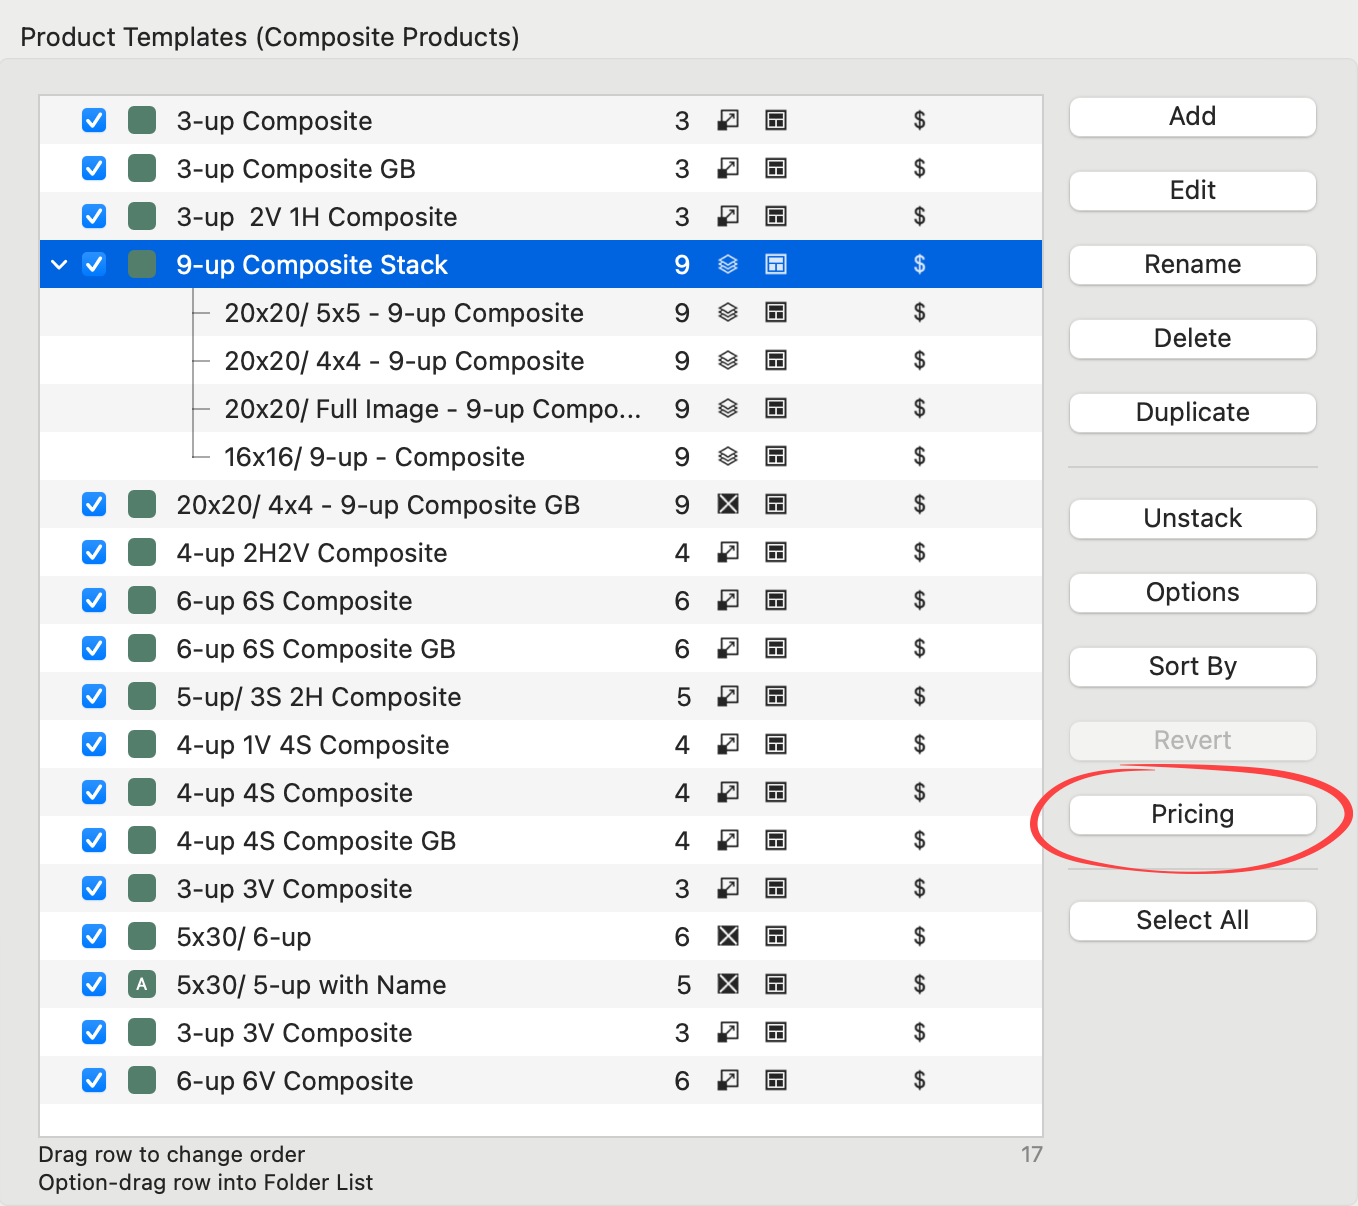
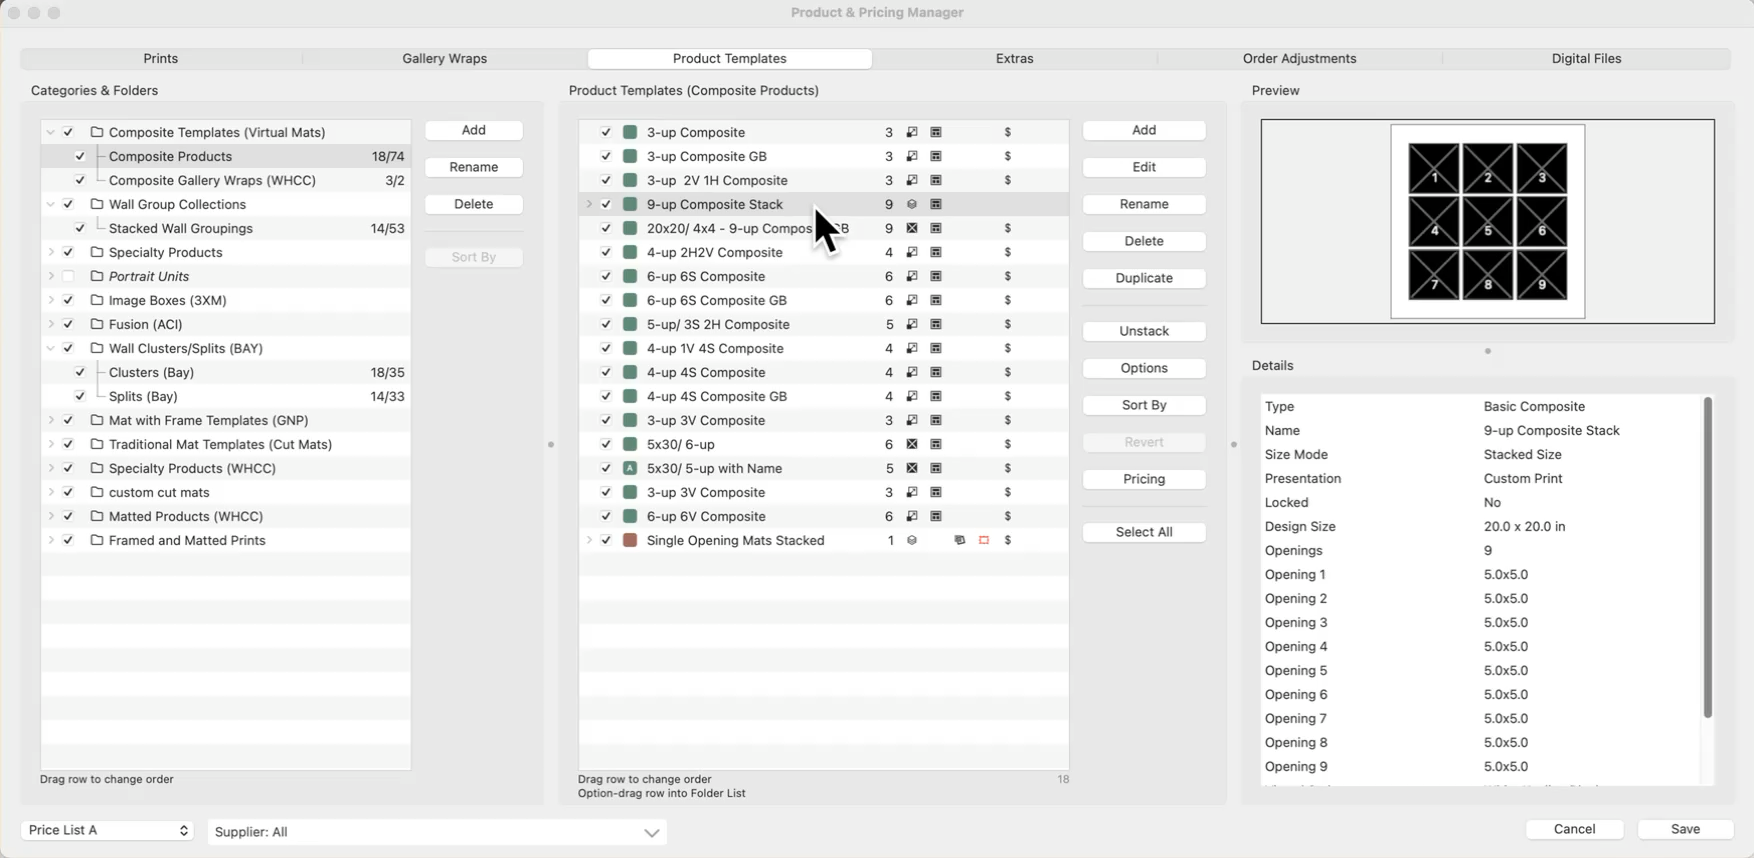
- Select a Product Template you wish to price from the Product Templates Panel.
- Then click the Pricing button to open the Price List Items dialog.
- Choose a pricing method for your product.
- If you select "Sum of Parts," you are done. ProSelect will use the print pricing you have set up. For example, if you select Sum of Parts pricing for the "9-up Composite Stack," each of the 4 templates within this stack will be based on your print pricing. If you offer a 20x20 Lustre print for $498, then the 20x20 "9-up Composite Stack" with a "Lustre" presentation option applied will also be $498.
- If you select "Fixed Price by Presentation Option," you must add price list items to each stacked size. Continue with step 4.
-
Select "All Stacked Items" from the drop-down list. Any modifications here will automatically filter down to every template within the stack. *To make modifications to a single stacked item, you must first select that item from the list.
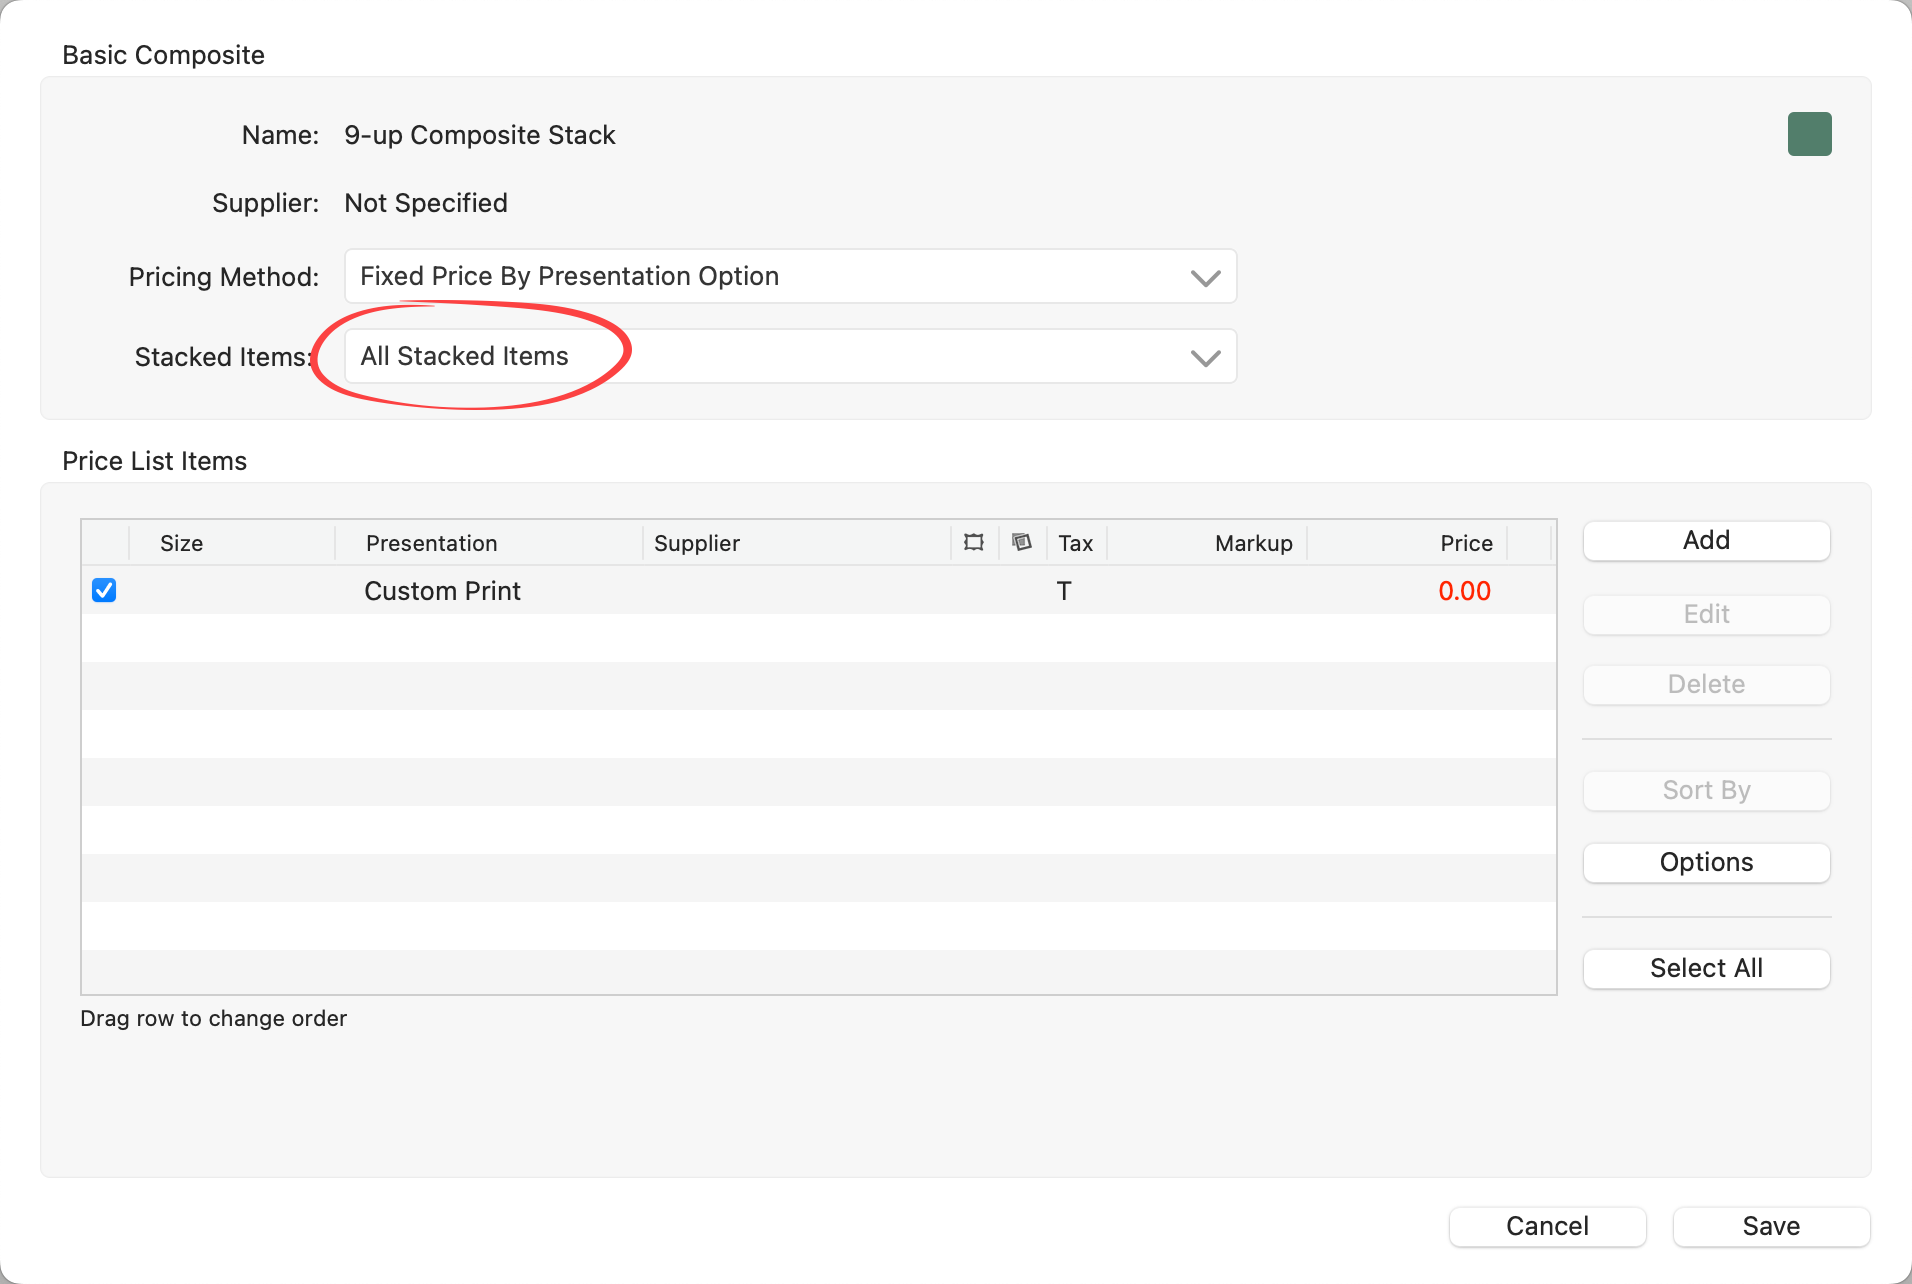
- Click the Add button.
- From here, select all the Presentation Options you want to offer using the check boxes. It is best to leave the pricing area alone for the time being. Adding prices at this stage would filter down to each item within the stack - potentially pricing some items incorrectly.
- Click the Add Item button.
- Each added presentation option will filter down and be applied to each stacked item.
- Now that you have added the price list items, cycle through each item within the stack and ensure each price list item has a price assigned.
- Click on the line item to price it. You can either use the Edit button to add a price or type a fixed price in the pricing box at the bottom of the dialog.
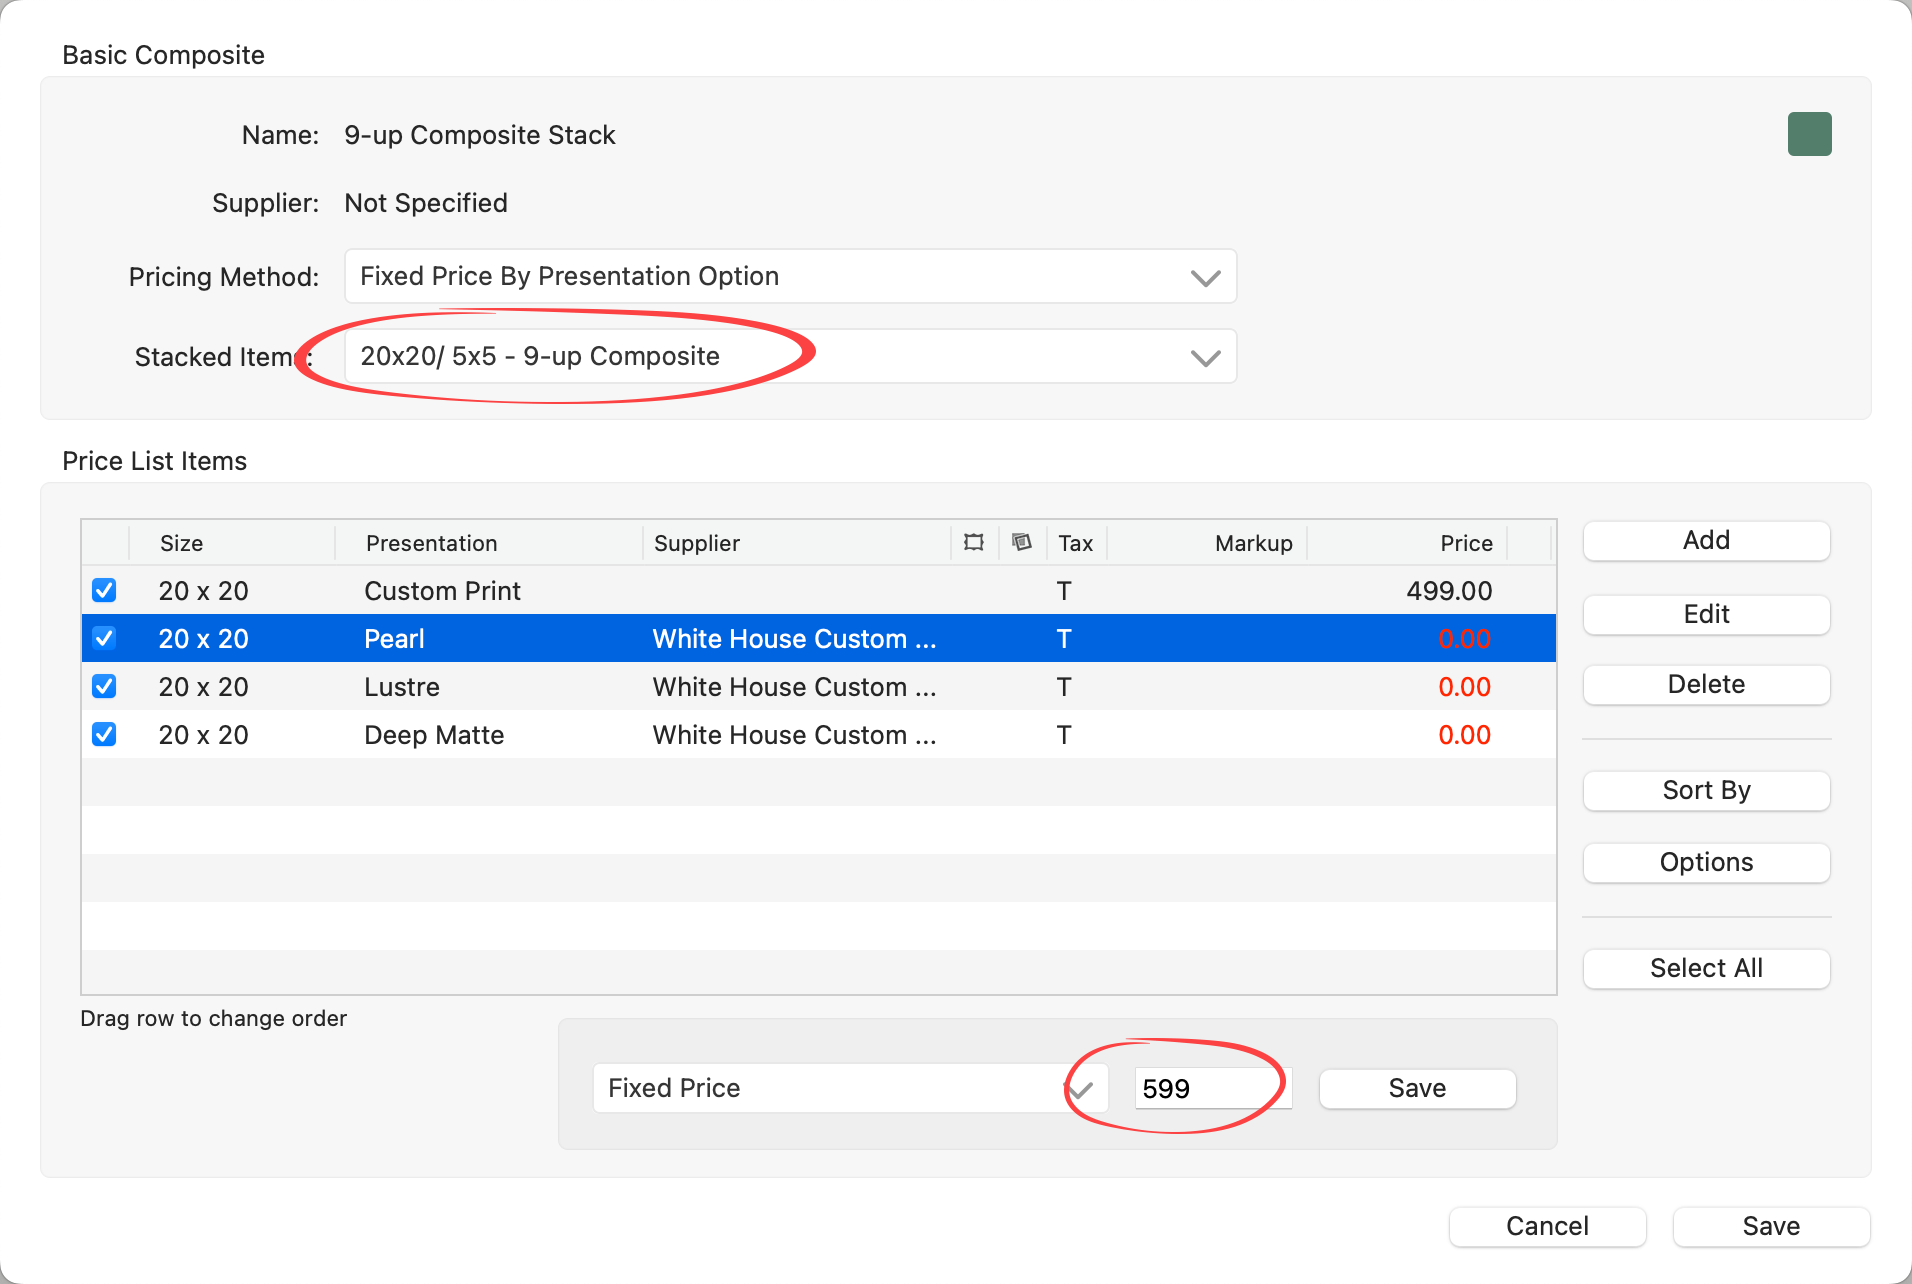
- Click the Save button when you have finished pricing each stacked size.
Understanding the Difference Between Stacked Wall Groupings & Clusters
In ProSelect, both Stacked Wall Groupings and Clusters allow you to present multiple wall design options quickly. However, there are important differences in how they are set up and priced.
Stacked Wall Groupings
- A Stacked Wall Grouping is a collection of wall grouping templates not tied to a specific supplier.
- When a template is stacked, multiple variations are layered together.
- You can populate the first template with images, then use the up and down arrow keys to cycle through the different sizes or layouts.
- This allows you to quickly compare options and select the best fit for your client.
Clusters (Bay Photo)
- Clusters are similar in function to Stacked Wall Groupings, but they are specific Bay Photo products.
- These layouts are pre-configured to match Bay Photo’s catalog offerings.
- You are not restricted to ordering from Bay Photo—you can still use these layouts with other labs if you wish.
Bay Splits
-
A Bay Split is a different type of Bay Photo product where a single image is divided across multiple panels.
Pricing Stacked Wall Groupings
- By default, Stacked Wall Groupings use Sum of Parts Pricing.
- The total cost is dynamically calculated from the prices of each individual product.
- If you change the Presentation Option (e.g., from Gallery Wrap to Metal Prints), the price automatically recalculates.
- Removing an image instantly updates the selling price.
- You can change the pricing model to:
- Fixed Price (set one selling price manually), or
- Fixed Price by Presentation Option (different prices depending on finish).
Pricing Clusters (Bay Photo)
- Clusters are set to Fixed Price by Presentation Option.
- Bay Photo offers four different finishes (Metal, Wood, Gallery Wrap, etc.), with supplier costs built in.
- A markup is applied to determine your selling price, and you can adjust the markup as needed.
- If you prefer, you can switch Clusters to:
- Fixed Price, or
- Sum of Parts Pricing for mix-and-match flexibility.