Managing Book Designs
Book designs are managed by the Book Designer. Go to the top menu, Products > Setup Book Designs. Before you start adding images to a book, you need to select a Book Design. The Book Design dictates the construction and style of your book. ProSelect contains a number of pre-designed books based on lab specifications. There are even more options available as part of ProSelects Supplier Collections. Each book design details specifications such as:
- Overall dimensions.
- Book type (Composite or Traditional Matted).
- Whether the book is single or double-sided, and which side a double-sided book starts on.
- Default border direction (Composite book designs).
- Minimum and maximum number of pages.
- Bleed and gutter requirements.
- Cover page settings.
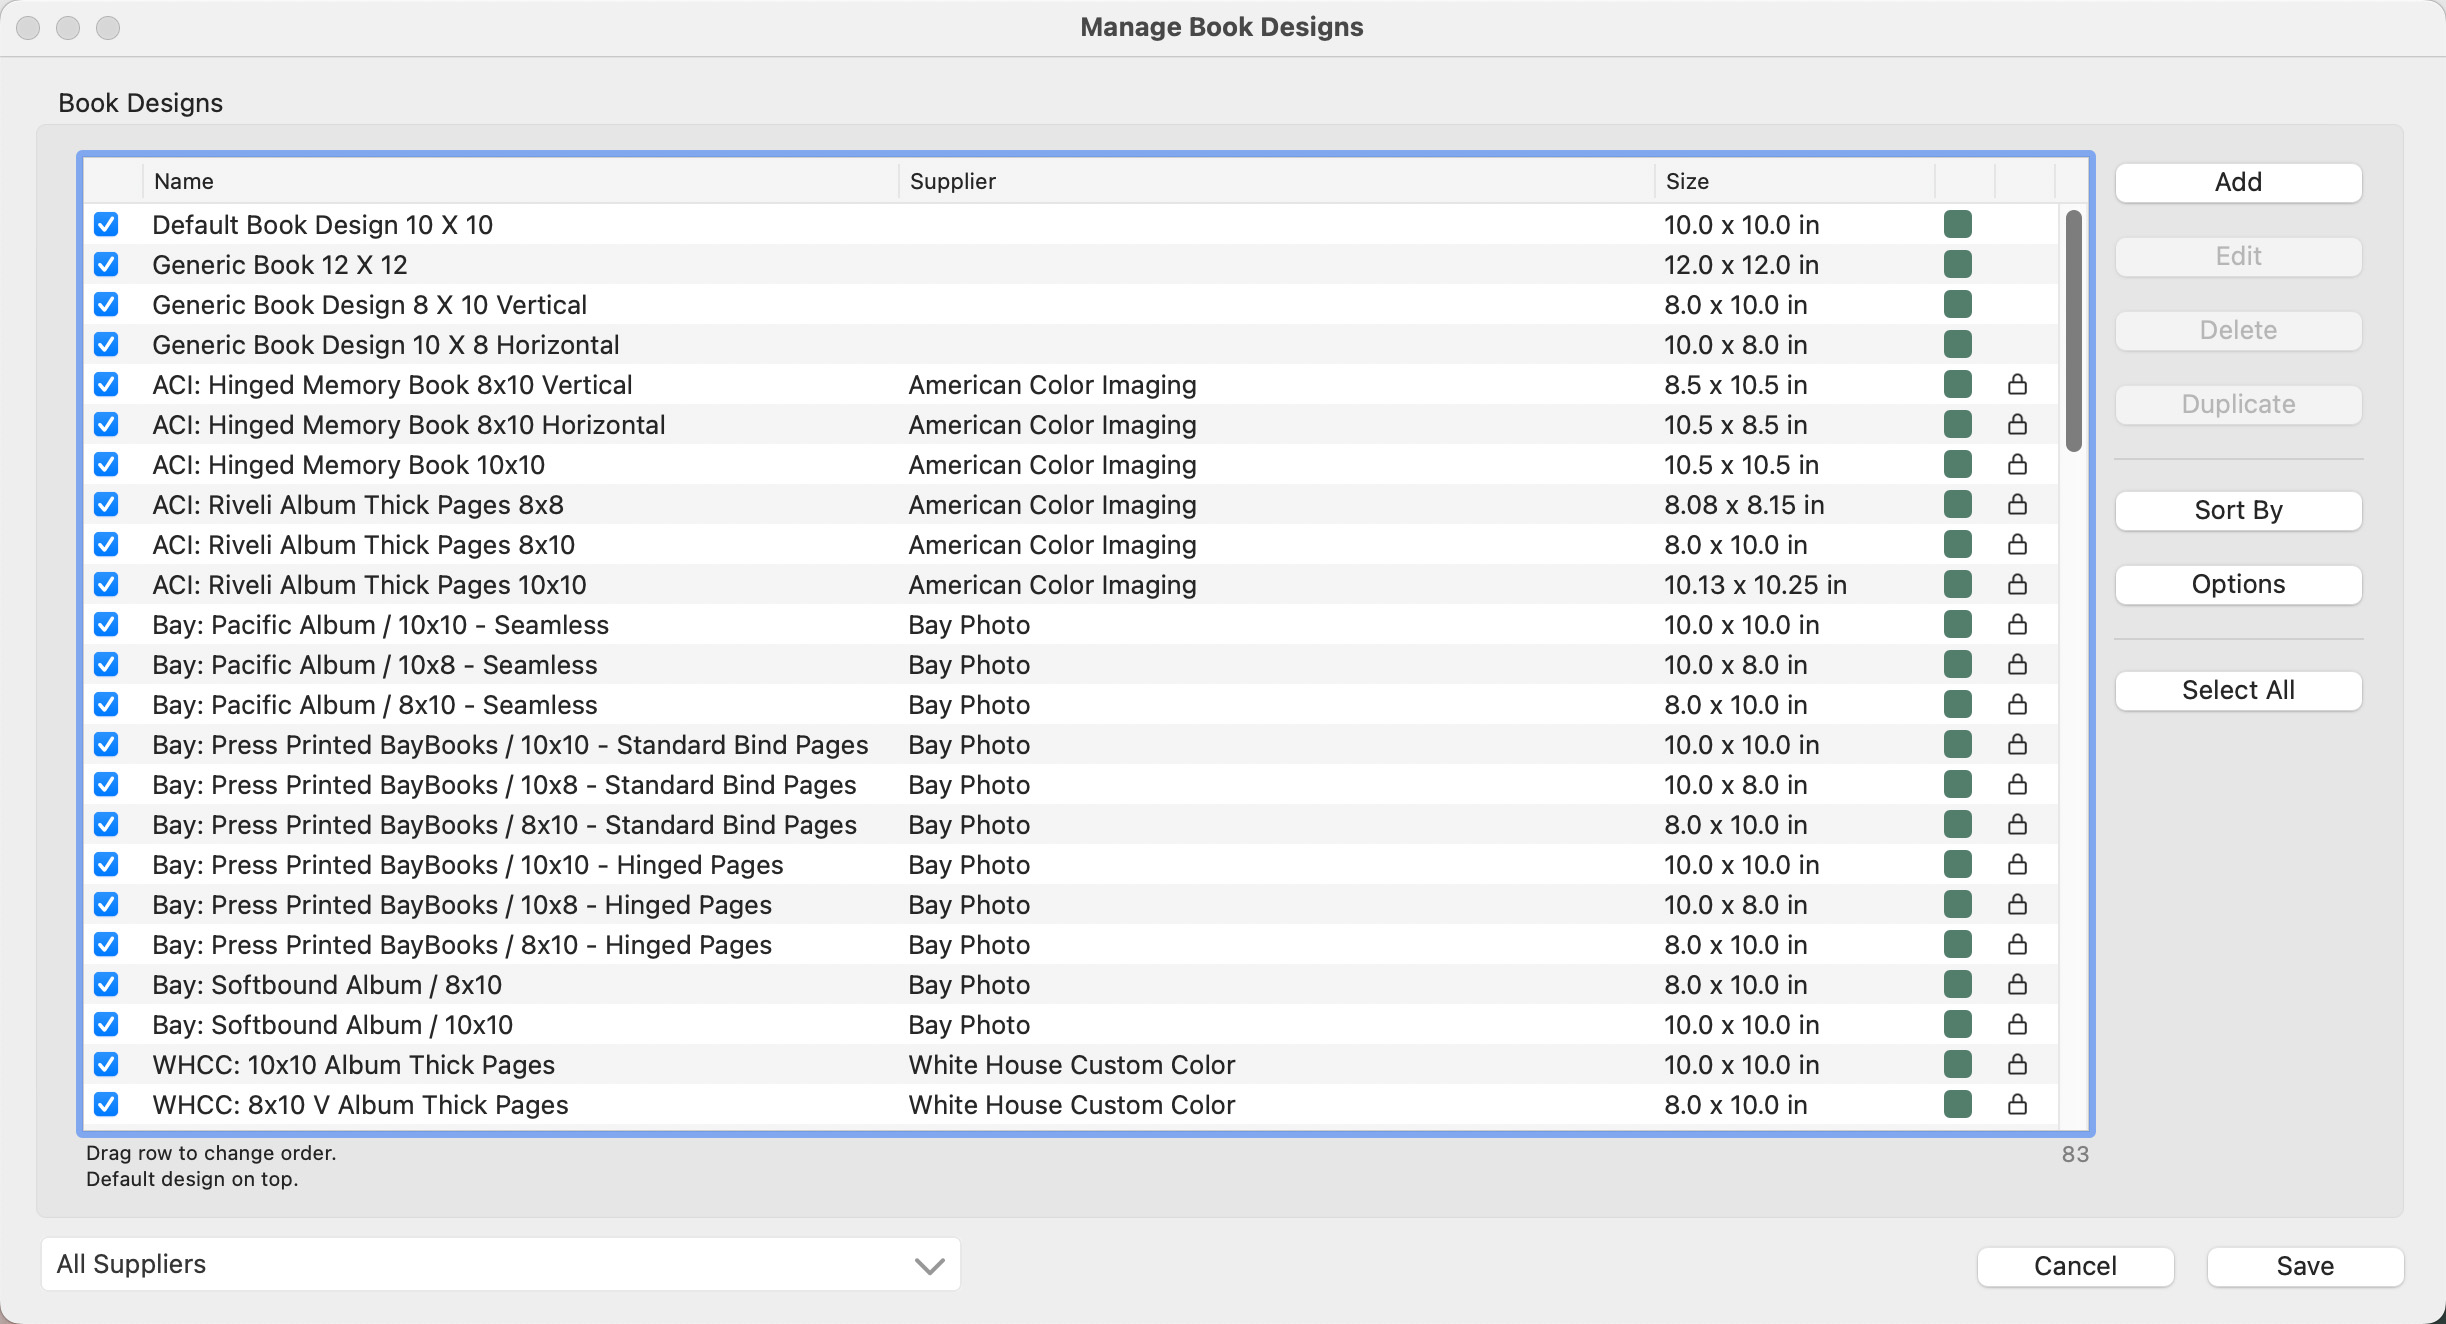
 : This checkbox indicates that the book design is "turned on" and available. Uncheck this box if you do not wish to offer this particular book design.
- Name: The name of the book design.
- Supplier: This column indicates the Supplier if one has been assigned.
- Size: Overall size of the book.
 Composite Book Design.
 Traditional Matted Book Design.
 Lock: This particular book is from a Supplier Collection and cannot be modified.
- You can change the order of the book designs by selecting a row and dragging it to where you want it to be.
- Filter by Supplier: Use the drop-down list at the bottom of the dialog to view only book designs by a specific supplier.
Manage your book designs by using the Add, Edit, or Duplicate buttons.
- Add: Create a new book design.
- Edit: Modify an existing book design. Book designs from Supplier Collections are locked and cannot be modified (except for the name). This restriction is in place to maintain the integrity of the supplier's specifications, ensuring that the designs conform to their production standards.
- Duplicate: Use the duplicate button to create a new book design similar to an existing one. This can save time.
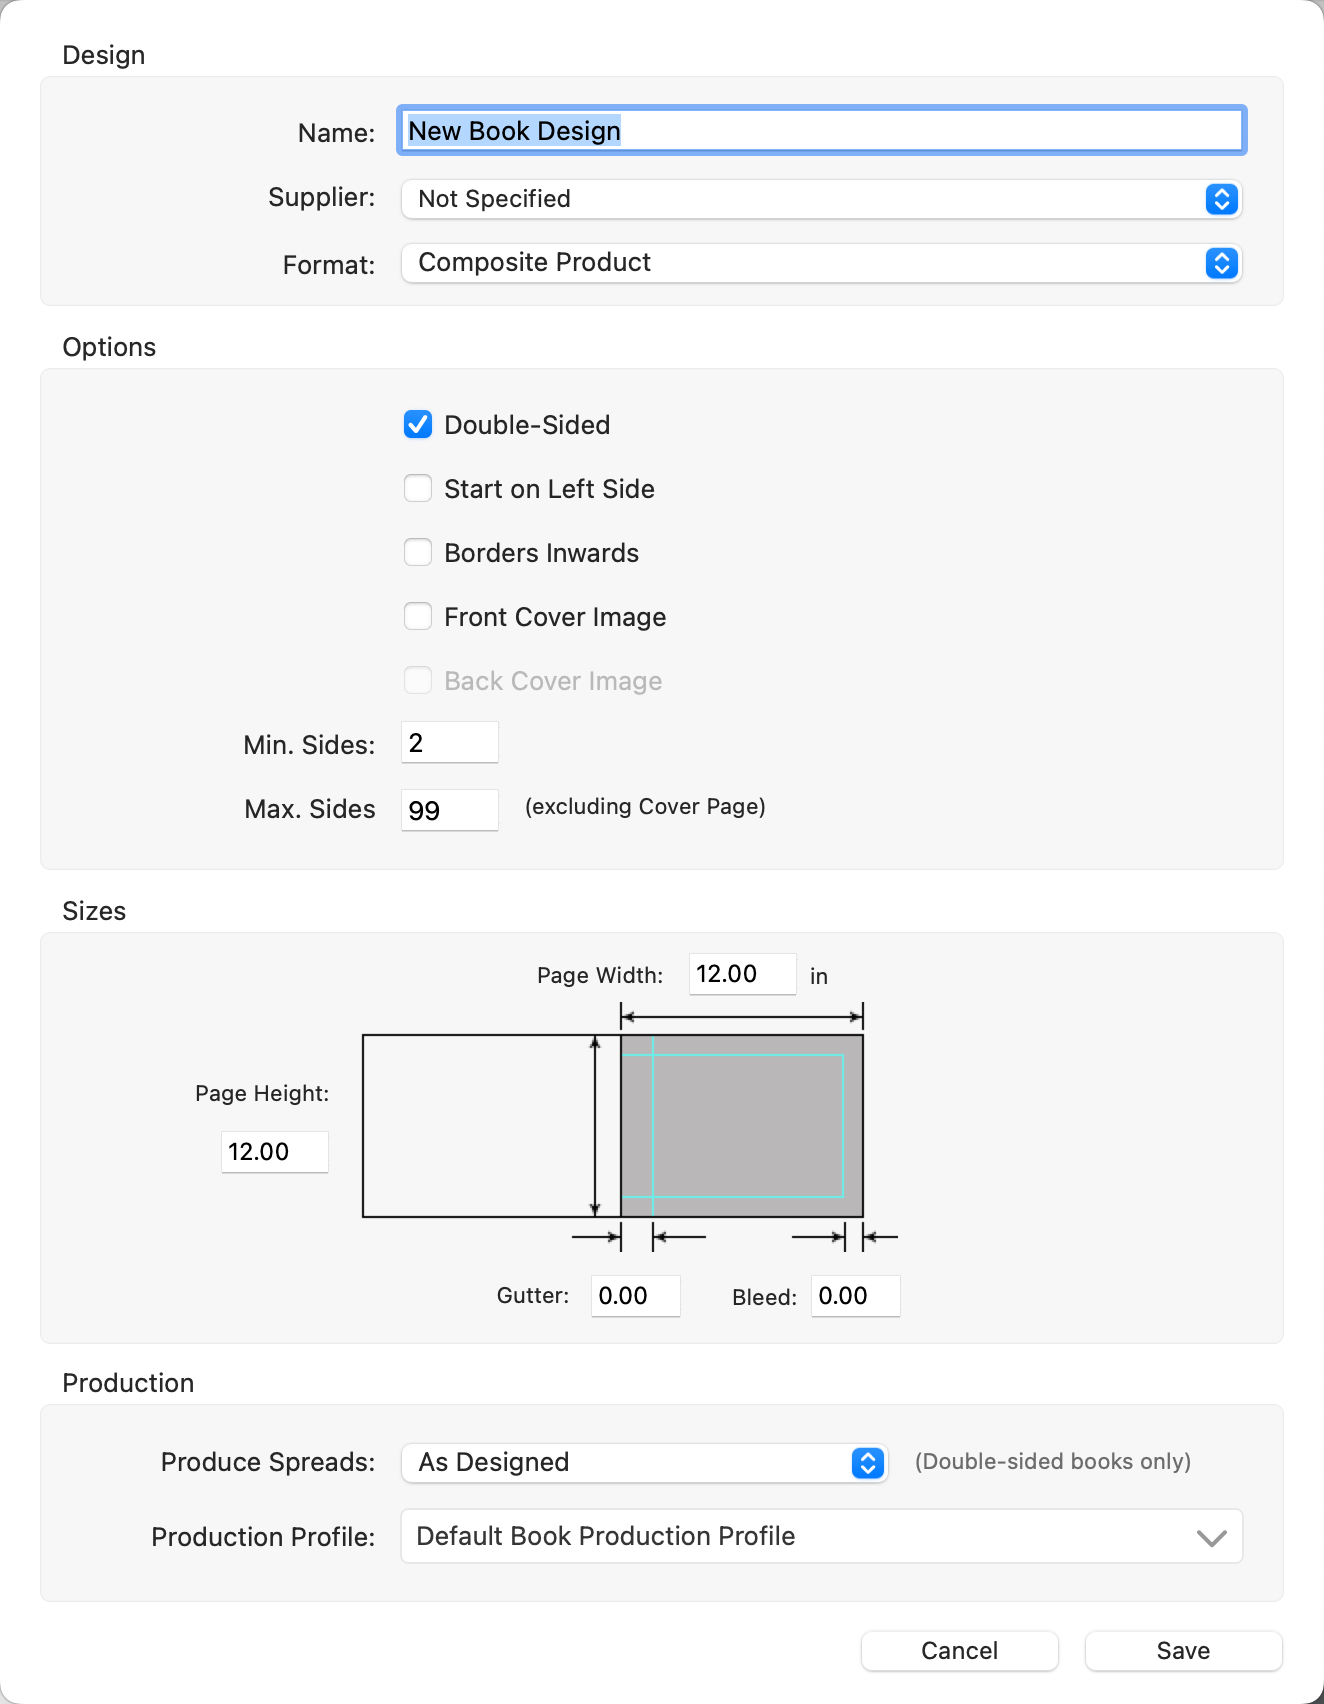
Design
- Name: Type in a name for the book design.
- Supplier: Optionally attach a supplier to the book.
- Format: Choose between Composite or Traditional Matted.
Options
- Double-sided: Check the box for double-sided books.
- Start on Left Side: Check the box if you wish the design to start on the left-hand side. By default, this is not checked. Most books begin on the right.
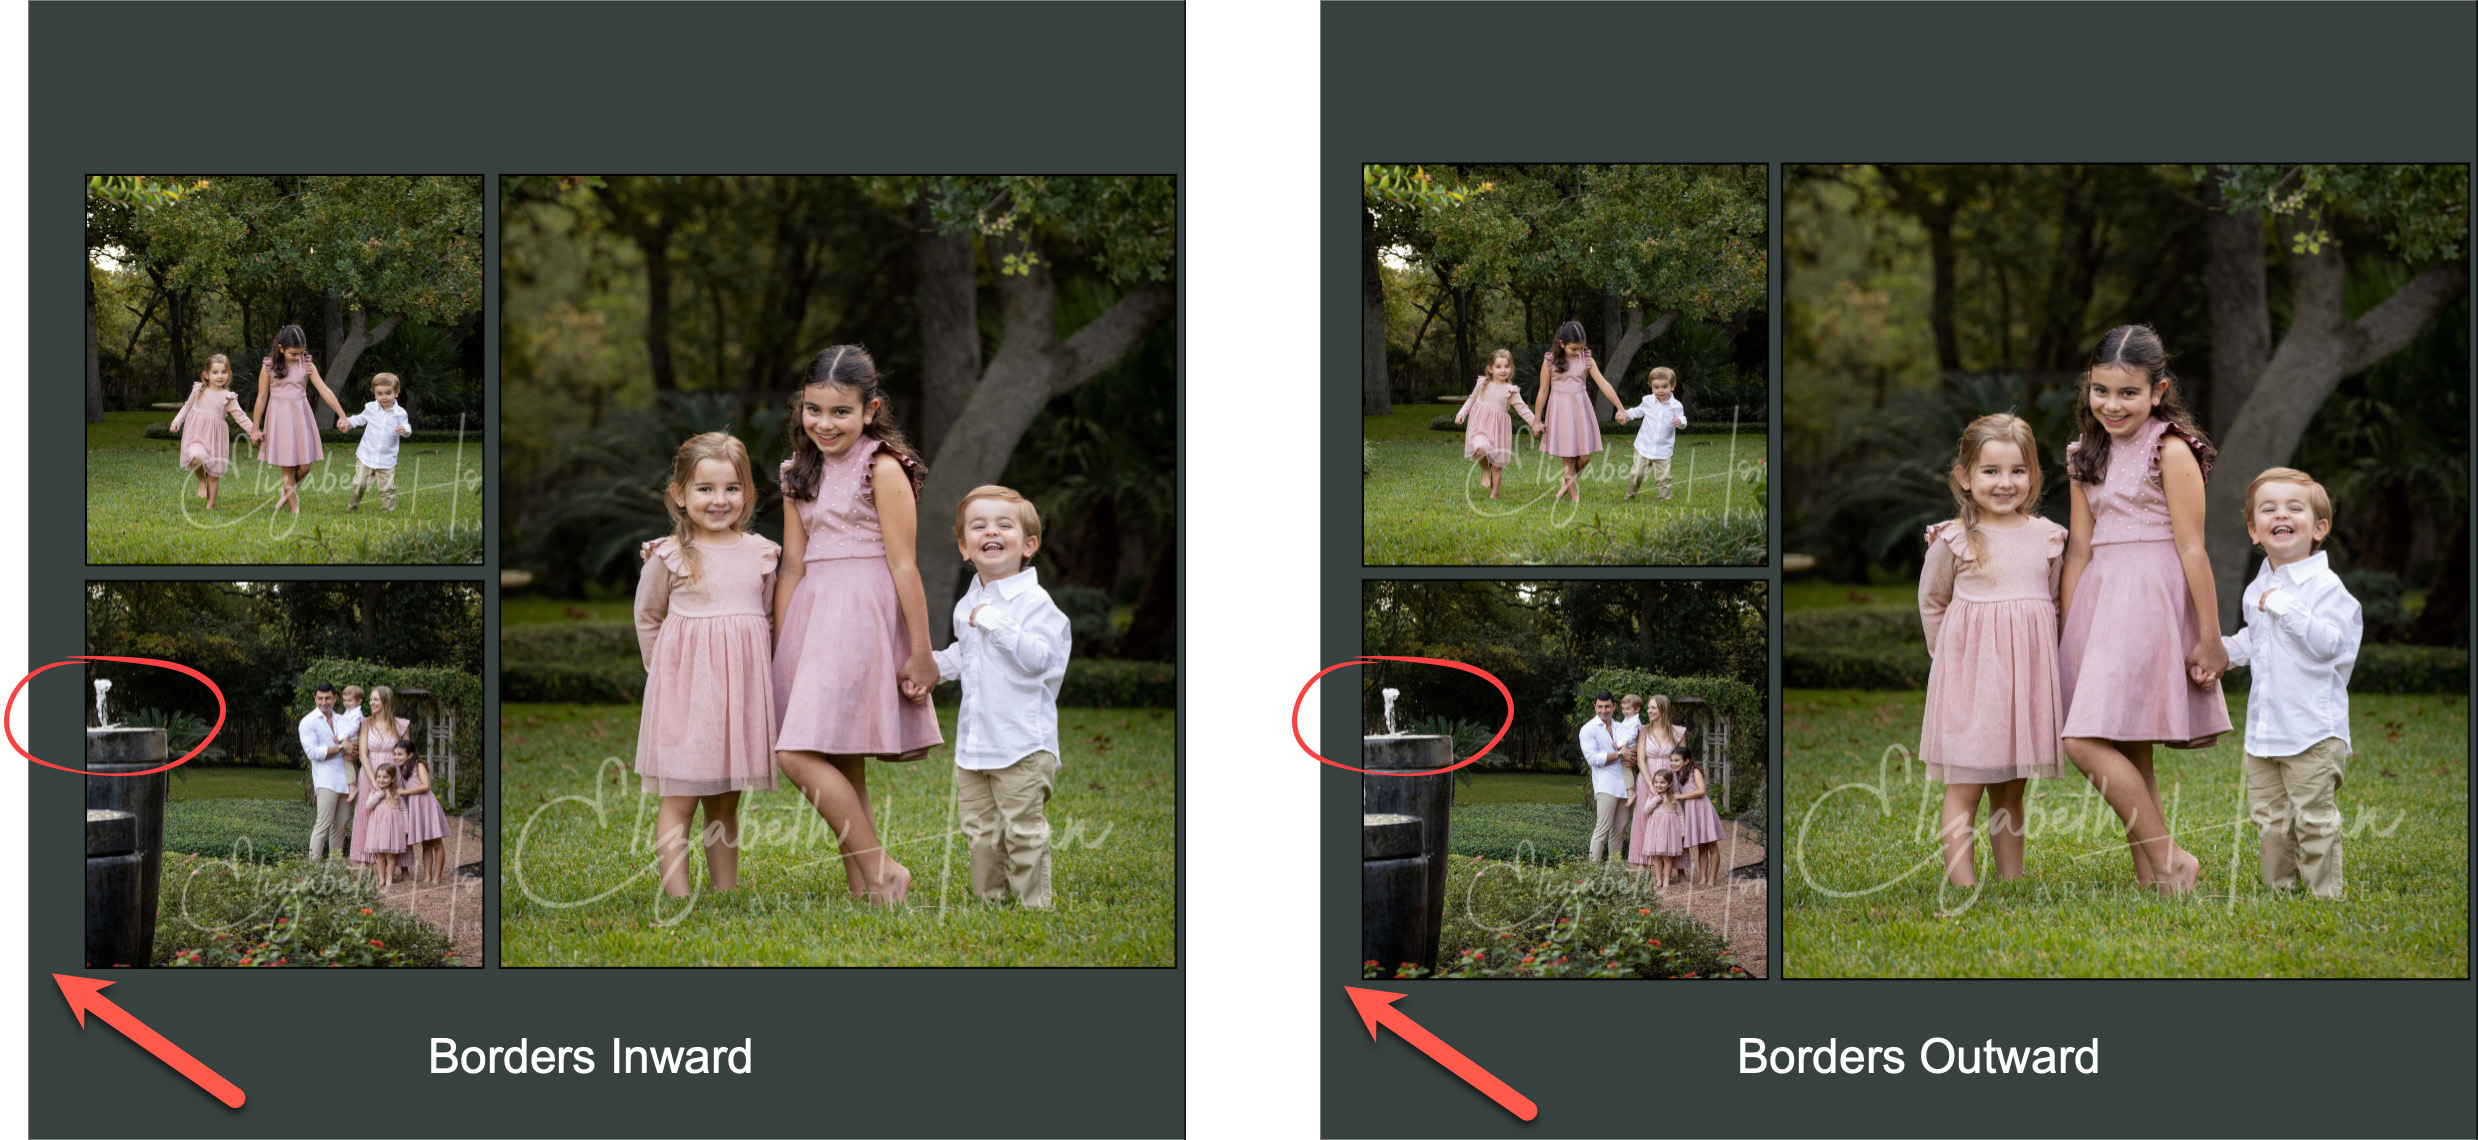
- Borders Inwards (Composites only): By default, all book designs are "Borders Outwards." Check the box to force all openings to "Borders Inwards". Read more about border direction here. You can also right-click on an image when Working with Books to switch the border direction.
- Front/Back Cover Image: Check the boxes to allow for a cover image.
- Min/Max Sides: Enter the minimum and maximum number of pages allowed (generally stipulated by a supplier).
Sizes
- Enter the page height and width.
- Add in a Gutter or Bleed amount (Composites only).
Production
Produce Spreads: This determines how double-spread pages are handled during Pro Production. There are three options available:
- As Designed: This option will produce the pages just as they appear in your book layout, including a mix of single and double-spread pages.
- Split Double-Spreads: This setting splits any double-spread pages into two separate pages. The filenames for these split pages will be appended with -A and -B to differentiate the halves of the original spread.
- Combine into Double-Spreads: This option merges single-spread pages into double-spread pages, effectively creating a larger page layout. This does not apply to single-sided, first, and last pages, which remain as individual single spreads.
Production Profile: The default book production profile will be selected. Optionally select an alternate Production Profile if desired.
The concept of bleed and gutter is important, especially for Composite books. Bleed refers to the additional area that is trimmed off during the book's production, ensuring that images and design elements extend right to the edge of the page. The gutter is the central part of the book that becomes less visible due to binding. It's important to ensure that no critical elements of your images fall within these areas to maintain their visibility.
For example, for a book that is 12 inches high and 14 inches wide, with a 0.25-inch bleed and a 0.5-inch gutter, the page dimensions should be set to 12.5 inches high (12 + 0.25 + 0.25) and 14.75 inches wide (14 + 0.5 + 0.25).
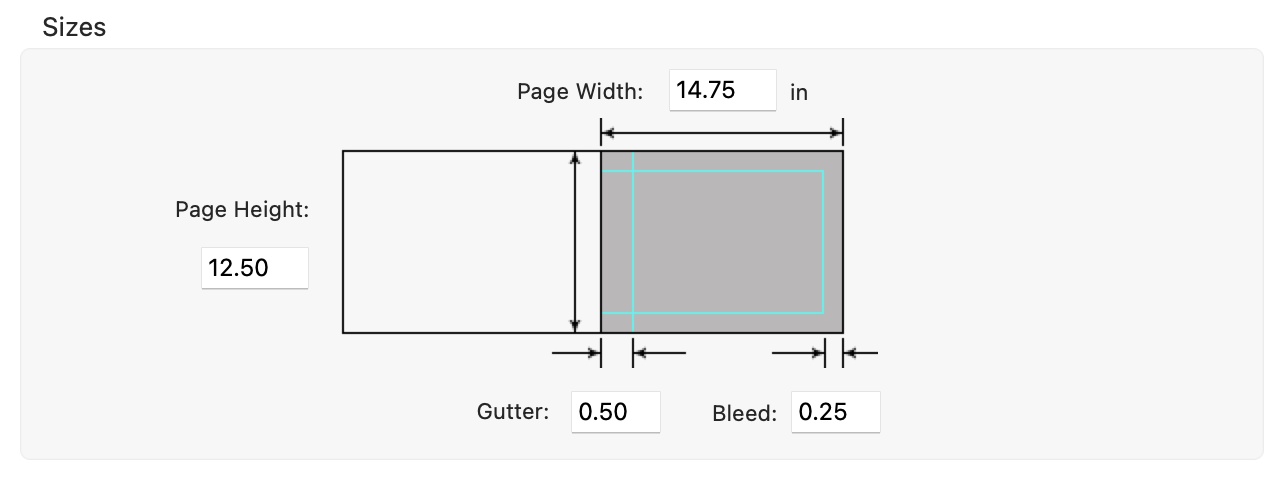
In Cropping view, bleed and gutter areas are shown by cyan lines, helping you visualize the final appearance of your book pages.

Manage Book Designs in a CSV File
- Export as CSV: Click on the Options button. Then, hold down the OptionAlt key while clicking "Export." You can manage Book Designs in a CSV file. This format is especially handy if you need to manipulate data in a spreadsheet environment. The exported CSV file includes a header line that explains the data required in each column, facilitating easier data entry or adjustments.
- Import a CSV file: Click on the Options button. Select "Import .CSV"
Handling CSV Files
- Header and Notes: The first two lines of the CSV file can be used for headers or notes and will be ignored during import if they contain no valid data. This allows for organized data management and annotation within the CSV file.
- Units of Measurement: The units used for all dimensions in the CSV file (inches or millimeters) are determined by the 'Working Units' setting. Adjust this by going to the top menu, ProSelectEdit > Settings > General Settings > General Defaults.
- Additional Export/Import Options:
- XML Format: Apart from CSV, Book Designs can also be exported in XML format. All imports, however, must be .CSV.
-
Export Collection: For distributing Book Designs along with templates or other resources, it’s recommended to use the "Export Collection" option under the Products menu. This method packages all items together into a single, easy-to-import file, ensuring a streamlined transfer or backup of multiple resources.
If you begin working on a book in ProSelect, and then make changes to the book design, the changes are not applied to that specific project. This restriction is in place to prevent unintended alterations to books that are already in progress or completed. However, if you modify a book design, these changes will be reflected in any new books that are created using the updated design. This approach ensures that your edits enhance future projects without disrupting existing ones.
When applying a virtual style to a book page (Composite books), you can choose how the borders are positioned: either inwards, which reduces the image size within the frame, or outwards, maintaining the image size. The default setting for border direction is defined in the Book Design and is set to apply borders inwards.
- You can also right-click on an image when Working with Books to change the border direction.
- Note that for Traditional Matted books, borders are only applied outwards, and this setting cannot be changed.
Important Note
Use caution when applying complex virtual styles. In some cases, the applied virtual style can create unwanted overlap. If this occurs, change the border direction to "Inward."