 Selling Via Zoom
When in-person meetings aren't possible, Zoom offers a practical alternative for remotely conducting ordering sessions. By sharing your screen via Zoom, you can display images, products, rooms, and slideshows, ensuring clients have a clear and interactive viewing experience just as they would in a studio visit. This setup supports both single and dual-monitor systems, ensuring a flexible and professional presentation environment from any location.
- Another computer, external monitor, projector, or TV can serve as your Presentation Screen while holding order sessions over Zoom.
If you are not showing images in actual size on a large screen or are only selling via Zoom, set your calibration to 12” to 14”. With that, you can show wall portraits with frame detail in Actual Size View. Keep in mind, they will not be actual size, but visually appealing.
Sharing with Two Monitors or a Projector (Preferred Method)
- Prepare Display: Ensure your second monitor or projector is powered on and connected.
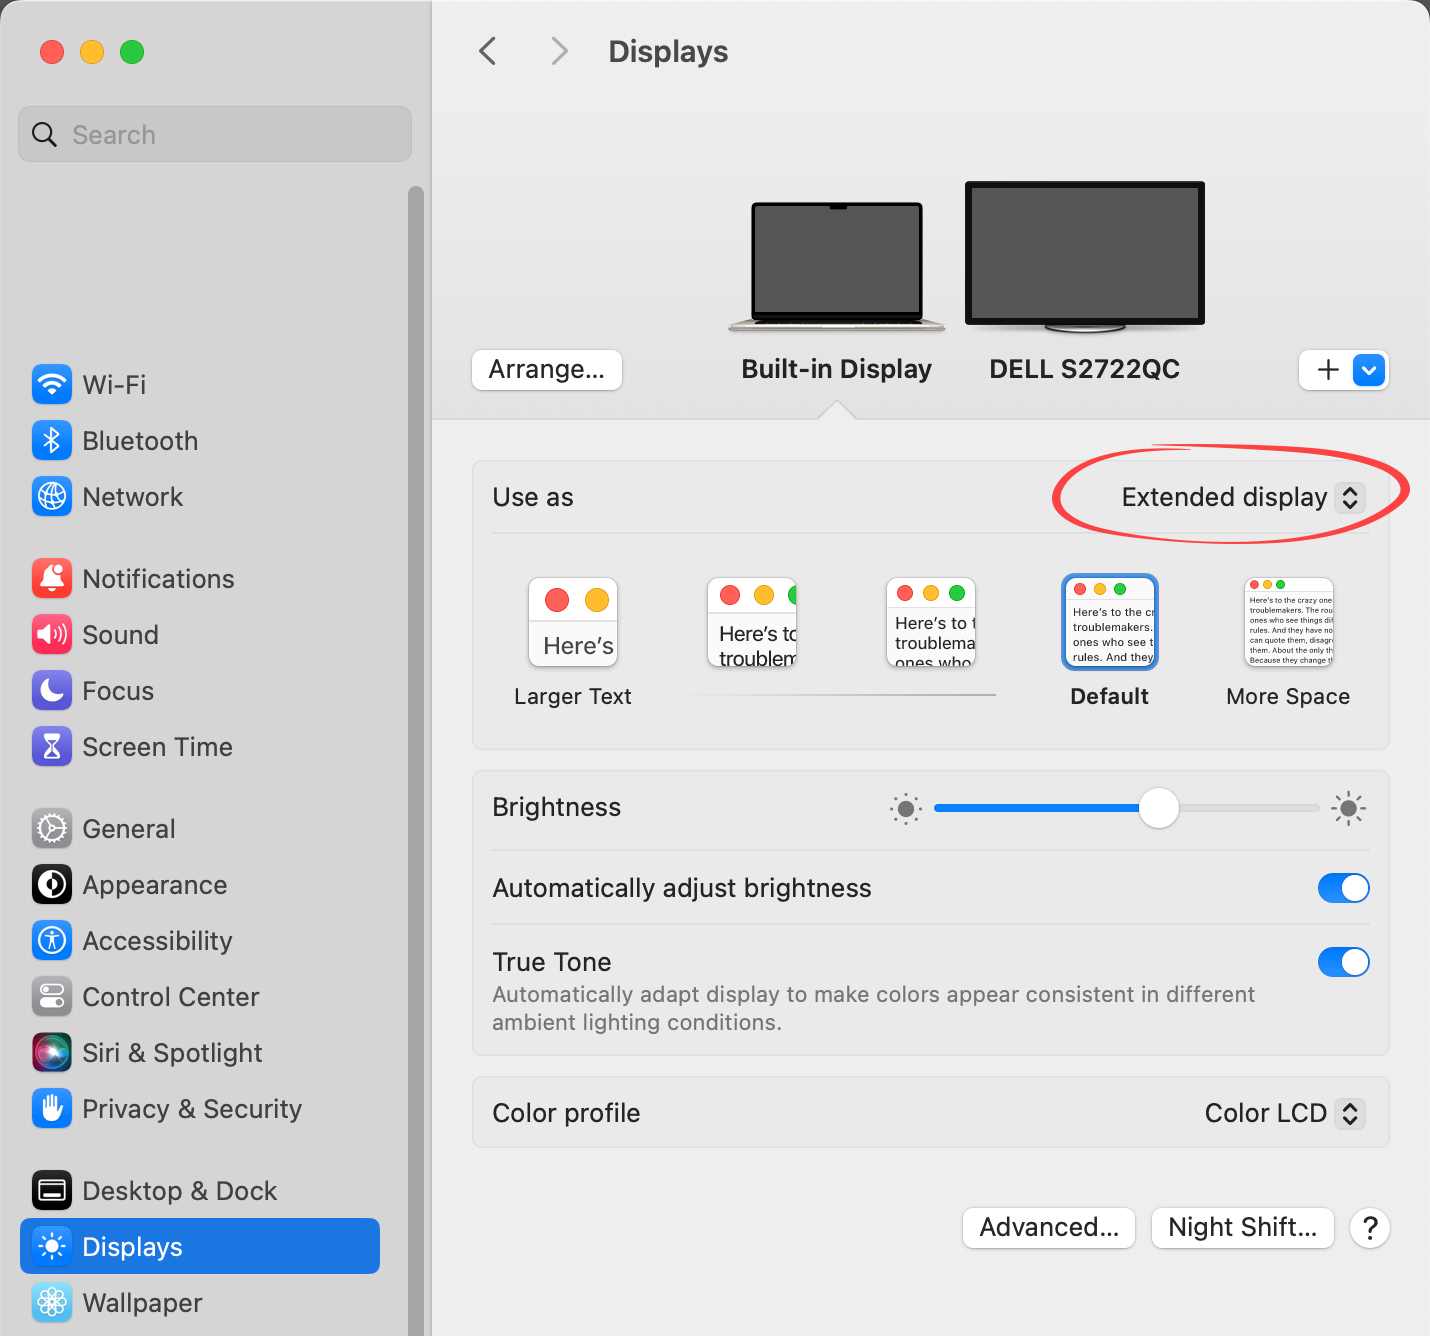
- Extend Desktop: Set your display settings to "Extended Display" (not mirrored).
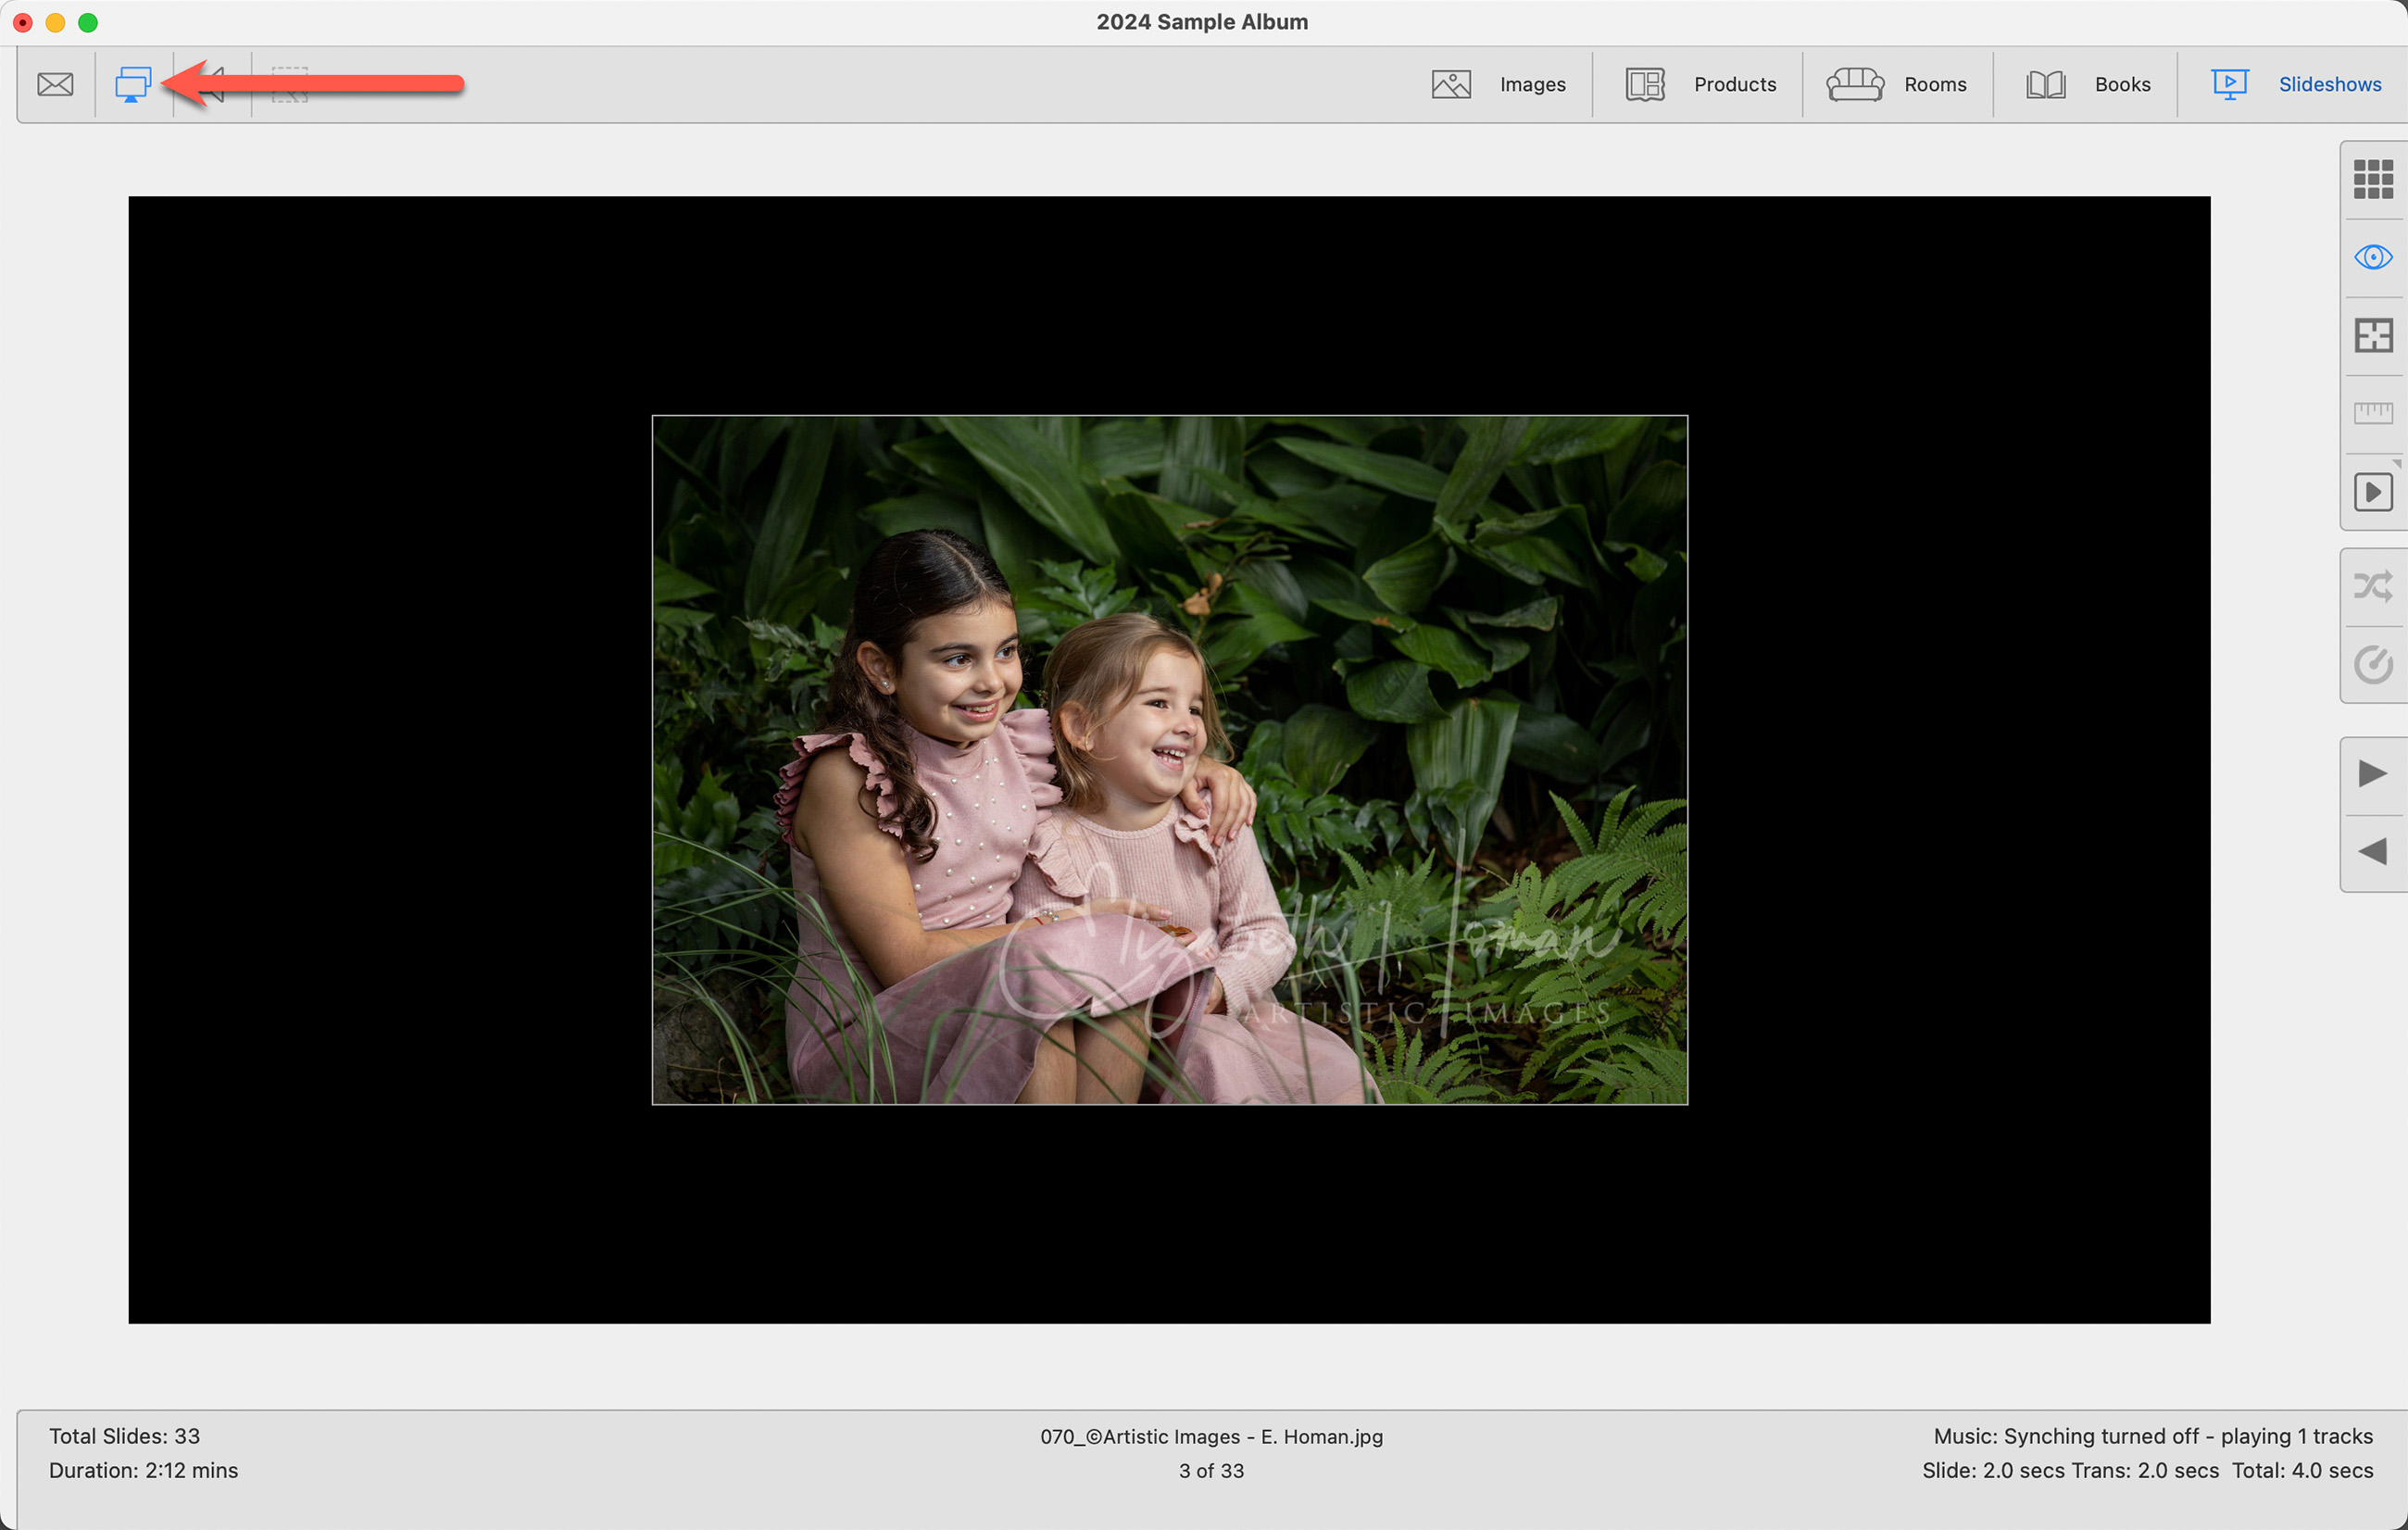
- Turn on Presentation Mode: In ProSelect, click on the Presentation Mode button
 .
.
- Update and Launch Zoom: Ensure that you are running the latest version of Zoom.
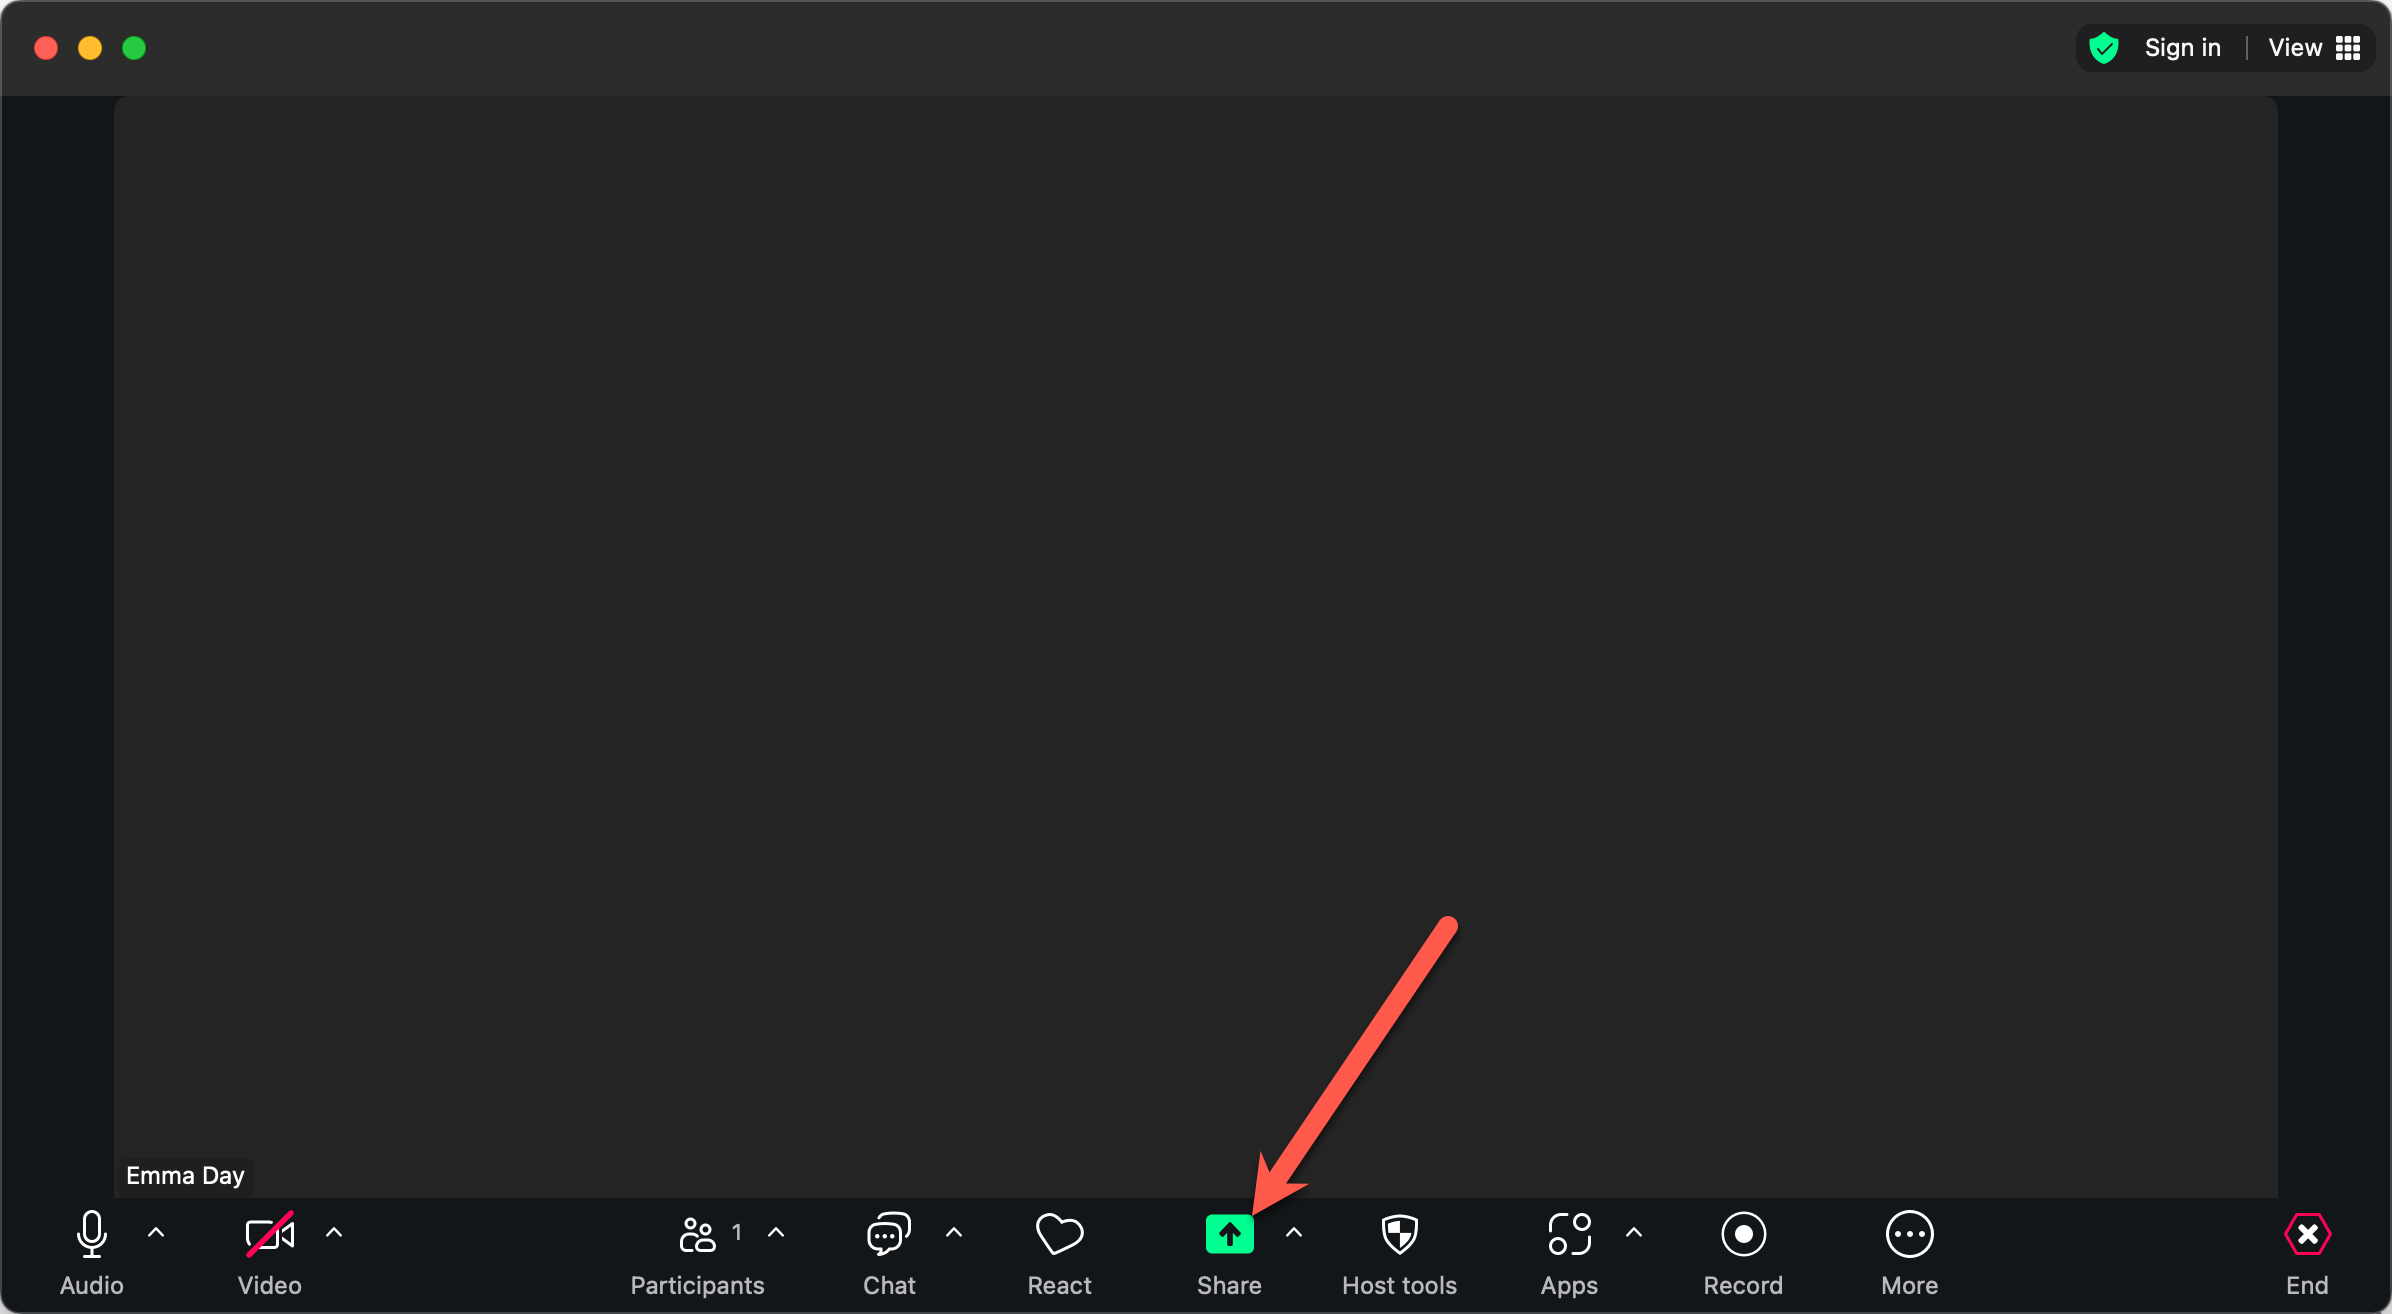
- Share Screen: When ready to share, click "Share" in Zoom.
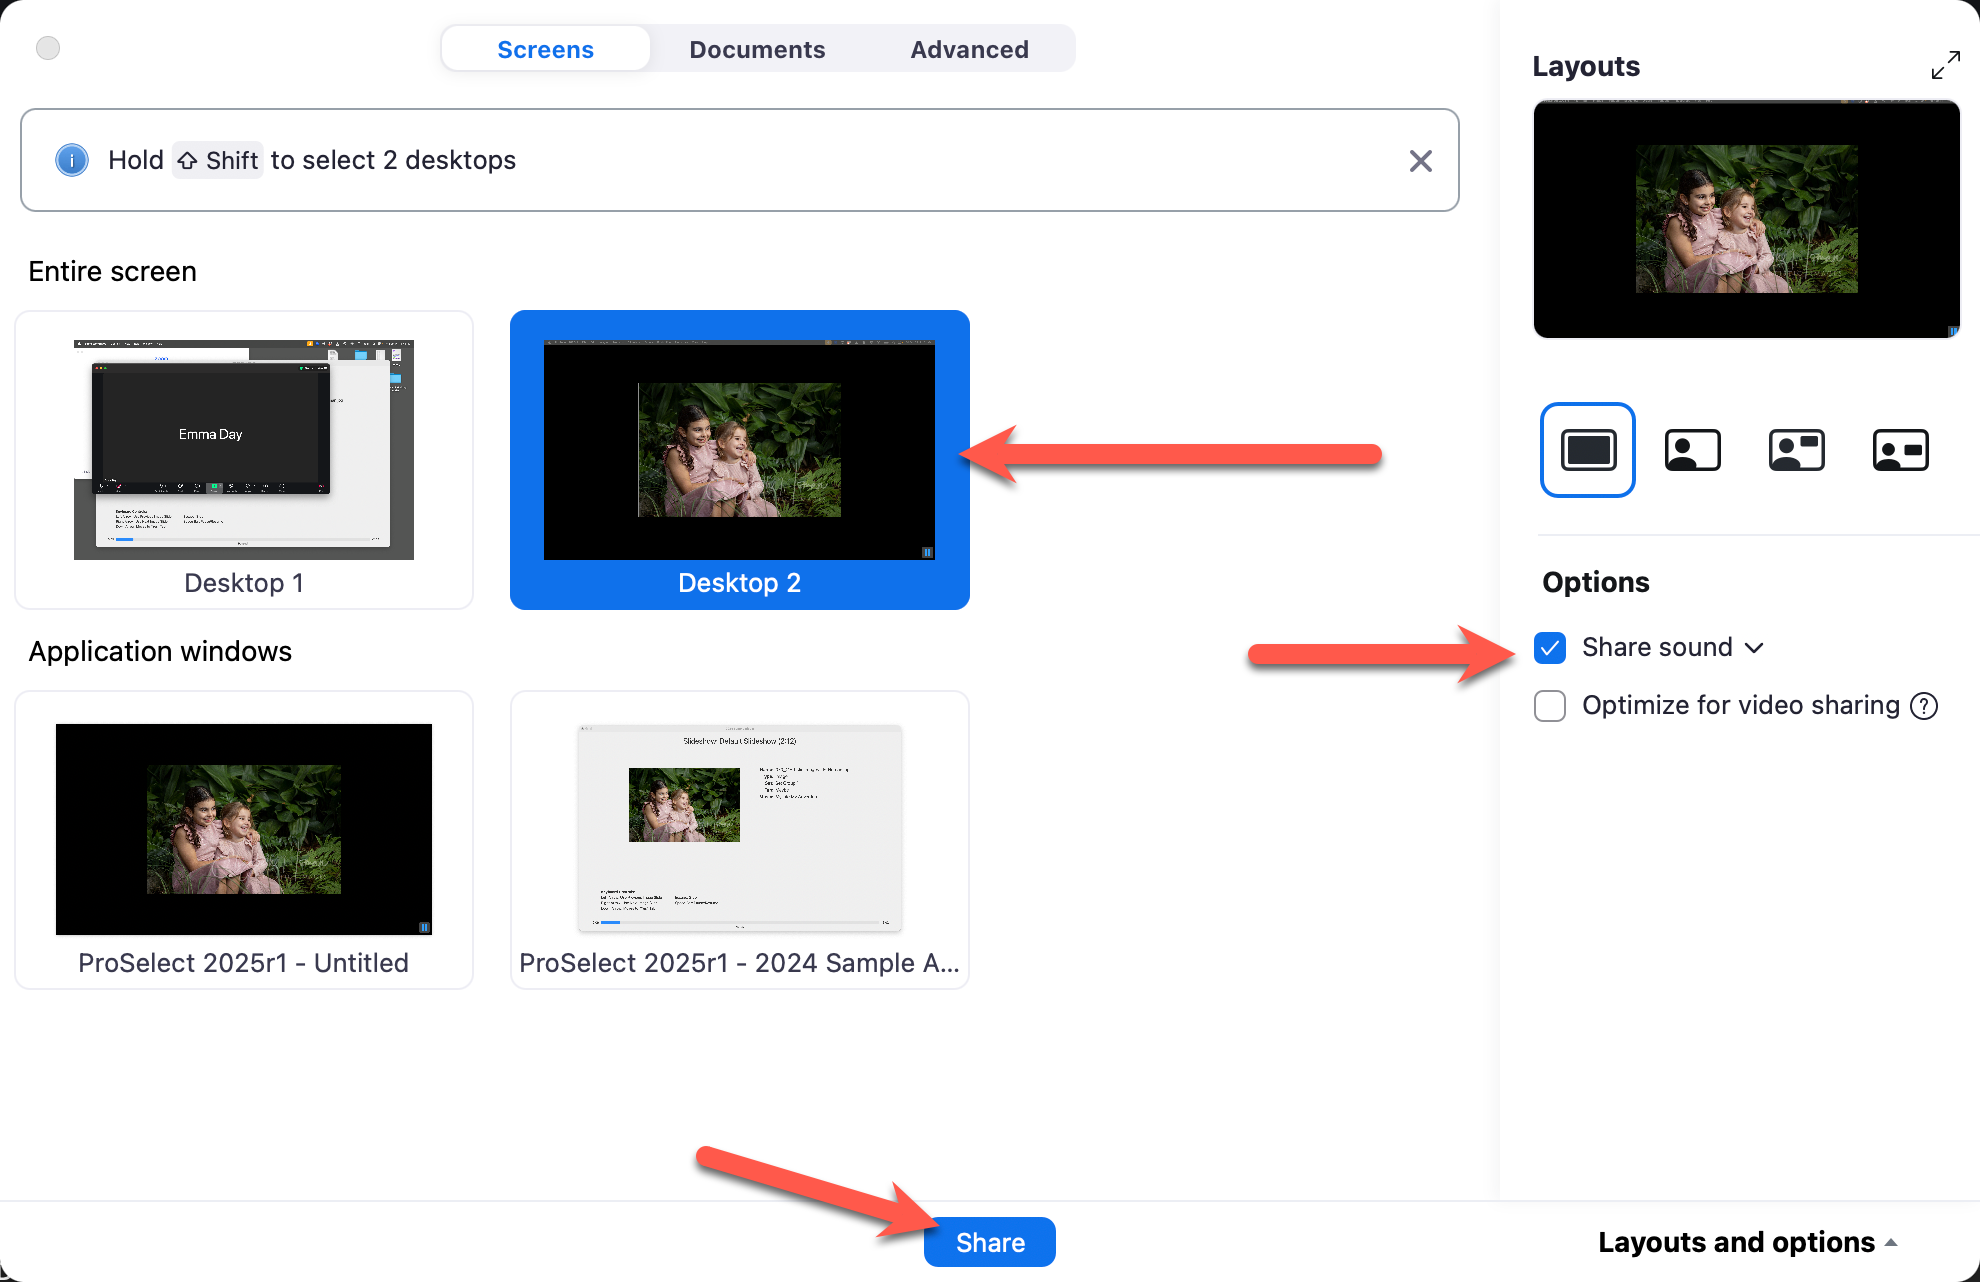
- Select "Desktop 2".
- Optimize Sound: In the Options area, check the "Share Sound" option.
- Click "Share".
- Your client will now see the Presentation Screen.

Sharing with a Single Monitor
- Update and Launch Zoom: Ensure that you are running the latest version of Zoom.
- From Zoom, go to Zoom Workplace > Settings > Share Screen.
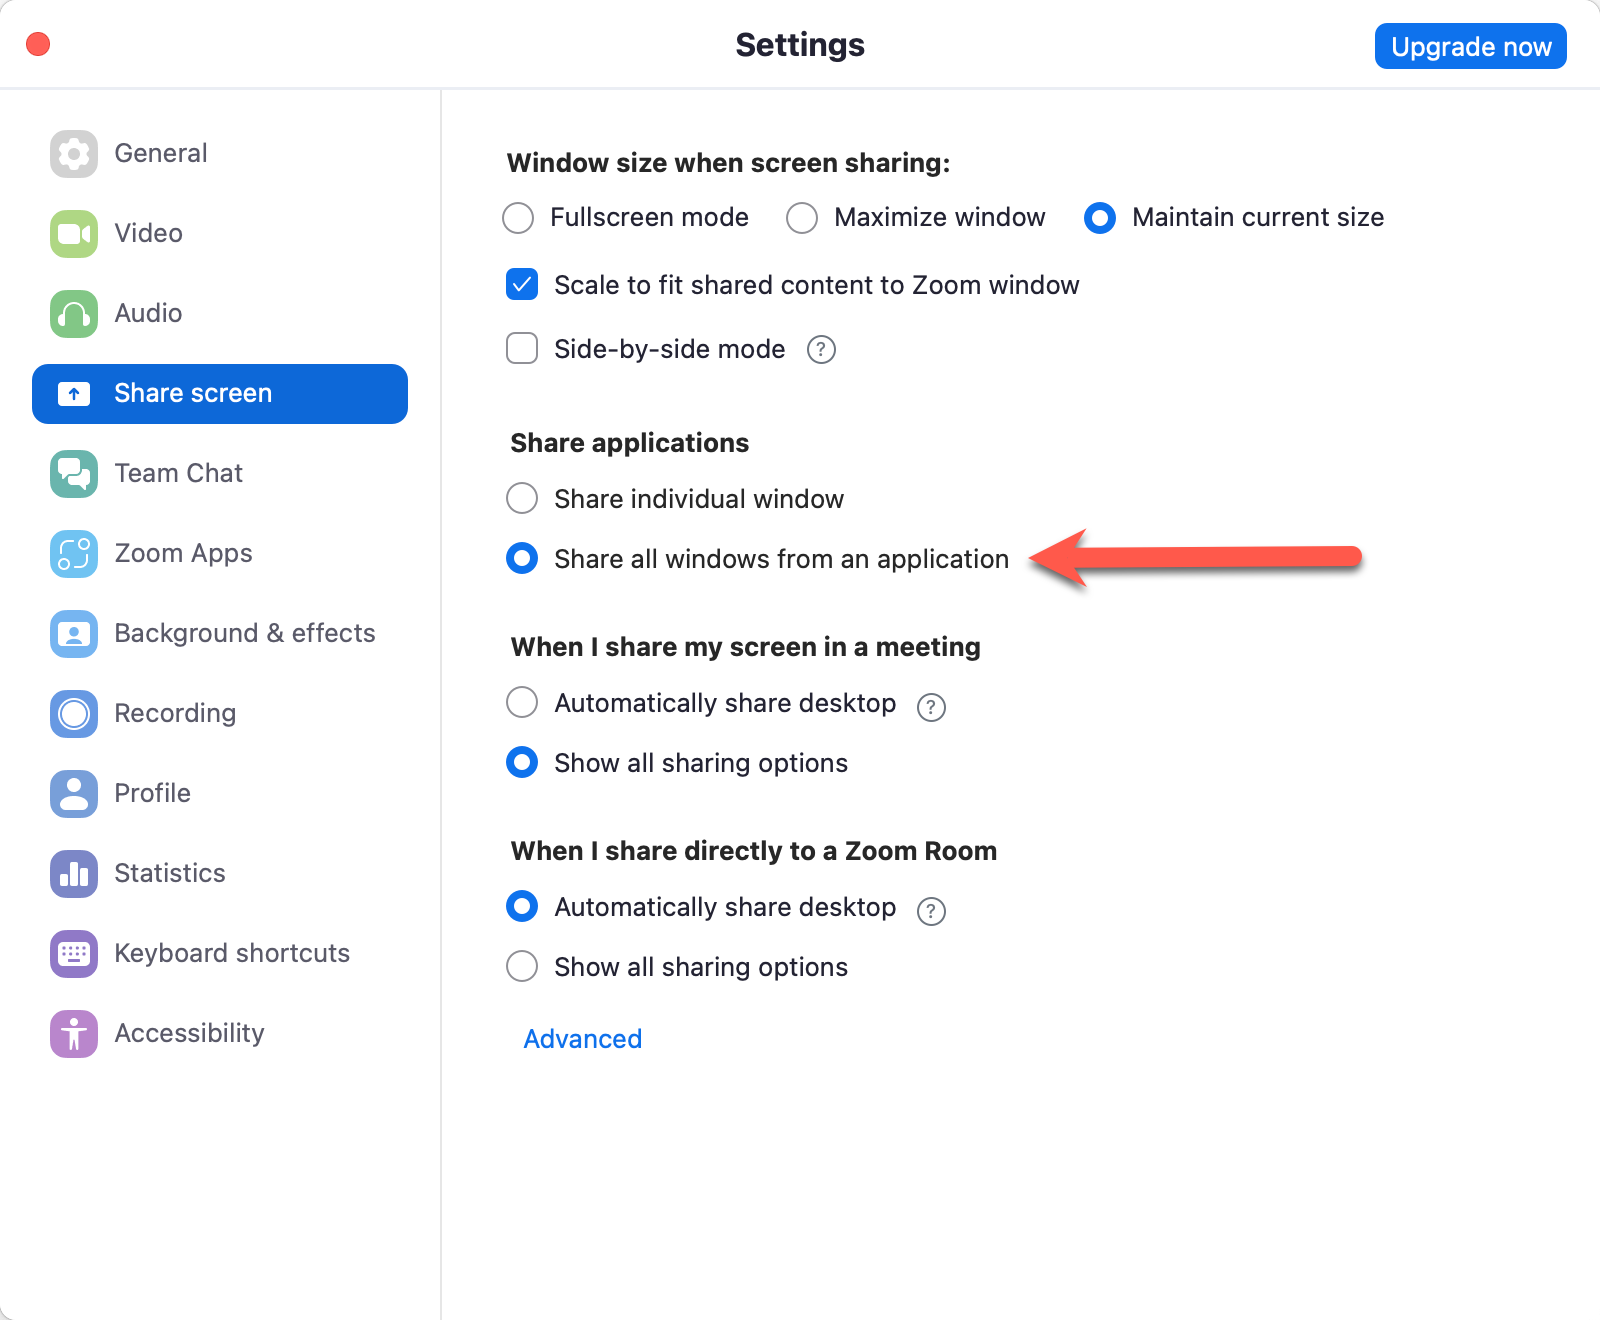
- Check the "Share all windows from an application" box. Exit out of Settings.
- Share Screen: When ready to share, click "Share" in Zoom.
- Select the ProSelect application window.
- Optimize Sound: In the Options area, check the "Share Sound" option.
- Click "Share".
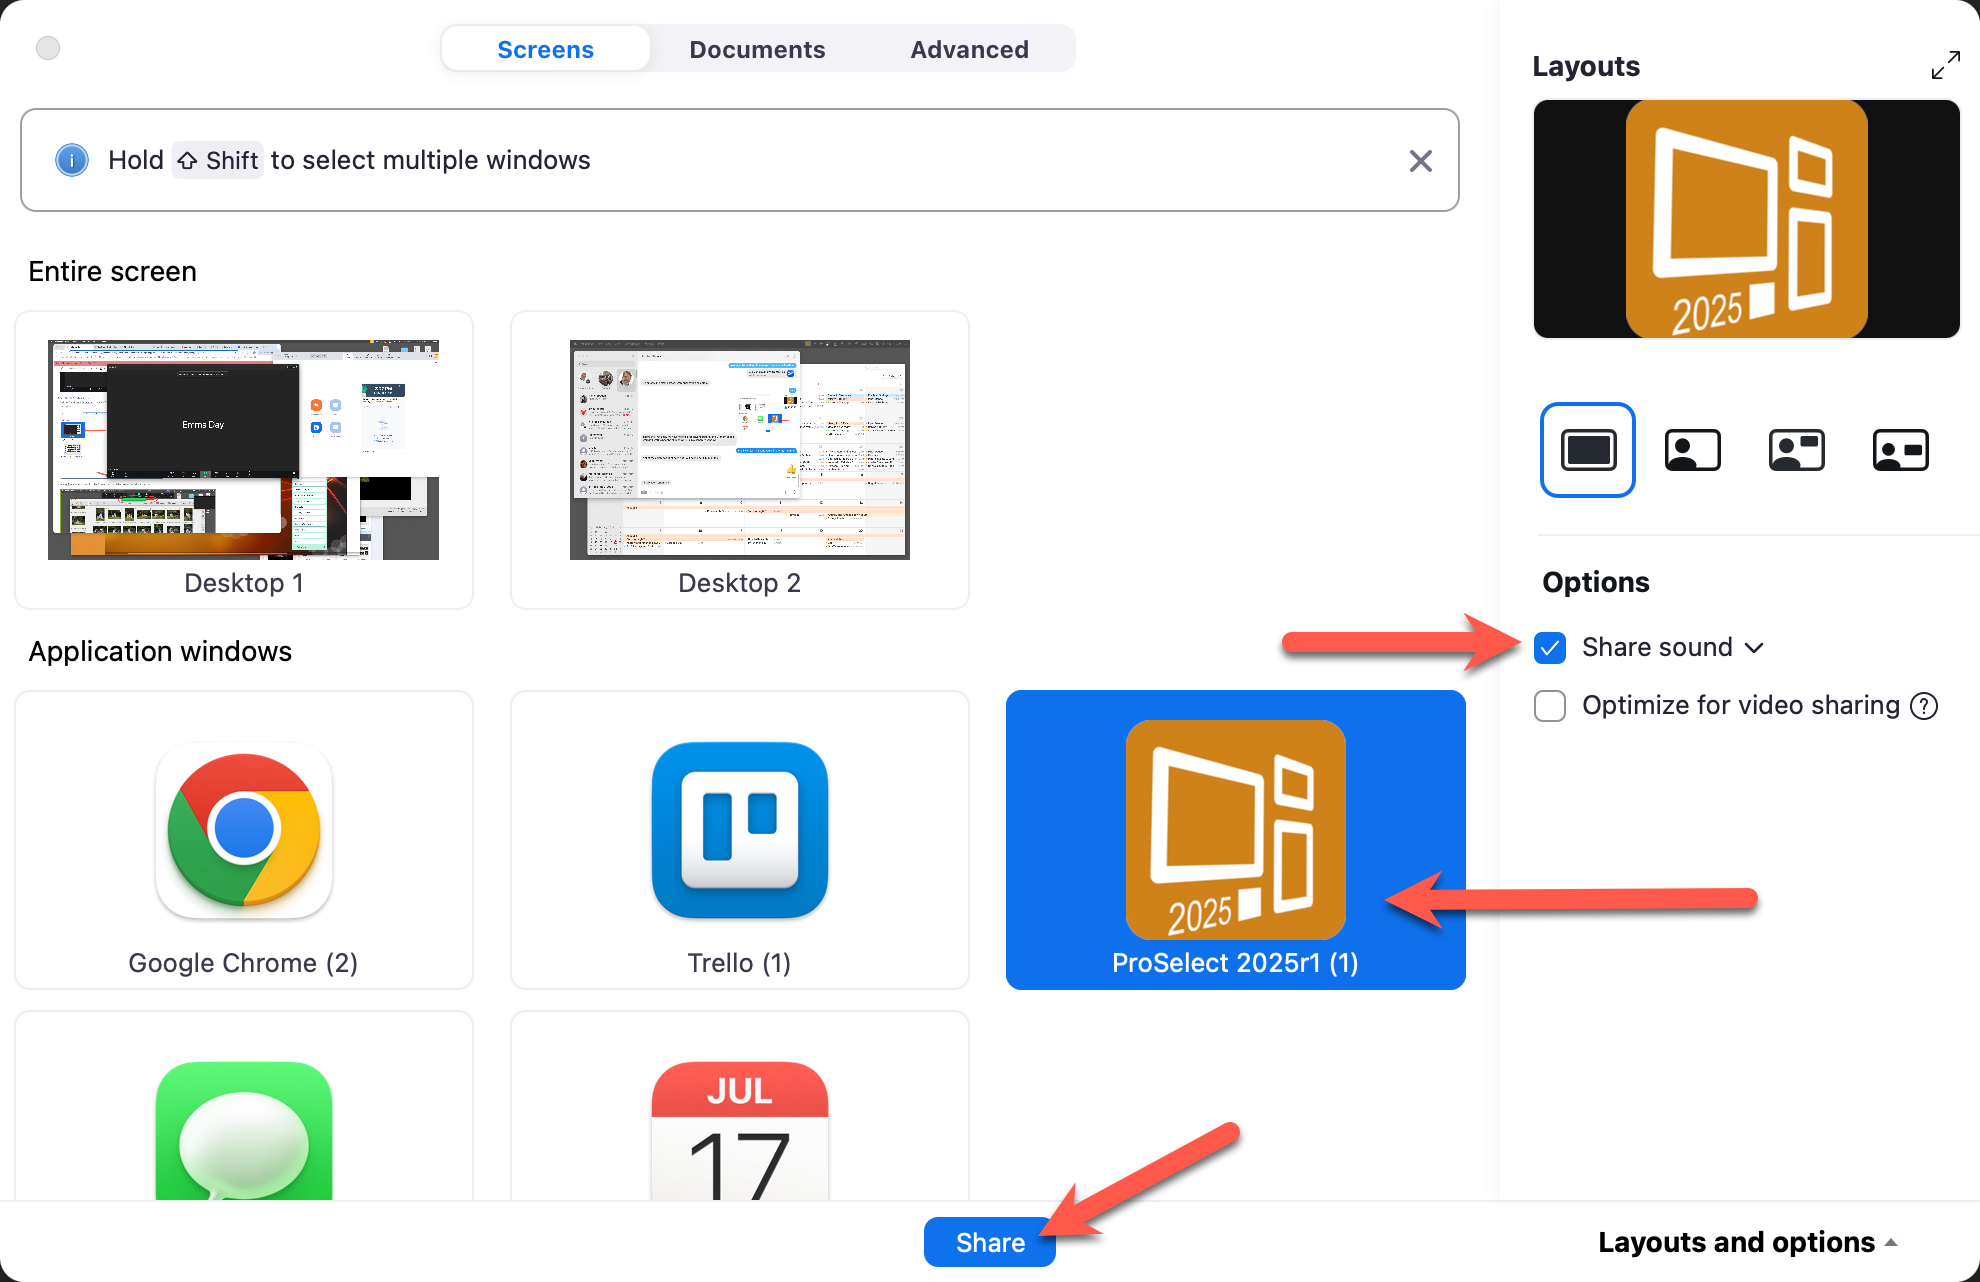
- Only ProSelect and any slideshows you run will be visible to your client. The application will have a green line surrounding it indicating it is being shared.

Sharing with a Single Monitor
- Update and Launch Zoom: Ensure that you are running the latest version of Zoom.
- Screen Selection: When you choose to share your screen, select the "Screen" option in Zoom.
- Optimize Sharing: In the sharing dialog, check both "Share Sound" and "Optimize for Video Sharing."
- Click "Share".
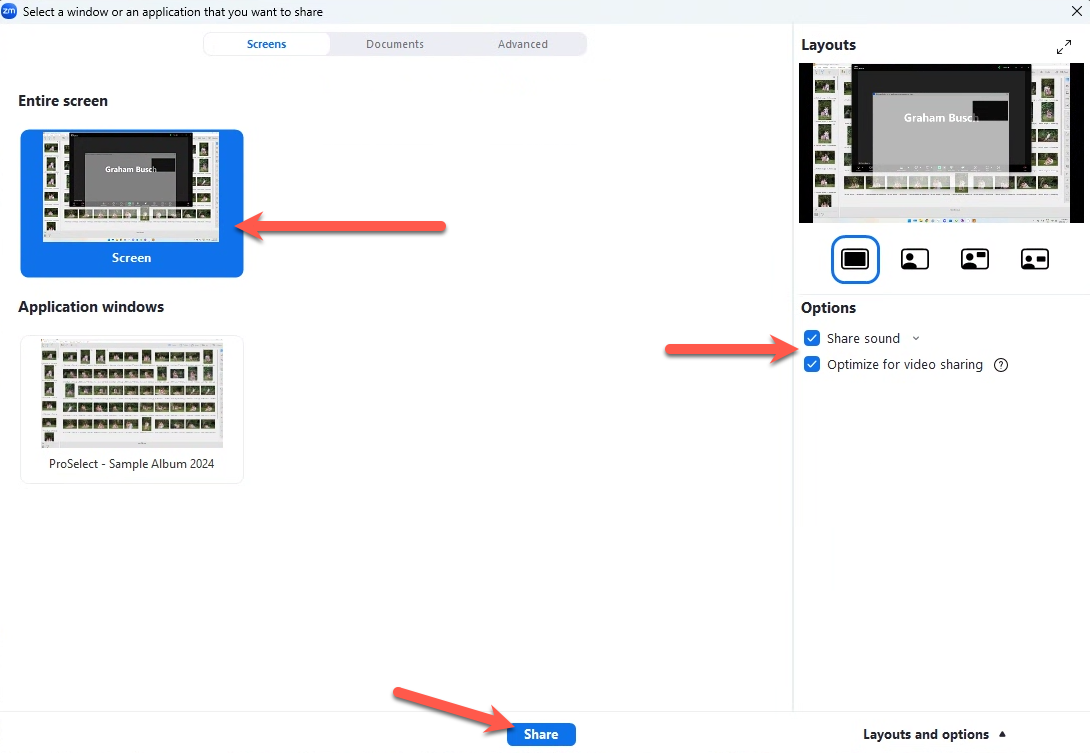
- Your entire computer screen, including ProSelect and any slideshows, will be visible to your client.
Sharing with Two Monitors or a Projector
- Setup Displays: Make sure your secondary monitor or projector is on and properly connected.
- Adjust Display Settings: Configure your display to extend across both screens.
- Turn on Presentation Mode: In ProSelect, click on the Presentation Mode button .
- Update and Launch Zoom: Ensure that you are running the latest version of Zoom.
- Share Screen: When ready to share, click "Share" in Zoom.
- Select "Screen 2".
- Optimize Sound: In the Sharing dialog, check both "Share Sound" and "Optimize for Video Sharing."
- Click "Share".

- Your client will now see the Presentation Screen.
In ProSelect, OpenGL technology is employed to enhance rendering speeds and enable advanced visual effects, such as the Ken Burns effects in slideshows. However, due to a recent Windows 11 update, these rendered images and effects may not transmit correctly over Zoom. This issue affects Slideshows in particular.
To resolve this issue, follow these steps:
- Open ProSelect and go to the top menu, Edit > Settings > Slideshow.
- Disable the "Use OpenGL" option.
Our testing confirms that turning off OpenGL allows Zoom to handle ProSelect slideshows smoothly without glitches. Note that deactivating OpenGL will also disable any Ken Burns effects in your slideshow. When sharing your slideshow via Zoom, remember to share your entire desktop instead of just the ProSelect window to ensure all content is visible to your audience.
This workaround should mitigate the current issues and maintain the functionality of your presentations through Zoom on Windows 11.
Allow Zoom Access to Your Camera
To control which applications can access your camera, follow these steps:
- Open System Settings on your Mac from the Apple menu.
- Click on Privacy & Security.
- Select Camera from the list.
- You will see a list of applications that have requested access to your camera. Toggle the switch next to Zoom to allow access.
- If you disable camera access for an app, macOS will prompt you to enable it the next time the app attempts to use the camera.
Allow Zoom Access to Your Microphone
Follow the same steps as for your Camera (above). Select Microphone from the list.
Allow Access for Screen Recording
This will allow Zoom to record your screen.
- Open System Settings on your Mac from the Apple menu.
- Click on Privacy & Security.
- Select Screen & System Audio Recording from the list.
- You will see a list of applications that have requested access to recording. Toggle the switch next to Zoom to allow access.