 Using Stacked Templates
Stacked sizing allows the populating of multiple products simultaneously. This feature is particularly useful when offering products in different sizes with varying aspect ratios. Wall groupings, for example, work best when stacked, as they can consist of small, medium, and large sizes. Stacked sizing is ideal for wall groupings that contain multiple images and transition from one size to another, such as going from a large (24x30) to a medium (20x24), where the aspect ratios differ slightly.
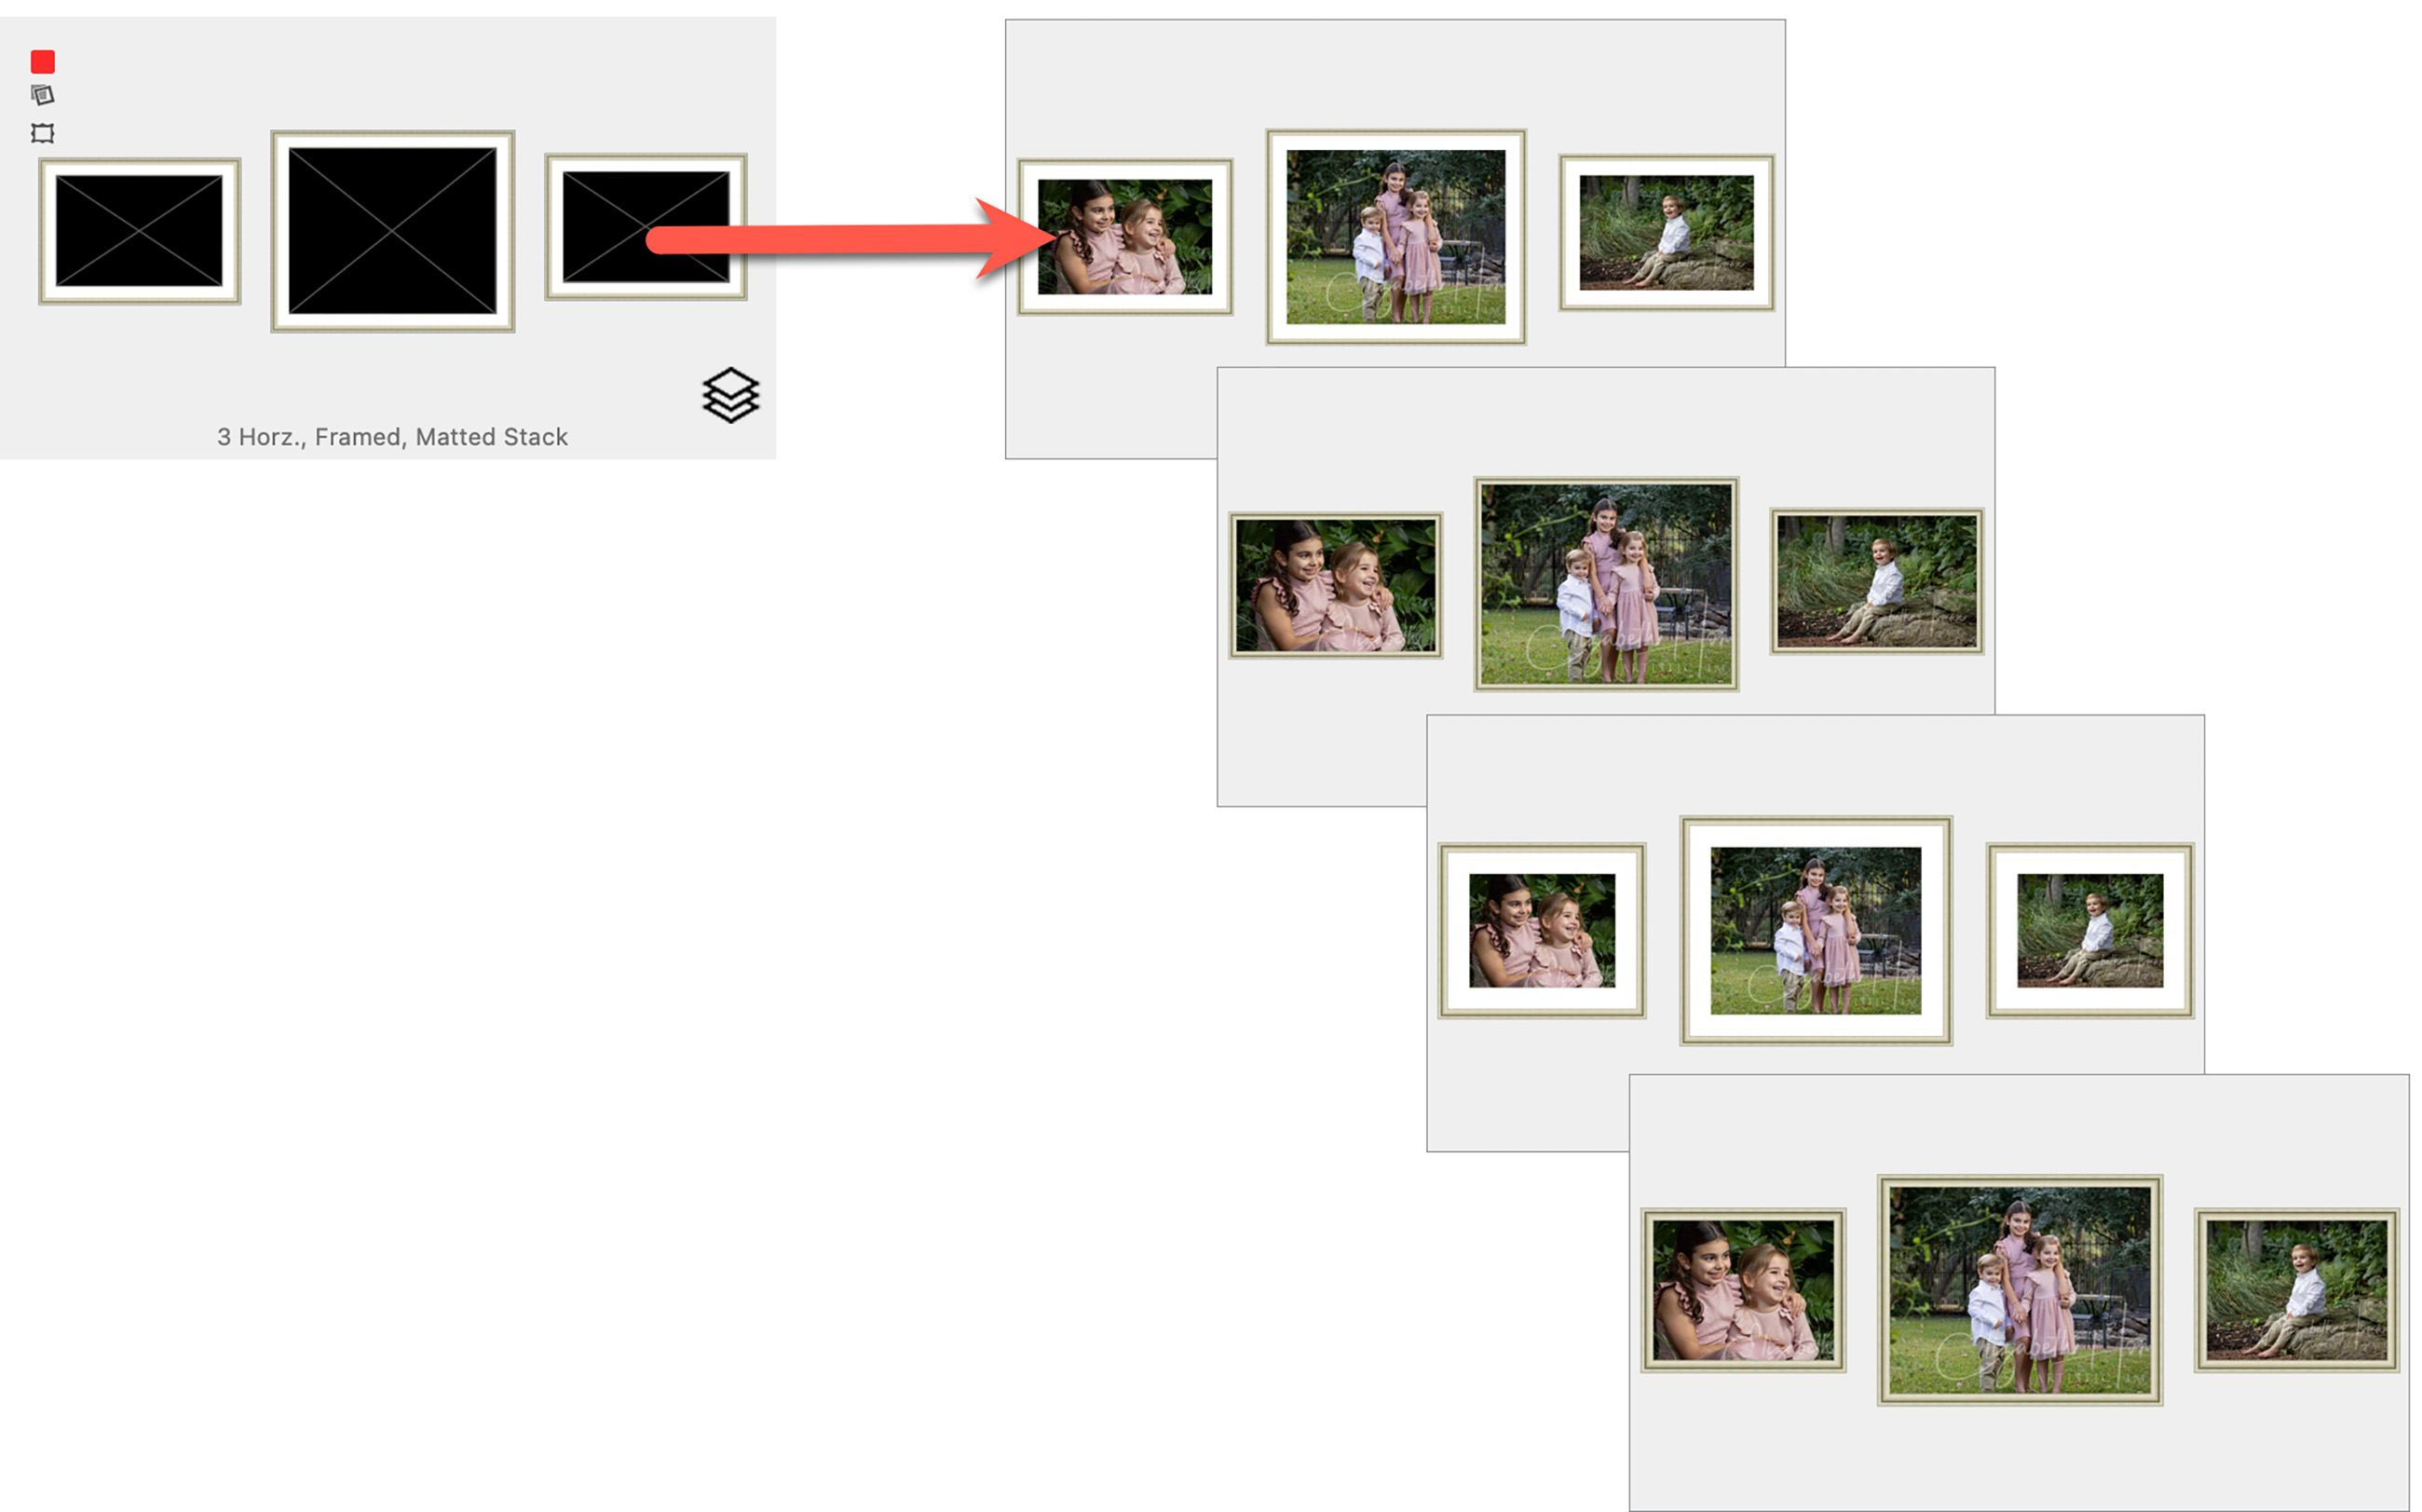
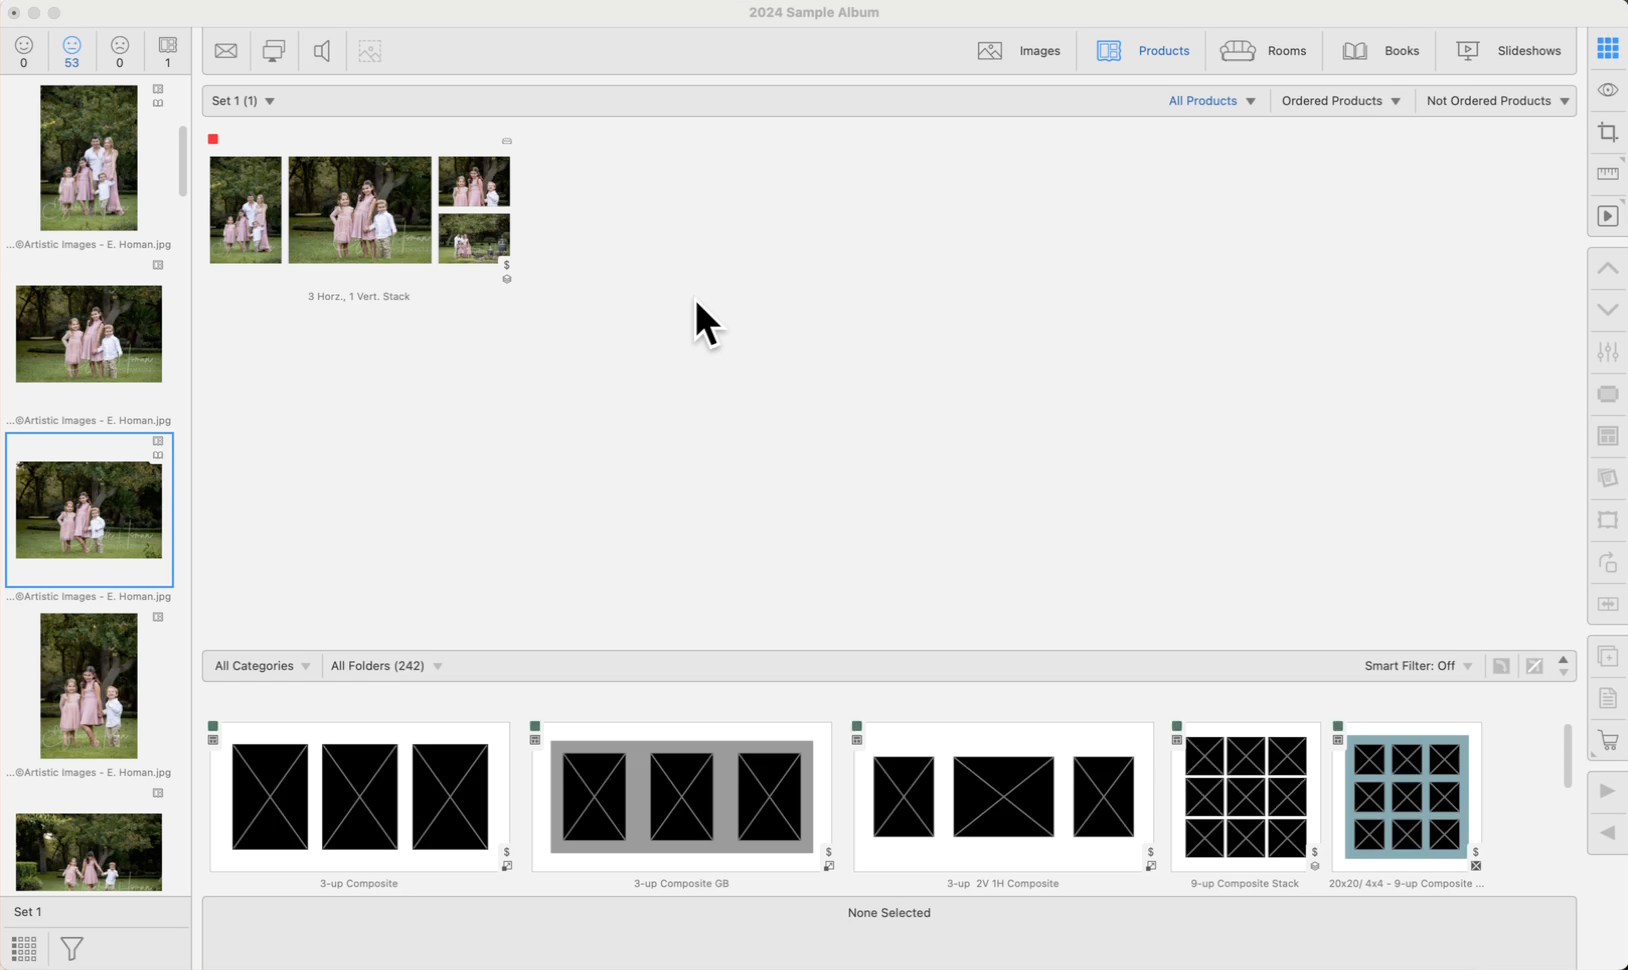
Each product template within a stack is treated as an individual layer. They are created individually and then added to the stack. When viewing the Product Stack in Working with Products (Thumbnail view), it appears as a single product with a stack tag ![]() . Learn about pricing stacked templates by clicking here.
. Learn about pricing stacked templates by clicking here.
When using stacked templates, the various stacked sizing options created can be viewed using up and down arrow keys, or the Previous/Next Stack tools ![]()
![]() . This allows you to cycle through the different sizing options available. This works in Working with Products, as well as Working with Rooms.
. This allows you to cycle through the different sizing options available. This works in Working with Products, as well as Working with Rooms.
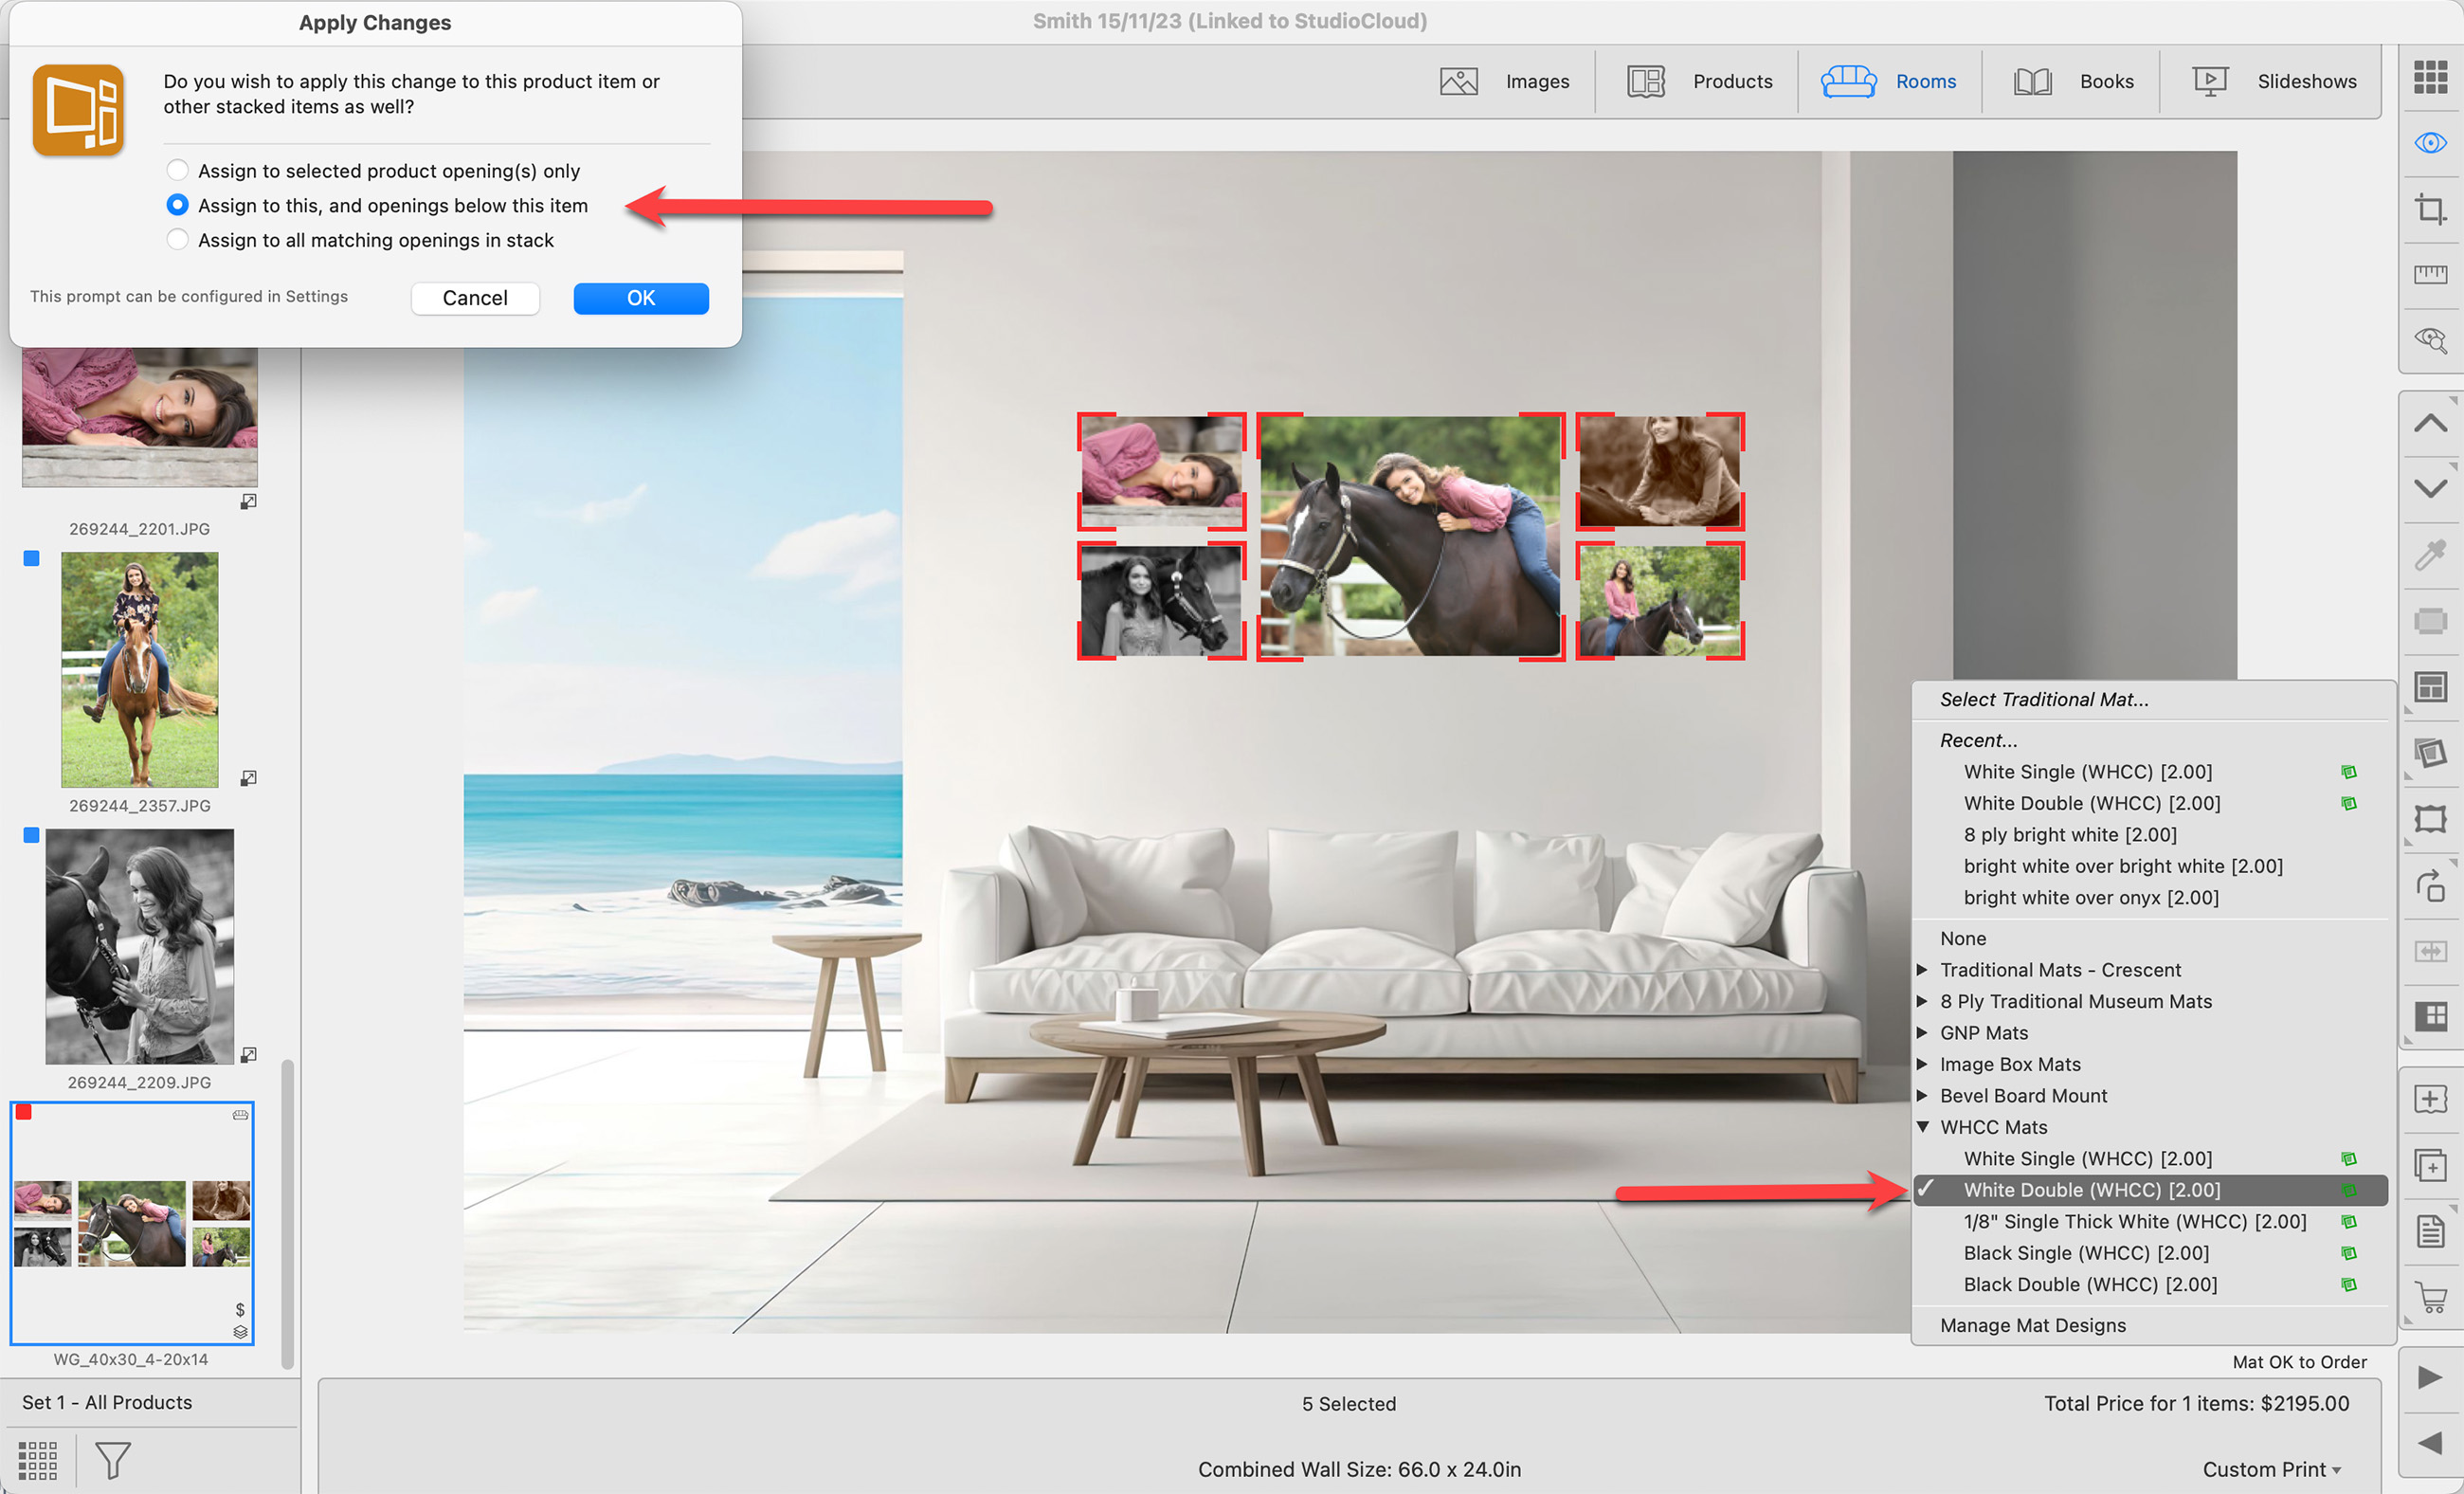
When applying mats and frames to Stacked Product Templates (Wall Groupings, Traditional Mats, etc), you will be asked to confirm where exactly to assign them. This is because you may only want to apply the selected frame or mat on the current stacked size. Alternatively, you may want to apply it to ALL the stacked sizes. The Apply Changes dialog will appear.
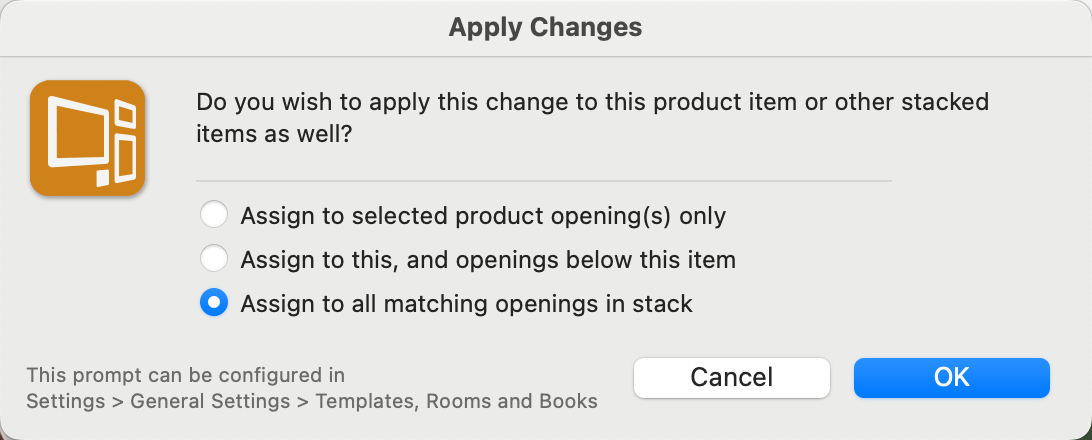
- Assign to selected product opening(s) only:
- This option applies the mat or frame to the selected opening(s) on that current layout only.
- If there are different configurations of that layout, the mat or frame will be applied to the corresponding opening(s) in any alternate configurations.
- Assign to this, and openings below this item:
- This option applies the mat or frame to the selected opening(s) on the current layout and all lower level layouts.
- If you are at the top of the stack, the mat or frame will be applied all the way down.
- If you are halfway through the stack, it will start from that point and apply the changes downward.
- If there are different configurations for those layouts, the mat or frame will be applied to the matching opening(s) in any alternate configurations.
- Assign to all matching openings in stack:
- This option applies the mat or frame to the selected opening(s) in each layout within the stack.
Because this dialog will appear every time you apply a mat or frame, you have the option to choose a selection and bypass future prompts. Go to the top menu, ProSelectEdit > Settings > General Settings > Templates, Rooms and Books > Stacked Templates.
Understanding the Difference Between Stacked Wall Groupings & Clusters
In ProSelect, both Stacked Wall Groupings and Clusters allow you to present multiple wall design options quickly. However, there are important differences in how they are set up and priced.
Stacked Wall Groupings
- A Stacked Wall Grouping is a collection of wall grouping templates not tied to a specific supplier.
- When a template is stacked, multiple variations are layered together.
- You can populate the first template with images, then use the up and down arrow keys to cycle through the different sizes or layouts.
- This allows you to quickly compare options and select the best fit for your client.
Clusters (Bay Photo)
- Clusters are similar in function to Stacked Wall Groupings, but they are specific Bay Photo products.
- These layouts are pre-configured to match Bay Photo’s catalog offerings.
- You are not restricted to ordering from Bay Photo—you can still use these layouts with other labs if you wish.
Bay Splits
-
A Bay Split is a different type of Bay Photo product where a single image is divided across multiple panels.
Pricing Stacked Wall Groupings
- By default, Stacked Wall Groupings use Sum of Parts Pricing.
- The total cost is dynamically calculated from the prices of each individual product.
- If you change the Presentation Option (e.g., from Gallery Wrap to Metal Prints), the price automatically recalculates.
- Removing an image instantly updates the selling price.
- You can change the pricing model to:
- Fixed Price (set one selling price manually), or
- Fixed Price by Presentation Option (different prices depending on finish).
Pricing Clusters (Bay Photo)
- Clusters are set to Fixed Price by Presentation Option.
- Bay Photo offers four different finishes (Metal, Wood, Gallery Wrap, etc.), with supplier costs built in.
- A markup is applied to determine your selling price, and you can adjust the markup as needed.
- If you prefer, you can switch Clusters to:
- Fixed Price, or
- Sum of Parts Pricing for mix-and-match flexibility.
Because the "Apply Changes" dialog will appear every time you apply a mat or frame, you have the option to choose a selection and bypass future prompts. Go to the top menu, ProSelect > Settings > General Settings > Templates, Rooms and Books > Stacked Templates. Select an option from the list.