ProSelect Album Recovery Files (PSARF)
ProSelect automatically creates and updates recovery files during album open and album save operations. These files are:
- Stored in system-level directories.
- Contain only album data—no image files.
- Continuously updated to reflect the most recent Open or Save event.
- Overwrite previous incremental restore points with each update.
If your .psa album file becomes corrupted or is accidentally deleted, ProSelect Subscriber Technical Support can often recover essential album data using the system-generated recovery file. This recovered data can be merged with your original images to help you rebuild the album. See Submitting a Recovery File for Support.
- The recovery file does not contain any user-accessible data or images.
- Recovery services are only available to users with an active ProSelect subscription.
- You must still have access to your original image files to fully restore your album.
- Support recovery is only possible if the recovery file remains on the same computer where the album was created or edited.
Album files can become unreadable or fail to save due to system, network, or user issues. Here are the most common causes and how to avoid them:
- Unstable network connection: Working on albums stored on a network or cloud drive can cause issues if the connection drops.
- Copy the album to your local drive before working. Move it back after saving.
- Outdated ProSelect version: Older versions may have bugs affecting file saving.
- Keep ProSelect updated.
- Low memory or disk space: System crashes during saves can corrupt files.
- Use at least 8 GB of RAM and ensure you have free disk space.
- Computer going to sleep: Sleep mode can disconnect network paths mid-session.
- Save early and often, especially after importing images and before ending a session.
- Dropbox syncing issues: Dropbox can interfere with album files.
- See Using Dropbox for more information.
- File opened on multiple computers: Opening the same album on more than one computer can corrupt it.
- Don’t ignore ProSelect’s warning.
- Antivirus interference: Security software may block ProSelect mid-save.
- Whitelist ProSelect in your antivirus settings.
- Hidden characters in notes: Pasting styled text (e.g., from Word) can insert unsupported characters.
- Paste as plain text only.
Recovery files are saved in the .PSARF format.
File Paths
- Mac: StartupDisk/Users/YourUserName/Library/Application Support/Pro Studio Software/ProSelect/Album_Restore/YEAR
- Windows: C:\Users\YourUserName\AppData\Roaming\ProSelect\Album_Restore
These directories may be hidden by default. For help locating them, refer to:
Additional Information
- Recovery files are organized into subfolders by year.
- Each saved album generates a unique recovery file.
- You may have hundreds of small recovery files on your system.
- Files are named based on the album file name, with added encrypted reference data.
- Since no image data is stored, recovery files are generally very small in size.
To request data recovery:
- Locate the relevant .PSARF file based on the album and date.
- Copy the file to your desktop or another temporary folder.
- Attach the file to your support ticket and reply.
Our Technical Support team will review the file and attempt to recover it.
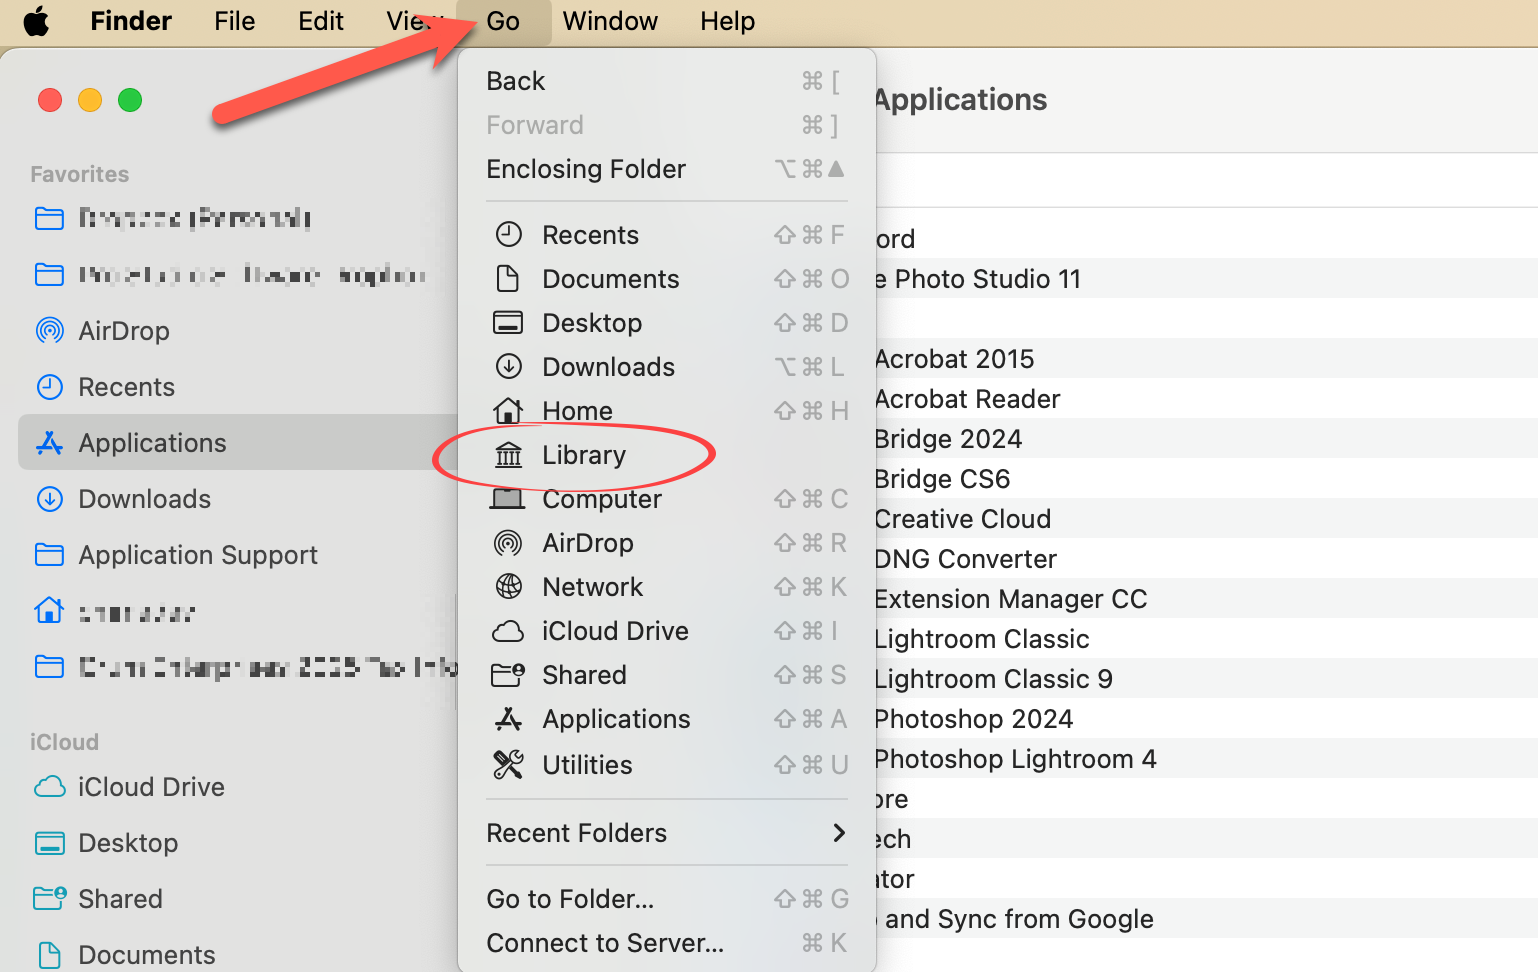
If you're using macOS and the Library folder is not visible under your user account, this will help you locate and access it. Starting with macOS 10.7 (Lion), Apple chose to hide the Library folder (the Library folder within your user directory) by default. This folder contains important application data, including ProSelect's setup files and ProSelect Resources.
Why You Need Access
Occasionally, you may need to access this folder to back up your data file or locate resource files.
How to Access the Library Folder
- Open a Finder window.
- Hold down the Option key.
- Go to the top menu, Go > Library.
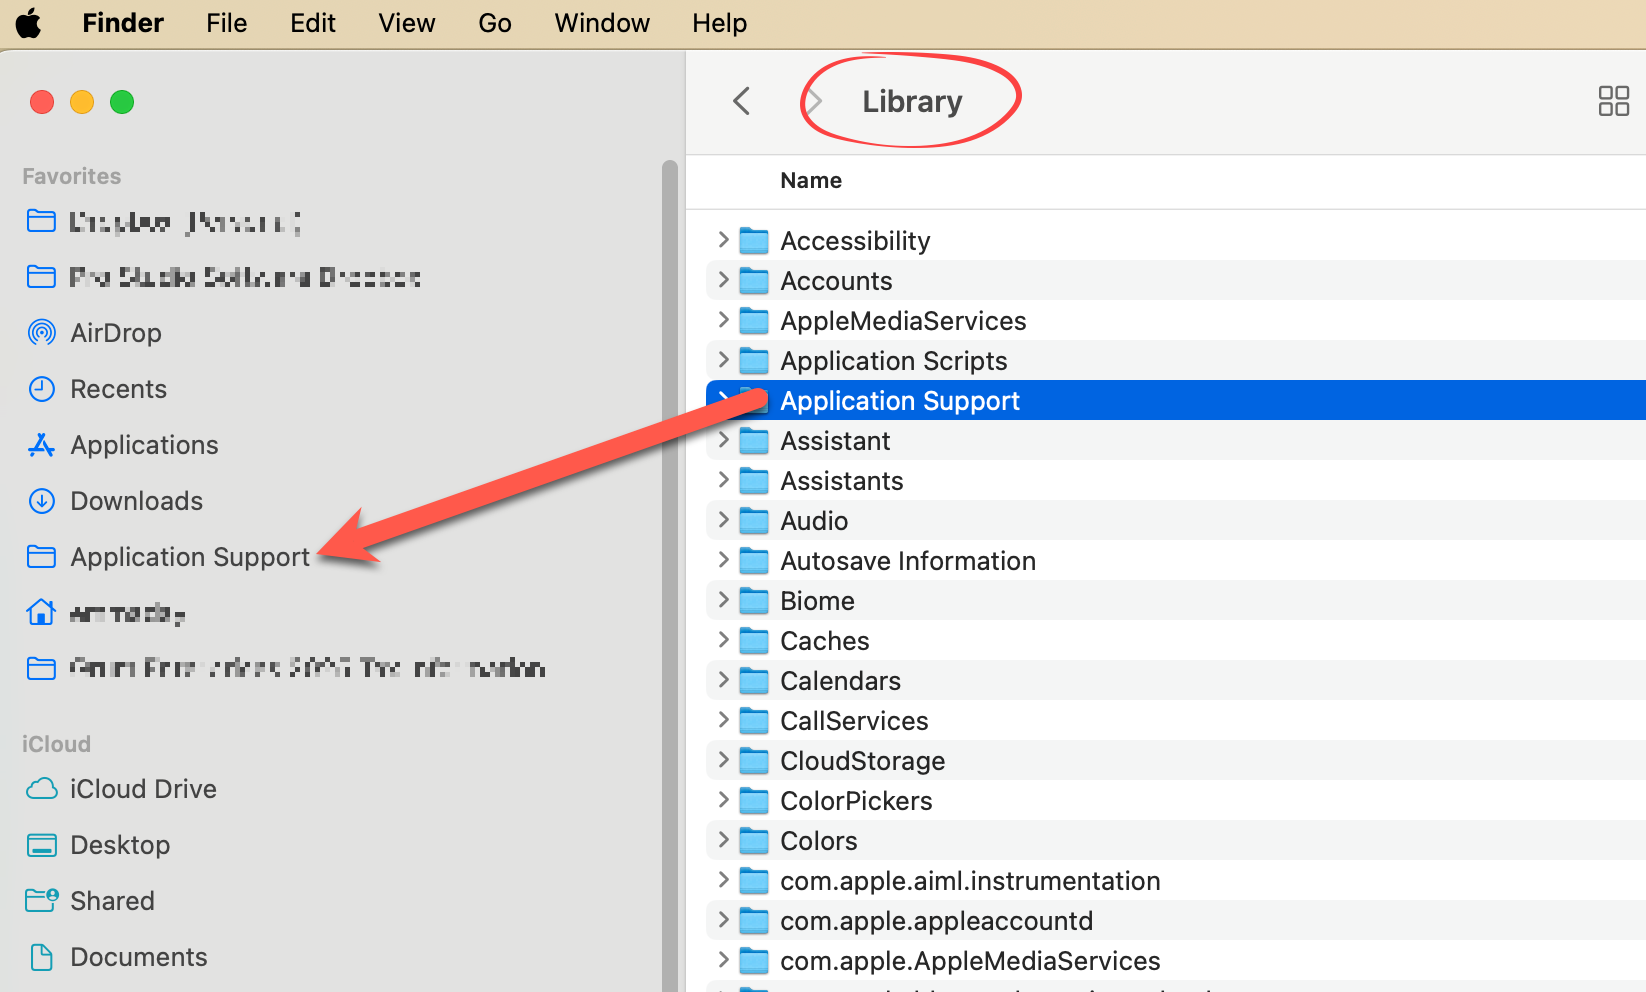
This temporarily reveals the Library folder. To make access easier in the future:
- Once inside the Library or Application Support folder, drag the folder icon from the top of the Finder window into the sidebar.
- This creates a permanent shortcut to the folder in your Finder window.
Quick Access from ProSelect
You can also access the folder directly from within ProSelect:
- Go to the top menu, Resources > ProSelect Resources Folder > Show in Finder.
- You are now in the Application Support Folder.
Windows may hide important folders like AppData or ProgramData by default. These folders contain essential ProSelect configuration and resource files.
To Access the AppData Folder
- Open File Explorer.
- In the address bar at the top, type: %appdata% and press Enter.
- This opens the Roaming folder inside AppData, where you’ll find the ProSelect and ProSelect Resources folders.
- You can also open File Explorer quickly by pressing Windows + E on your keyboard.
To Permanently Display Hidden Folders
- On Windows 10 or 11: In File Explorer, go to the View menu and check Hidden items.
- On Windows 7: Go to Organize > Folder and search options > View tab, then select Show hidden files, folders and drives and click OK.
*Be aware that enabling this setting may expose other hidden system folders. You can reverse this setting at any time.
Quick Access from ProSelect
You can also access the folder directly from within ProSelect:
- Go to the top menu, Resources > ProSelect Resources Folder > Show in Explorer.
- This opens the folder where ProSelect stores resource images and supporting data.
If the "ProgramData" Folder is Missing
If you're missing the C:\ProgramData folder used by ProSelect, it may be due to a non-standard Windows installation, such as one that was migrated from Windows XP. This issue can be fixed by updating a registry entry. Please proceed with caution or consult a technical support person.
- Click the Start button and search for regedit, then open RegEdit.exe.
- Navigate to the following path:
- HKEY_CURRENT_USER\Software\Microsoft\Windows\CurrentVersion\Explorer\User Shell Folders
- Double-click on AppData in the right-hand panel.
- Change the value from: %USERPROFILE%\Application Data to: %USERPROFILE%\AppData\Roaming
- Click OK, then exit the Registry Editor.
- Restart ProSelect or the ProSelect Network Server.
* Only perform this change if the value is currently set to %USERPROFILE%\Application Data. If it's already set to %USERPROFILE%\AppData\Roaming, no action is needed.
If you've received a recovery file from ProSelect Technical Support, follow these steps to restore your album:
- Download the Recovery File: Save the .PSARF file (ProSelect Album Recovery File) provided by Support to your local computer.
- Open the File in ProSelect: Launch ProSelect and open the recovery file. This will load your album data into the software.
- Update the Image References: Once the recovery file is open, ProSelect will prompt you to relink the original image files:
- Navigate to Thumbnail view.
- Select all images (they will appear as gray placeholders).
- Press Cmd + UCrtl + U to update the image references.
⚠️ This process must be completed on the same computer where the album was originally created or last edited. ProSelect uses the original file paths to locate the image files.
If You're Using a Different Computer
If the original computer is unavailable:
- Go to the top menu, Album > Original Images > Reload Original Images.
- Manually relink the image files to their new location on the current computer.