


In ProSelect 2018r1 and newer, you can use work with irregular shaped items using the geometric opening options for templates to quickly create a circular wall product into which you can drop and image and display it on the wall in RoomView.
If you wish to add a surrounding mat and/or frame to this, you need to take a few more steps using an overlay image to provide the Mat (and frame) to the product. If you are designing this template to be one specific size that no decisions to be made. If you wish to offer this in a range of sizes you need to decide:
(a) If you are happy to keep the width of the mat proportional to the overall size. For example, a 16" overall product size with a 2" wide mat could also be sold as a 32" oversize with a 4" mat. In this case, only one template needs to be designed at non-fixed size and you can simply use the different print paper sizes to scale it up or down.
(b) If you want to offer dis-proportionate mat widths for different product sizes such as a 2" matt with both a 16" and 24" overall product size then a 3" mat on a 32" sized product, you will need to create a separate template and overlay image for each size.
Proportionate Sized Mat
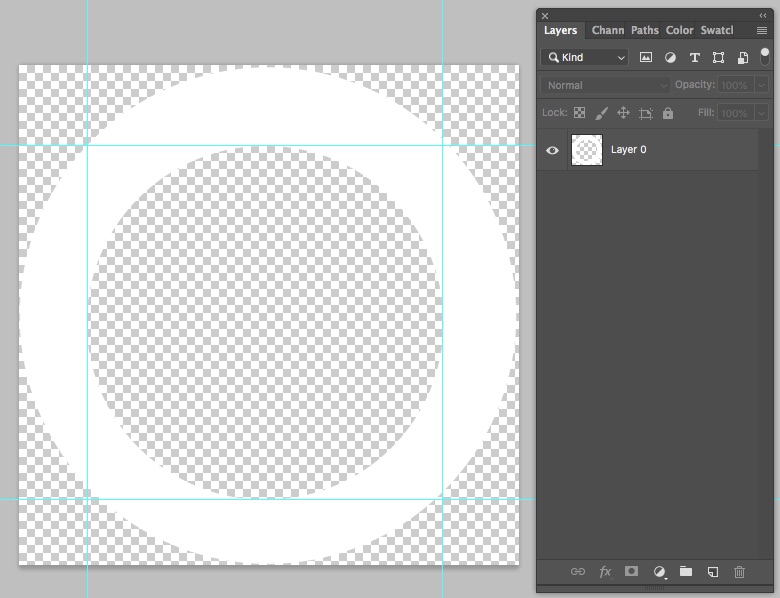
In Photoshop, create a new transparent image at your starting size say 16" (or 4800pixels @ 300ppi) square. Use rulers to mark the 2" offset around the edges for the inside circle. Drag a round selection rectangle corner to corner and fill this with your mat color. Drag a smaller circle from your ruler corner intersections to mark the inner edge of the mat and use the delete key to cut a hole in the inside.
KnowledgeBase Article: Designing a Circular Template with a Mat