


Labs are now offering products where an image is printed over several panels, maybe metal, canvas or photographic paper.
When you are creating a product like this, it's important to have something to show the customer something that represents the product, shows it on the invoice and properly translates correctly into High-Resolution Production for lab ordering.
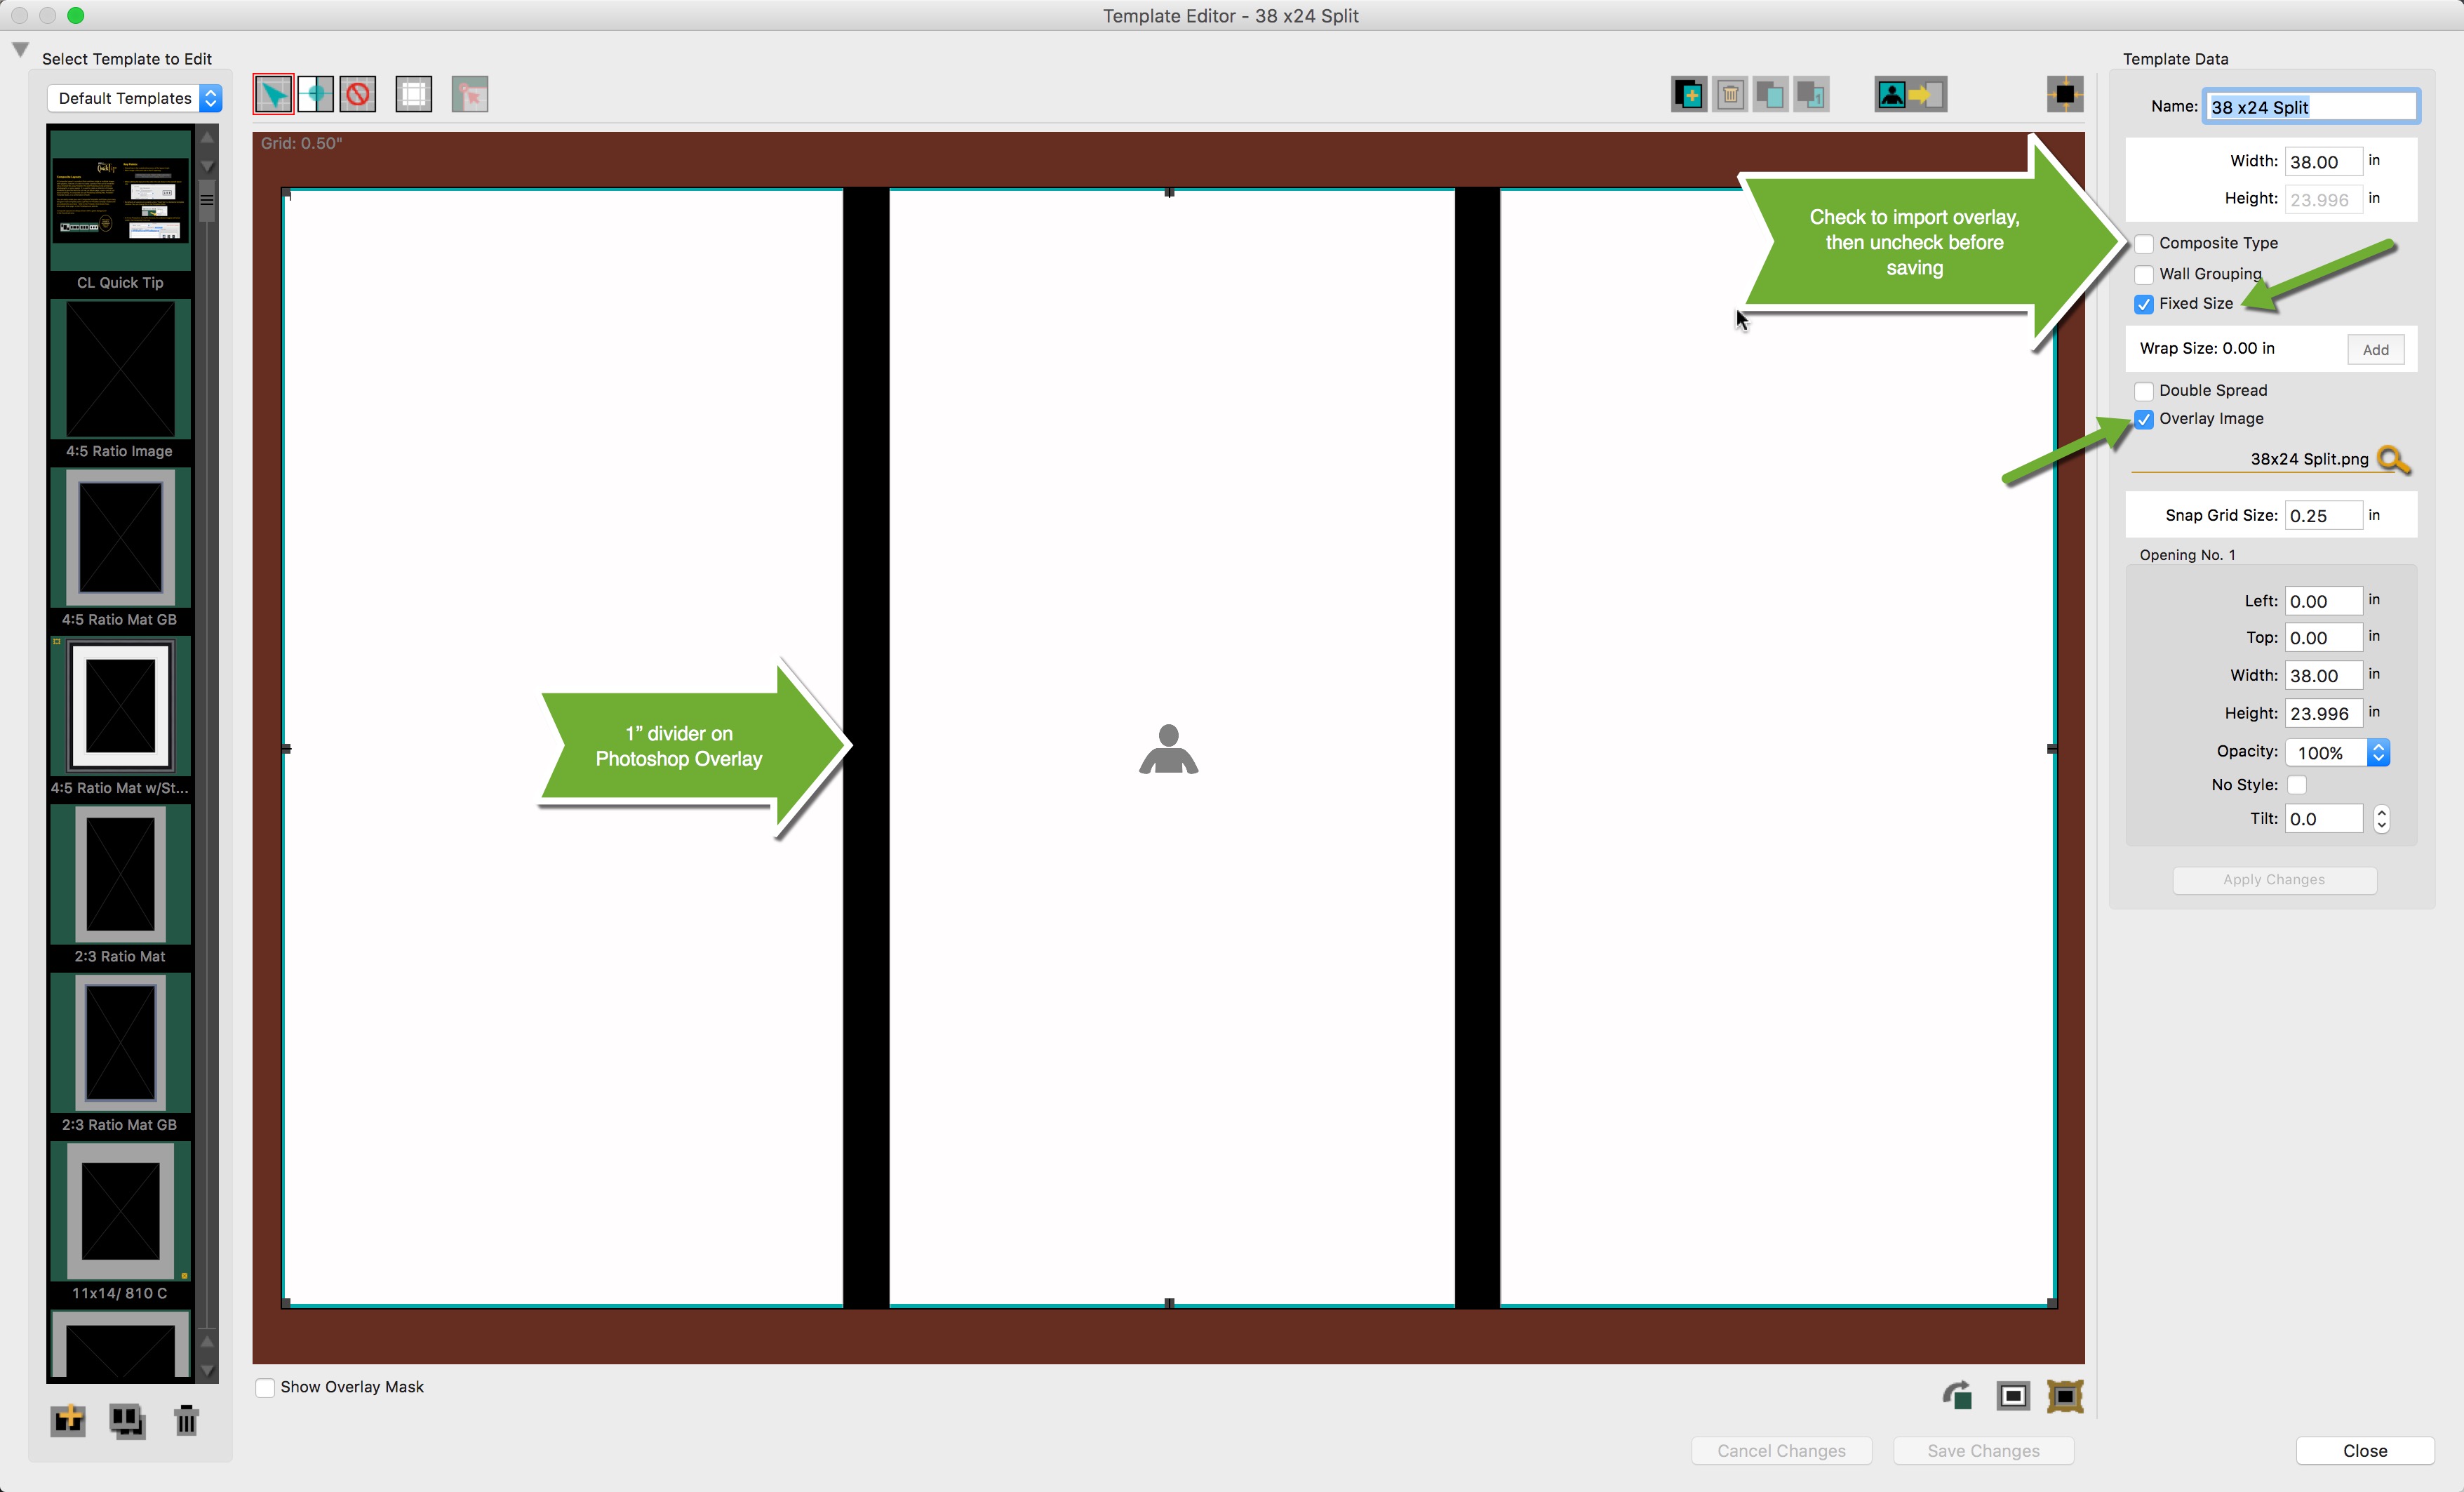
With that being said, you will need to create a photoshop psd file the overall size of the template with 1" black fills representing the space between the images. It only has to have one layer, transparent with black. This photoshop document should exactly match the template provided through your lab, usually within their ROES ordering system. The overall size of the photoshop psd file and the ProSelect template must match. In the lab system, they usually show the size of the individual panels as opposed to the overall size. You may need to do some math. In our example, our individual panels are 12 x 24. The template size becomes 12 + 1 + 12 + 1 + 12 = 38". The height is 24". The template size equals 38 x 24.
This shows the ProSelect template in the template editor. In order to use a psd overlay, you need to initially set the template to "Composite Type". That allows you to import the overlay. Before saving, uncheck "Composite Type" so the overlay is ignored in production producing a single image.
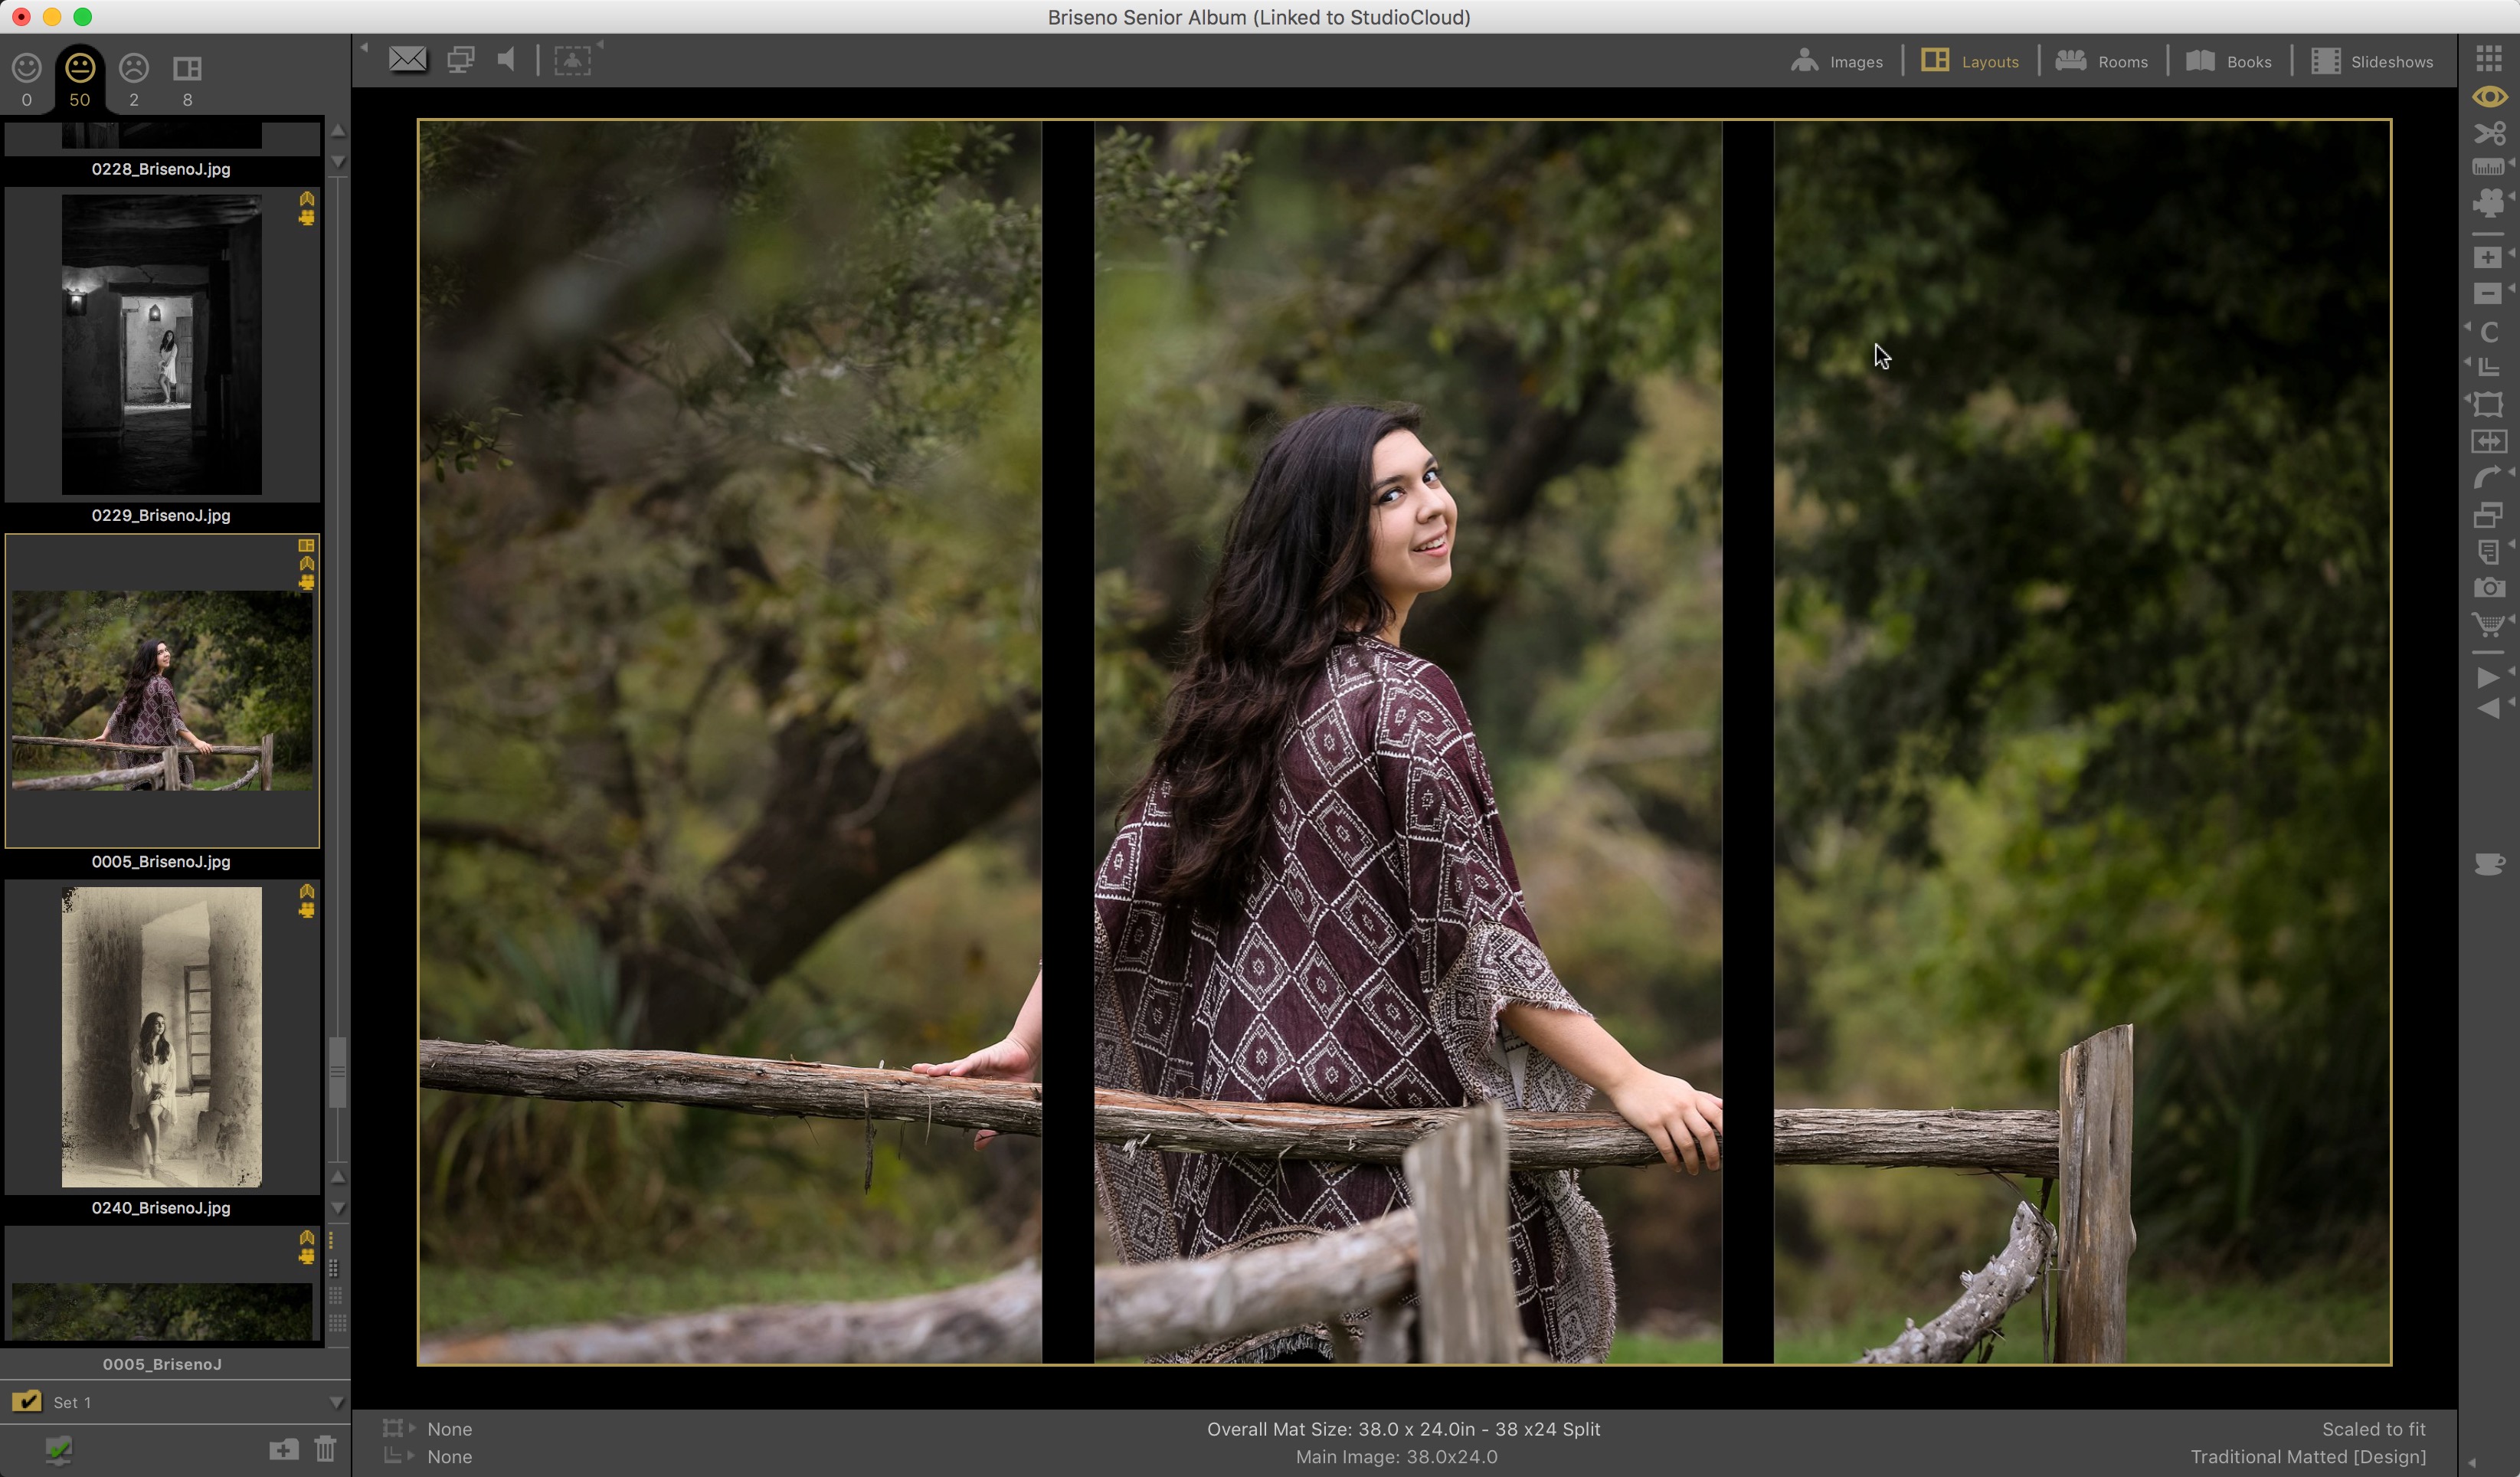
The image below shows how the template looks in Working with Images or Select Size View.
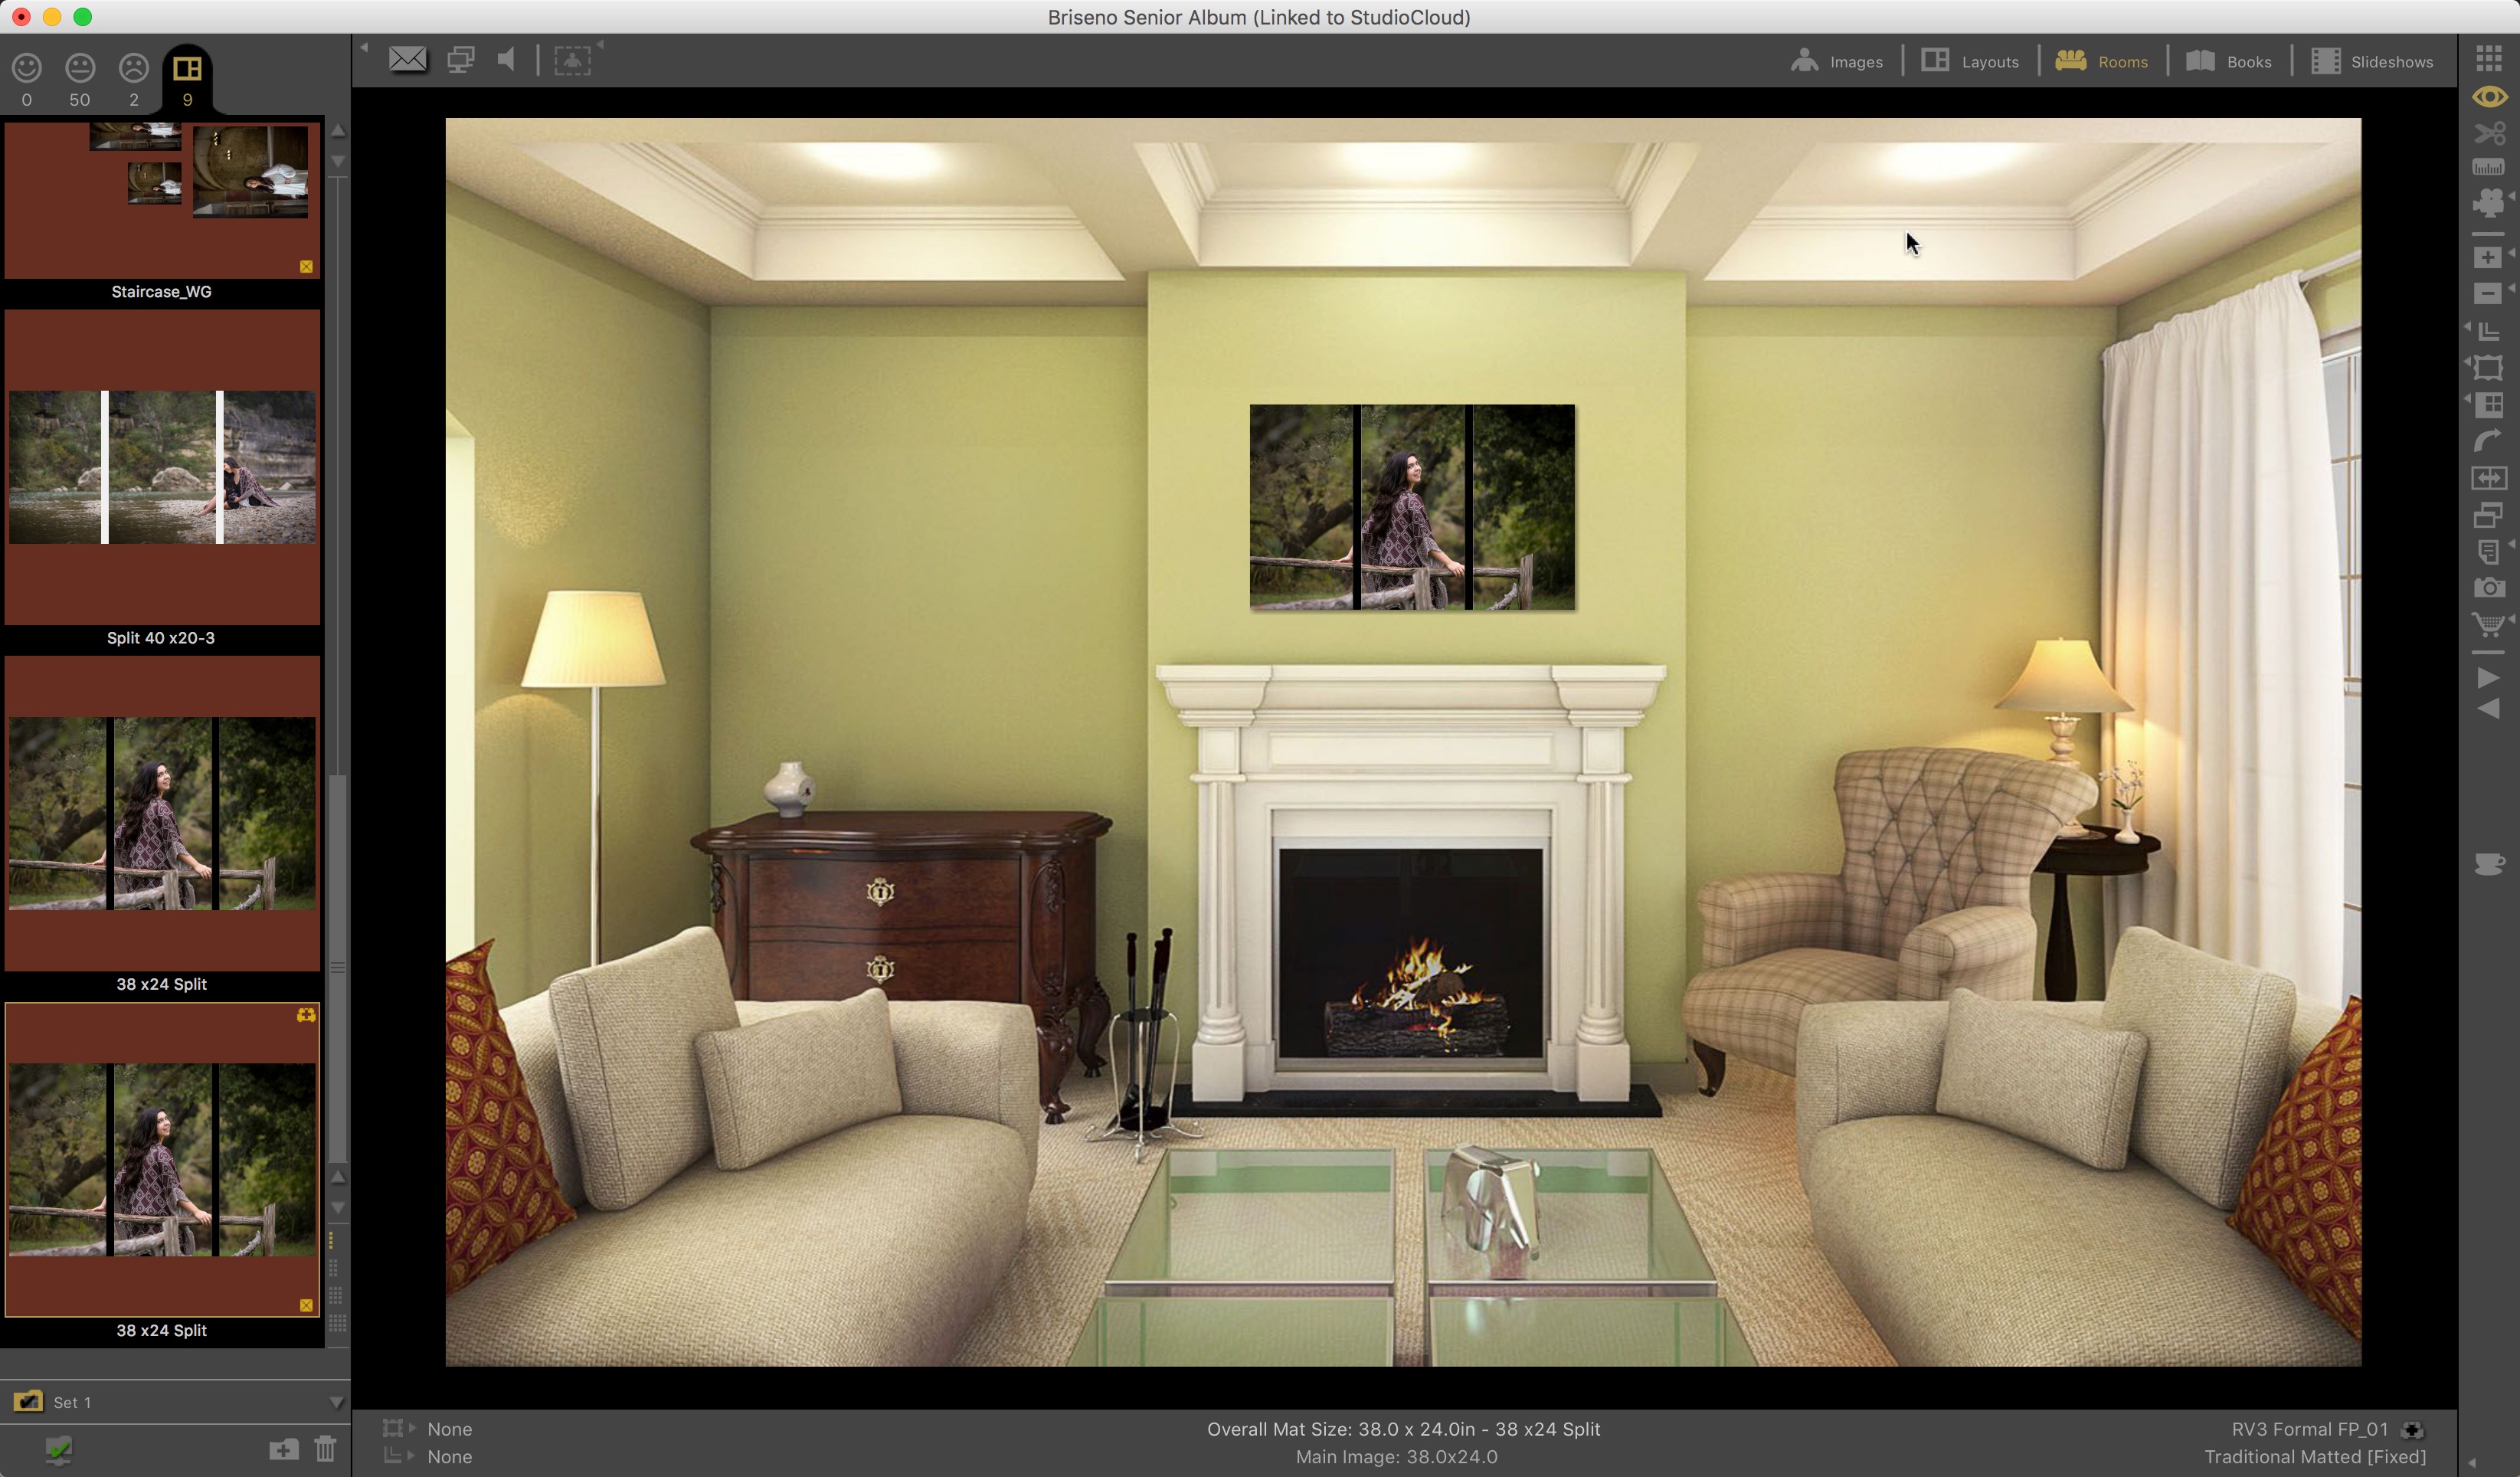
This is the layout/ template used in Room View. Note that the back divider lines show in this view, but the size and the spacing are accurately represented. If you felt you needed to, you could duplicate the template, and edit the Photoshop overlay to change the black divider lines to the wall color. Currently ProSelect has no way to support transparency in this situation.
This shows how the product is represented on the invoice.

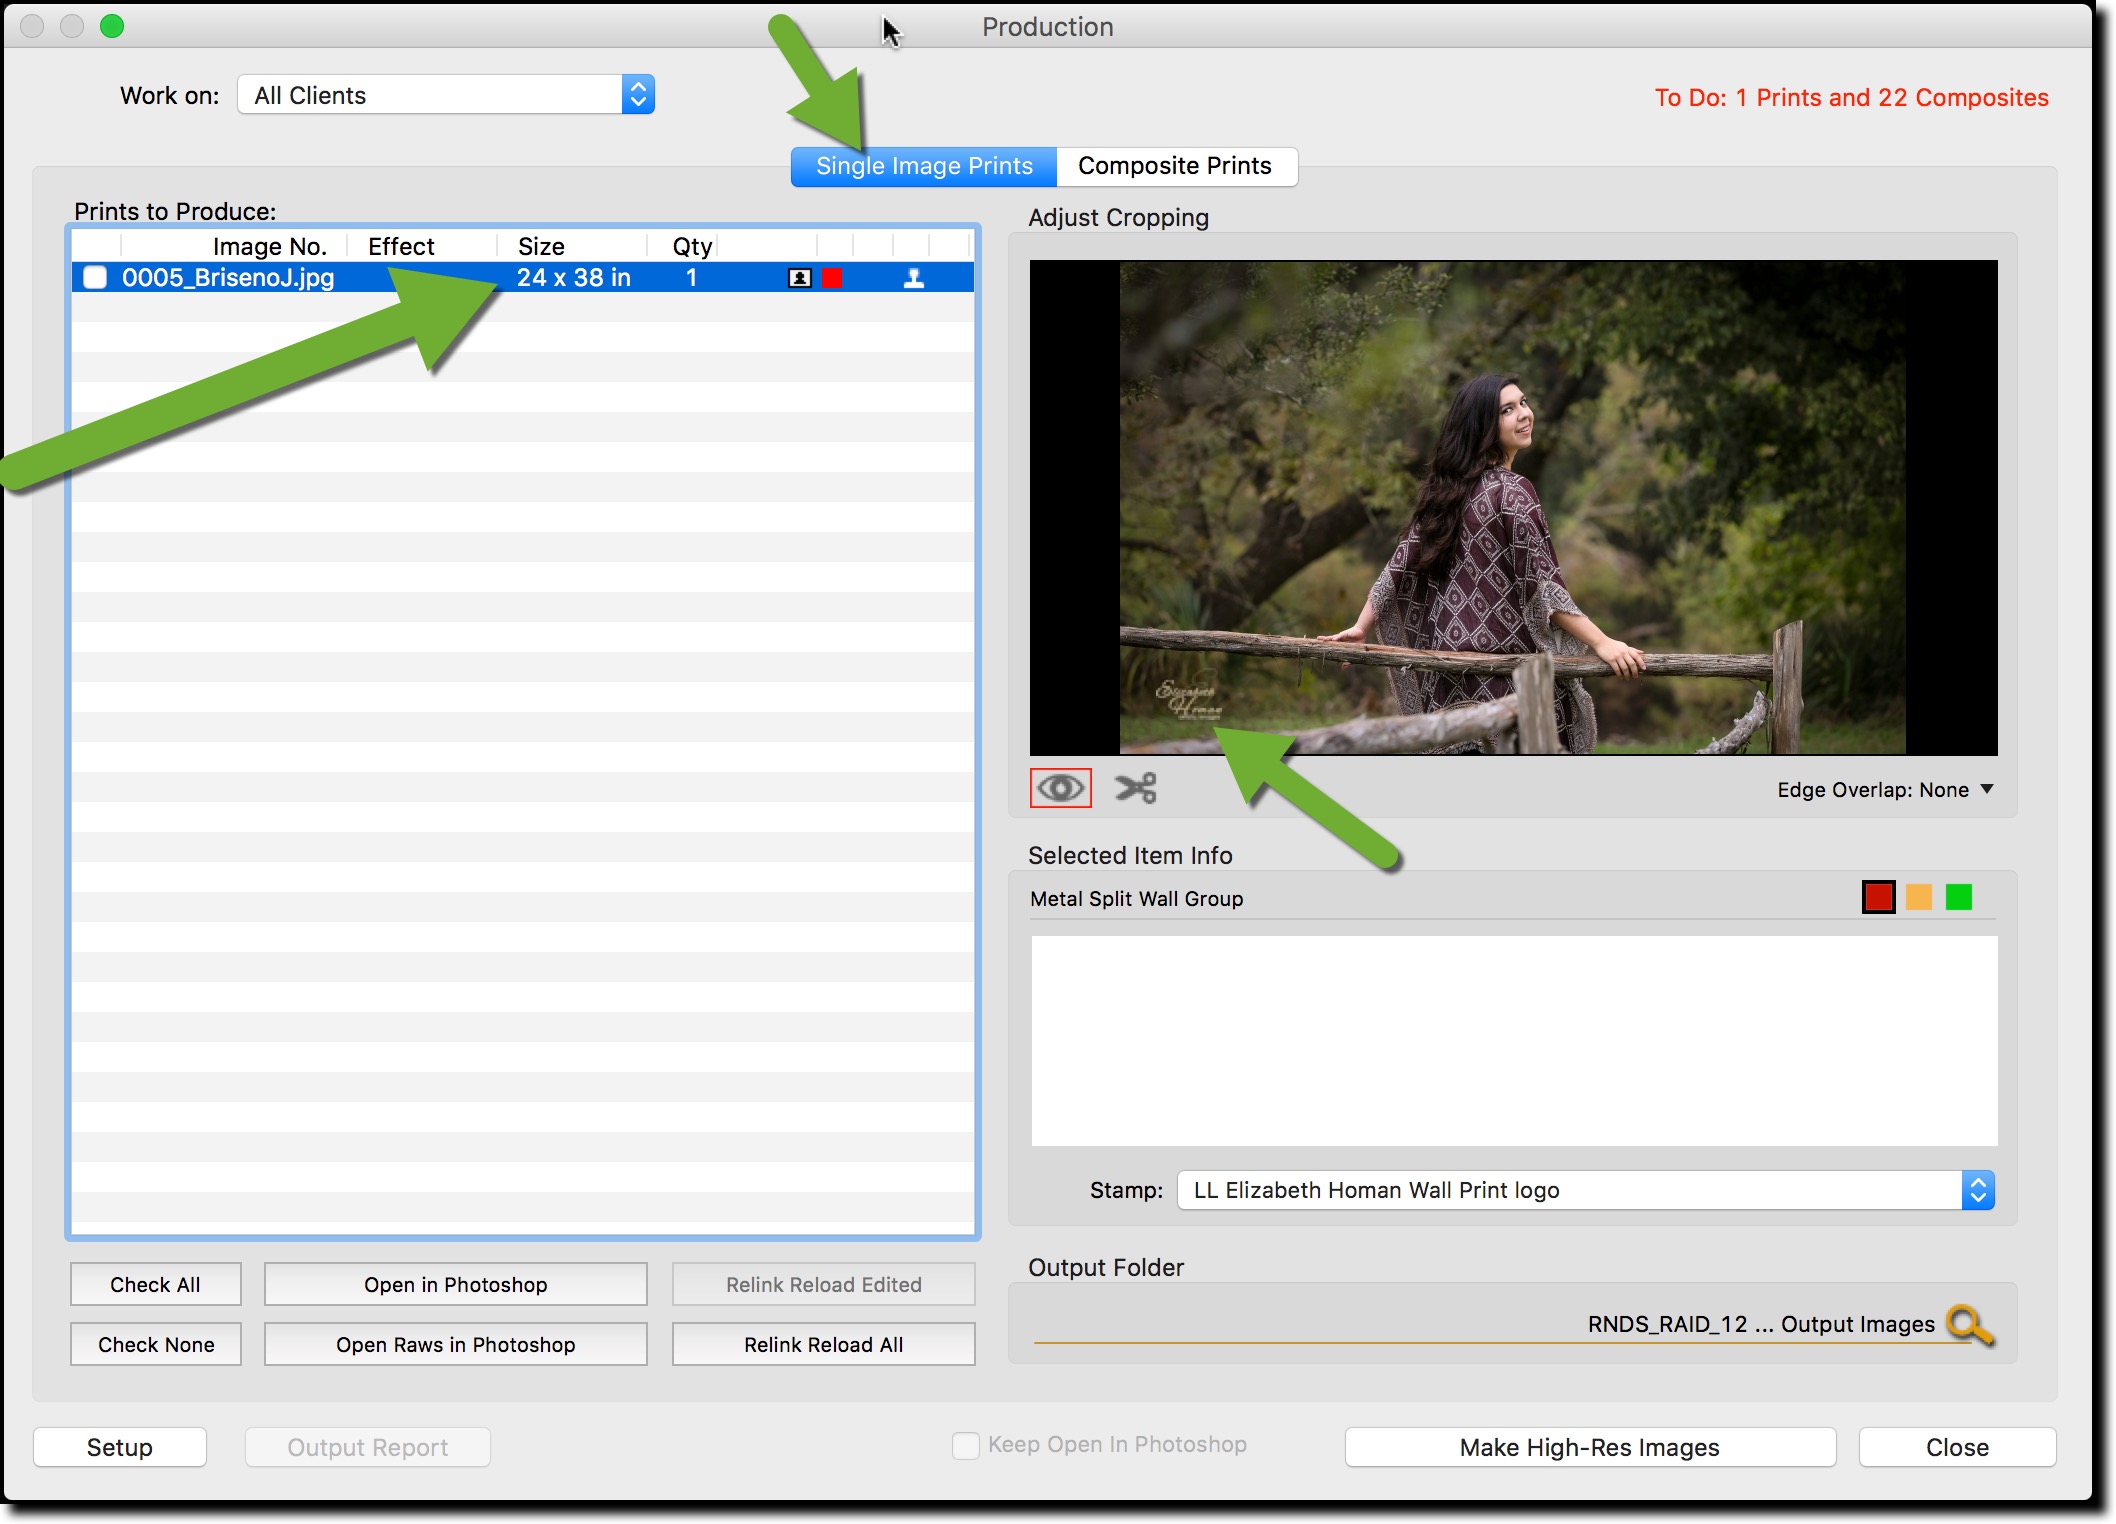
Below is the high-resolution production window. Note that the production file appears in the "Single-image Prints" tab and is the correct size for lab ordering. If you have setup to have your studio logo added in production, not how that appears on the image as well.
KnowledgeBase Article: Creating and Ordering Image Splits