


ProSelect 2013r1 and newer can create fully rendered .mp4 movie files that exactly match the slideshows that you play in ProSelect. Exported slideshow movies can be uploaded to Facebook, YouTube, web site blogs as well as being played on most computers and mobile devices. These movies can also be used to create a Hi-Def (HD) DVD which can be played on DVD players.
Note: Versions of ProSelect prior to 2013r1 could produce very compact slideshow movies that used Quicktime to display the transitions. However, this technology is being phased out and almost no video players apart from the Quicktime player would correctly include these type of transitions.
This article covers the steps required produce a HD DVD of your slideshow using a Mac computer equipped with a DVD burner. While there are a number of software products for doing this, we have based this article on using Roxio's Toast Titanium.
Note: If using Windows computers, then you could replace the reference to Roxio's software with an alternative software such as products by Aimersoft "DVD Creator for Windows" and iSkysoft "Video Converter Ultimate". Please note that we have not downloaded or tested these products.
Pre-requistes
- ProSelect or ProSelect Pro 2013r1 or newer (Pro version required for some optional slideshow features including Ken Burns Effects, adding video clips and text on title slides).
- Toast Titanium 11 with optional HD and Blu-ray Plugin OR Toast Titanium Pro 11 (which includes the plugin) available from Roxio.
- A DVD or Blu-ray writer
ProSelect Setup
If you plan to create HD DVD's, then make sure that you have set up ProSelect to add images to your albums at the highest resolution. This is particularly important if you are using the Ken Burns: Crop to Fill Screen or Random Sizing options in the slideshow style that you are using to create the exported movie.
This maximum size is currently 2400x1600 and this setting can be found in Preferences --> Importing Images --> Settings --> Adding Images --> Resize to.
Design your slideshow in the Working with Slideshows section because you can only export a movie from this area.
Notes:
- If you set up your slideshow style with a fixed aspect ratio of 16:9, then when you play the slideshow in ProSelect, it will appear exactly the same as it will when exported as a HD movie. This setting is in Setup Slideshow Styles -> Advanced Tab -> Edges & Borders -> Force to Aspect Ratio (under Slideshow menu). This setting only effects slideshows played in ProSelect. When you export a slideshow, the aspect ratio of the exported movie is controlled by the movie size preset that you select - a "HD shaped" movie is in a 16:9 aspect ratio.
- Remember it's easy to duplicate a slideshow style, so you can have two styles: one for playing on screen in ProSelect and one for previewing/exporting the slideshow if you wish.
After you are happy with how the slideshow plays in ProSelect it's time to export it as an .mp3 file...
Exporting the Movie
- Make sure that you are in Working with Slideshows.
- Select Export --> Slideshow Movie (under the File Menu)
- Select the Slideshow that you have designed (ProSelect Pro users can design up to 5 different slideshows per album)
- If you want the slideshow to start and end with a fade transition, then check the Include Start & End Transitions box. Otherwise the slideshow will start showing the first slide and end showing the last (a bit like playing a slideshow in ProSelect with Show First Slide on Paused Start and Pause on Last Slide set up in your slideshow style.
- You can optionally add a copyright stamp (and/or favourites stamp as of v2015r1 and newer) to the exported movie if you wish.
- For creating a HD DVD check, choose either HDTV 1080 (higher res) or HDTV 720 (lower res) in the Output Presets section. If these presets are not shown, click the Add Button and select from the popup menu.
- Click the Export Button to start the export. This may take some time depending of the number of slides, the type of transition you are using and the speed of your computer.
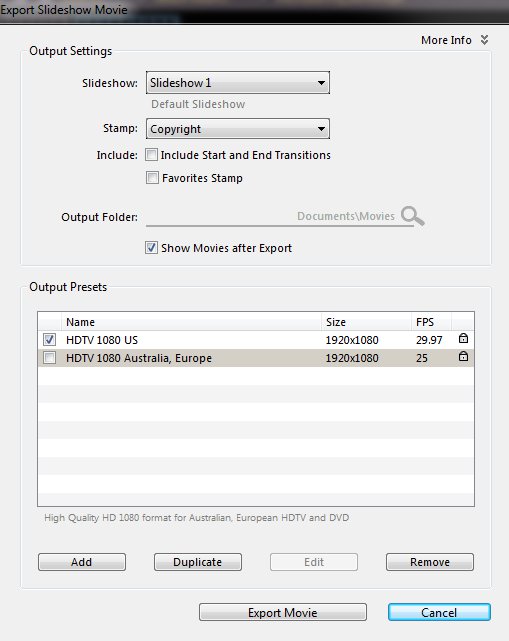
Note: This Export window is shown in v2015r1 and will look slightly different in other versions of the ProSelect software.
Testing the Exported Movie
Once the movie has been exported, then you should play it on your computer to make sure that it works as expected.
This can usually be done on most computers by simply double-clicking on the movie file to launch the default movie player.
Burning the Movie to a DVD (using Toast Titanium)
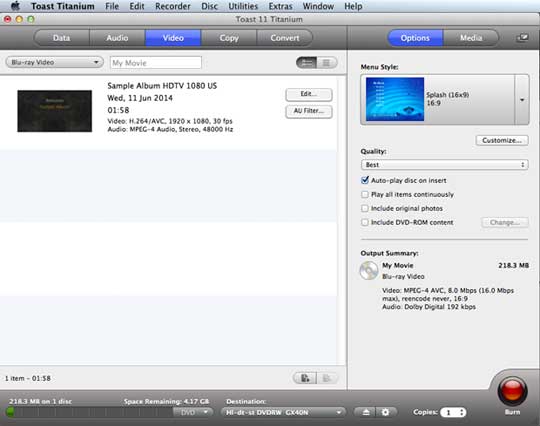
- Launch Toast Titanium and select the Video Tab
- Drag and Drop your exported movie file (.mp4) into the window.
- Select a menu Style from the list at the top right.
- Select Quality: Best
- Select Auto-play on Disk insert: On
- You can use the Customize button to change the name of the produced disk and the menu name. Most other default settings can be left as they are.
- Insert a blank DVD disk in your burner.
- Click the Burn button to start saving the movie to the DVD.
KnowledgeBase Article: Creating a Slideshow DVD