
Official Release Date: Feb 1, 2018
This page cover all major changes but there is a lot more... see this Knowledgebase article for all the details.
You can use the hyperlinks in What's New section at the back of the ProSelect 2018r1 Reference Manual (quick access under the Help menu in ProSelect) to get to the relevant new or updated sections in the manual.
Professional Mats on Images and Layouts
ProSelect 2018r1 now supports the display and ordering of almost any industry-standard Mat Design on both Images and Layouts making it easy to order real products that exactly match your designs in ProSelect.
ProSelect comes with over 100 pre-setup mats for you to use. You can also use the built-in Mat Designer to create additional mats with features that can include these elements:
- Bevel Cut (white/black core)
- Reversed Bevel Cut
- 8 Ply Bevel Cut (white/black core)
- Keylines
- Solid color or textured
- Bevel Mount (black/silver/gold core)
- Fillet frames
- Raised Mats
- V-Grooves
- Custom widths or automatic optical centering
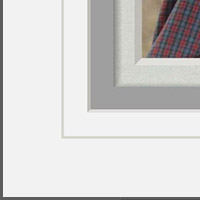
Triple Mat with keyline, bevel, reverse bevel, raised mat, white core 8-ply bevel cut
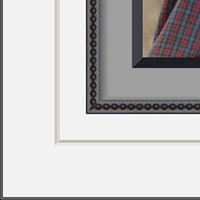
Double mat with v-groove, fillet & black core bevel mount
Mats can be applied as a:

- Surrounding mat around images and composite layouts. In these cases, the mat's width is fixed by your Mat Design.
- Inner Mat to control the appearance of the mat area WITHIN both traditional matted and composite layouts and book pages. In these cases, the template's design controls the outer most mat area with the Mat Design controlling the size of the seond and third mats around each opening in the layout or book page.
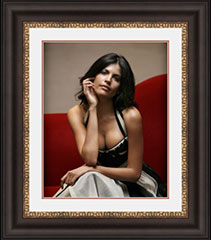
Print with Surrounding Mat & Frame
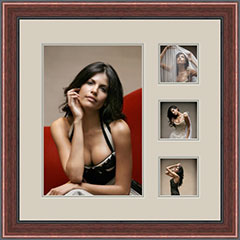
Layout with Inner Mat & Frame
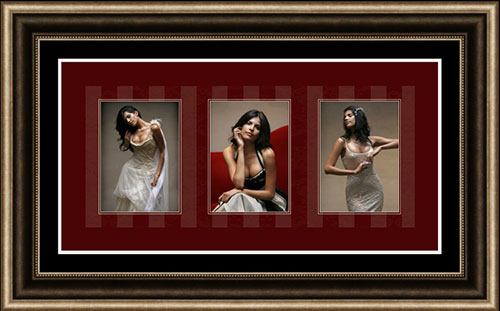
Composite Layout with Inner Mat, Surrounding Mat & Frame
Mats replace Template Styles used in ealier versions and any existing styles are automatically converted into the new Mat Designs when you first install the new version.
When using a Mat on a Composite Layout and Book Page, you can now select whether the mat borders surrounding each opening in the layout are applied in an inwards (as in previous versions) or outwards direction giving you even more design flexibility. Traditional Matted Layouts now only apply mats in an outwards direction to maintain exact print opening sizes for these products.
Like Frames, Mats use Price Groups to allow you setup fixed or automatic (size-based) pricing for your mats.
Mat Overlap
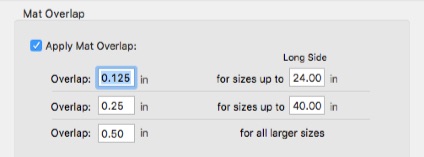
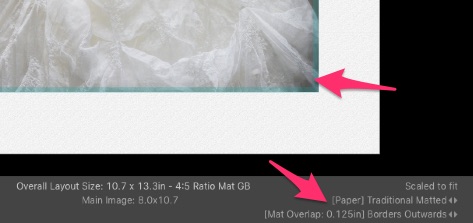
Whether you are designing matted wall art or books, ProSelect accurately accounts for Mat Overlaps so you don't have to worry. You can select a different mat overlap size for different print size ranges. The mat overlap for the selected item is shown in the Info bar and as a cyan edge in Cropping View.
Mat Production Options
Mats can be ordered as either a:
- Traditional Mat - when you want to deliver a physical cut mat on the final product, or
- Virtual Mat - when you want to have the mat produced digitally, through High-Res Production*, as part of the final printed item.
This gives you total flexibilty on how you wish to deliver your products.
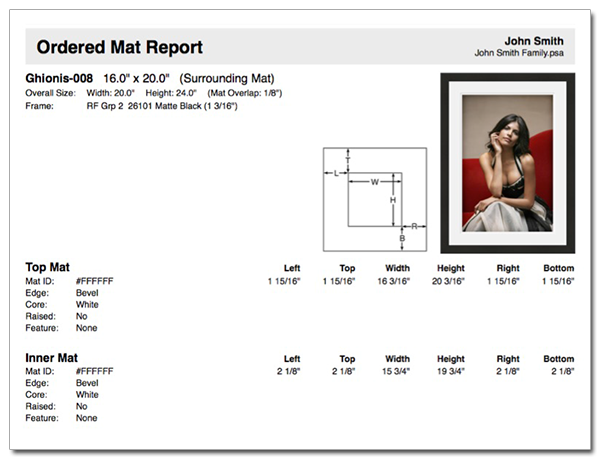
The Ordered Mats Report* provides full specifications for all Traditional Mats so your mat supplier/framer can accurately build final products that match your designs. You can print the report with dimensions in decimal inches, decimal fractions (adjusted to 1/16") or centimeters.
Full mat cutting data is also available in ProSelect's Production Report for direct input into mat cutting machines (coming soon).
Additional Built-In Resources
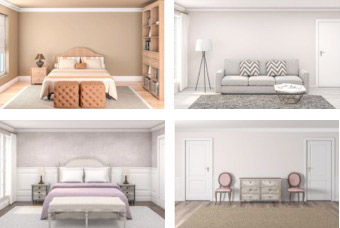
ProSelect 2018r1 adds even more built-in Rooms, Templates, Mats Designs (some with Fillet Frames) to the great selection already included in the 2017r1 release. These are automatically installed with fresh machine installations and can be manually added to existing setups using the Install 2018 Default Resources option (under File Menu -> ProSelect Data).
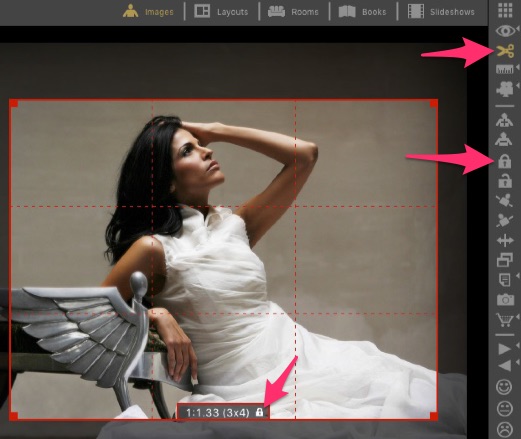
Lock in your Custom Crops
Your custom Crop can now be Locked on any image. Locked Crops Ratios keep the same crop when images are sized up or down. Images without a Locked Crop Ratio automatically crop to match the selected Print Paper Size.
Vignette
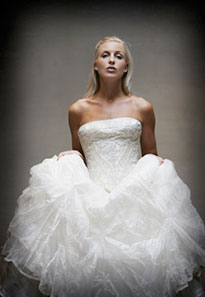
Low-Key Vignette
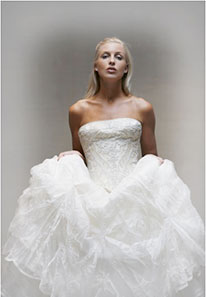
High-Key Vignette
You can now be apply a Low or High Key Vignette to one or more selected images to instantly give your images some extra punch.
Work Faster with Contextual Menus
To speed up working within ProSelect, there are new right-click contextual menus throughout the program.
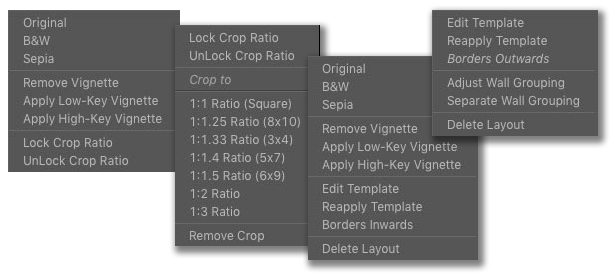
More Info at a Glance
The Info bar is now three lines high to provide more information on the selected item. When using layouts & books, you can quickly switch layout types and border directions using the buttons on the right-hand side. If you are using two screens and have ProSelect's Mirror Display Area option turn on, then only you see this information.

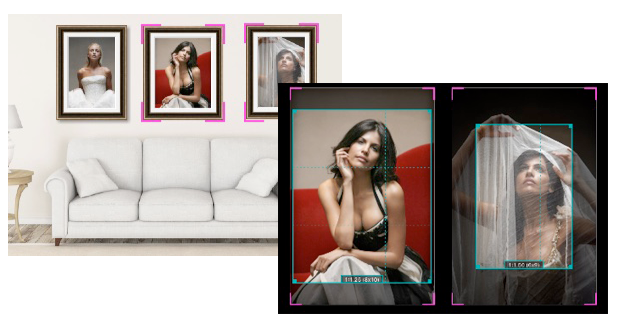
Cropping View in Working with Rooms
You can now use Cropping View when in Working with Rooms to make fine cropping adjustments in any selected layouts and prints in a room. Just select the items and press the "C" key.
Adjustable Wall Groupings
When Working with Rooms, you can adjust the positions of the prints in a Wall Grouping Layout by right-clicking on the wall grouping and selecting Adjust Wall Grouping from the popup menu (see above) or using the Edit ->Wall Grouping menu. This allows you to quickly adjust the spacing of any item (opening) in a Wall Grouping Layout after adding or changing any surrounding mats or frames. Since the adjusted Wall Grouping is still one item, the entire design can be easily added as one Custom Product to your order.
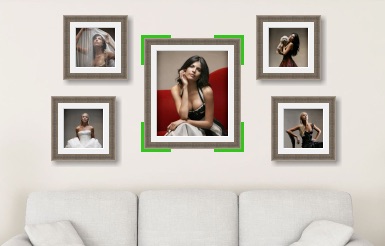
If you need even more flexibility, you can use Separate a Wall Grouping... to break the grouping into individual duplicate prints. Each Print can now be individually sized, framed and matted.
Finally, select two or more Prints in a Room and use Combine Into Wall Grouping Layout to create a single layout ready to be ordered as a Custom Product.
Template Shapes
Templates can now have any irregular outside shape by assigning a B&W shape (mask) file to the template. Combine this with an overlay image to design and show almost any custom product including dye-cut press-printed products.
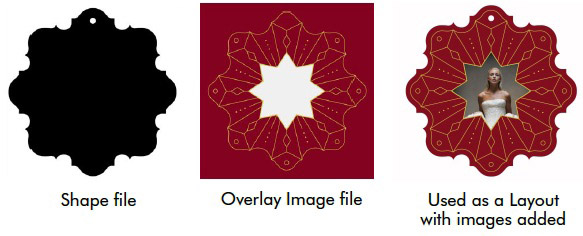
As well as this, openings in a template can now be set to use the common geometric shapes: Rectangle (default, as before), Round Rectangle, Circle, Oval, Diamond or Hexagons. You can easily create a circular product by creating a full-sized opening set to a circular shape in a Wall Grouping template as shown on the left side below.
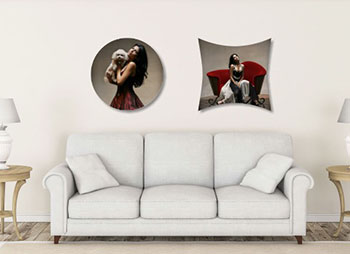
Image List Filtering
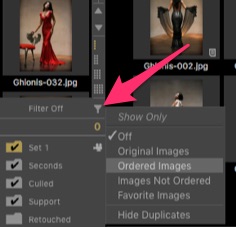
When using the Images Tabs (Yes, Maybe & No), you can now filter the Image List to show only:
- Original images (hides any duplicates)
- Ordered Images
- Images Not Ordered
- Favorite Images
This filter also effects which images are shown in Thumbnail view. This is great for focusing on just the images you want to have visible. Similar options are available when using the Layouts Tab.
Price List Improvements
You can now optionally apply a markup to Print and Layout Extras prices.
The Print Paper Sizes and Presentation Options windows now show a green check mark next to items which have been used in one or more price list items so you can quickly identify and remove any unused items.
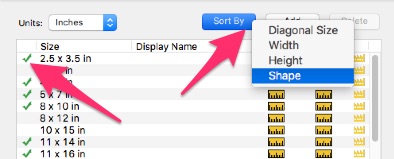
In the Print Paper Sizes window, you now have the option to sort the sizes by Diagonal Size, Width, Height or Shape. The last option can be used to easily separate square shapes from rectangular shapes.
Add Templates to your Price List in a Flash
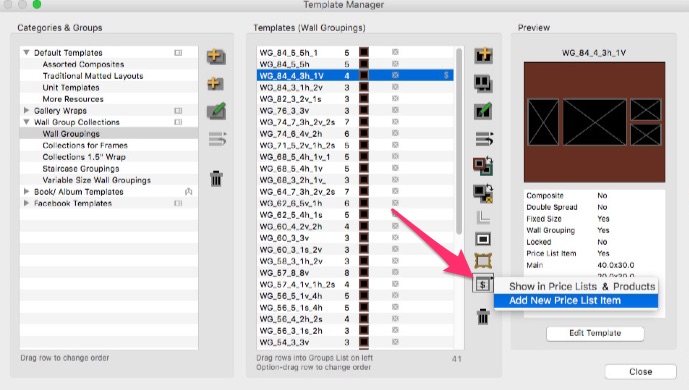
Templates & layouts which have one or more associated Price List items now display with a $ sign on their thumbnails (when Show Thumbnail Tags is on under the View menu) so it's easy to know which ones you have setup and are ready to order.
In Working with Layouts (Thumbnail view), you can now right-click on a template and quickly "Add a New Price List Item" or show any existing price list items for the template in the Price List & Products window.

or using the new Open Price List button in the Template Manager
New Ordering Features
Ordering a mat with a print or layout is as easy as ordering a frame.

The dropdown menus are automatically set to the currently applied mat and frame when using the Quick Add button (if you have this option selected in Preferences). Prices are automatically calulated when you have this setup in your price list or you can just enter your own prices directly.
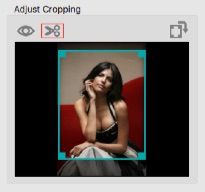
You can now adjust the cropping of an ordered print in the "Change" window and you can now rotate the cropping rectangle in the Custom Product and Add with Extras windows. Click the crop icon in the preview area to show the rotate button.
In the Place Order window, you can now use the Quick Add button to order multiple layouts at the same time provided all layouts are the same (except for the images in them!).
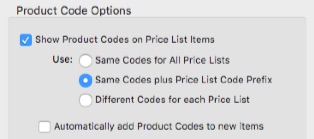
New Product Code Options
You can now optionally setup ProSelect to have a different Product Code for each item in each price list.
This information is exported to external studio management systems so you can obtain sales reporting across your different price lists (subject to Studio Management support).
Ambient Music1
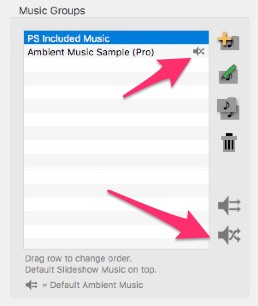
Your Ambient Music group can now be set to play in random play order to hear a different starting track each time it is first started.
Swipe Gesture Support
If you are using a mouse with vertical and/or horizontal scrolling (eg Apple Magic Mouse) or a touch screen computer (eg Microsoft Surface Pro), then you can optionally use swiping gestures when in Show Images View (when Working with Images) to move images up or down to the next Image List tab. Likewise, turning on Swipe Horizontal will move the Next or Previous image.
Collections on Steriods
Collection files are now in a new extendable format. They can be used to distribute Templates (with and without mats and frames attached), Book Designs, Styles, Mats, Frames, Rooms, Title Slides and Slideshow styles as well as any associated price list entries. This makes it easier for suppliers to prepare products for ProSelect.
New Production Features1
ProSelect's High-Res Production supports the output of Virtual Surrounding Mats on Images and Composite Layouts. Mats are added as separate layers in output to PSD files for easy post-production changes.
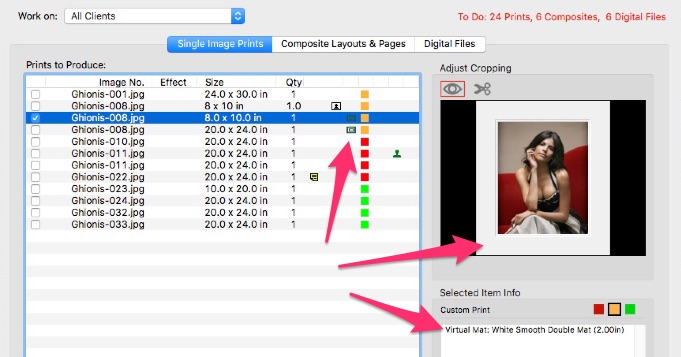
You can now rotate a crop in the Production window allowing easy production of a landscape orientated crop on a portrait orientated image.
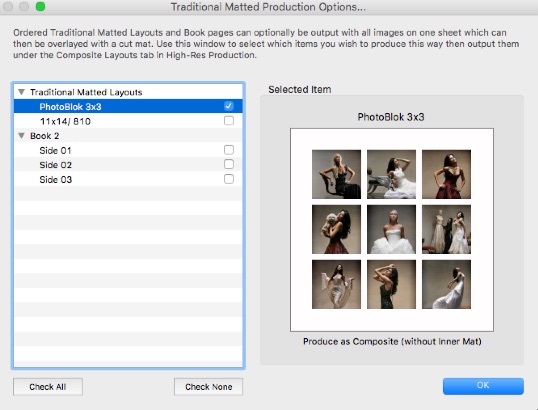
When producing multi-image Traditonal Matted Layouts (or Book Pages), you can optionally choose to output any of these layouts as a composite image without any overlaying mats so you can quickly assemble the finished product by simply laying a cut mat over the whole print.
This is done in the new Traditional Matted Production Options window (under Production Menu).
StudioCloud Improvements
Added the option to export sample images of ordered items in the XML order data sent to StudioCloud. This will be supported in StudioCloud in the near future.
Other changes
- Export Production Package (under Production Menu) now allows you to select and include original images, raw images or both (for Ordered Image and Book Image) in the production package.
- The maximum allowed length for frame images is now 1000px (up from 750px) to allow more details in thinner frame sections such as fillets.
- You can now use the Delete key to remove layouts and book pages from the album in Thumbnail view. You can also right-click on an item and select "Delete" from the popup menu to do the same thing. Both of these operations are Undoable.
- Setup Frames window. You can now update the list of Frame Resources using the Refresh button next to this list.
- In the Order Report, any Frames and Mats that are added to items at a $0 price are now displayed as "Included" rather than $0.
- Add menu shortcuts: Cmd/Cntrl-N for New Album, Cmd/Cntrl-W for close album & SHIFT-Cmd/Cntrl-S for Save As
- The Select Resource Image window is now re-sizable.
- When Working with Layouts and Books, after you have turned on Smart Filtering of templates, you can use the spacebar to toggle the current filtering selection on/off to allow you to quickly show all available templates then switch back to only showing the filtered ones.
- When working with Layouts and Rooms, newly added non-fixed size layouts are now always displayed at their design size when first added to an album. You can reselect this size from the Larger Size right-click menu by selecting the size with "Design" next to it.
- Empty graphics blocks now display as diagonal stripes in the Template Editor (and in layouts and book pages).
- When shifting to Working with Rooms from Working with Layouts, the layouts tab in the image list is now automatically selected, and the last selected layout is now visible in the list.
1 Feature available in ProSelect Pro version only.

